Database and Data
The Database
For the database we used PostgreSQL as it is an industry standard, easy to work with, highly compatible, and highly scalable. Our client requested that the data we needed to store were user data, models, datasets, records of downloads, and feedback.
User data:
User data includes usernames, emails, permissions, and hashed passwords. On request of our client, our system needed three permission types. Clinicians have download access of models and datasets. Data scientist have upload and download permissions, and then since it is a closed system, a third user type with the ability to create users. We store these permissions as integer values in the database.
Datasets:
Datasets are uploaded as zips and are stored in flat file stores in the directory ‘src/data/datasets’. In the database we store the dataset name, a description, the file path of the dataset for sending file responses for download, and the user ID of the uploader.
Models:
We also store trained machine learning models as docker images. We initially thought we would use docker hub for this, but since our system was closed and we only want registered users downloading our docker images, setting up a private docker repo and adding new users to it would be difficult to automate and tedious to do if we had to do it manually, plus we found it was more user friendly if the user could just download the docker image rather than using a command on the terminal to pull it from docker hub.
We build the docker images and save them as .tar files which can then be downloaded. These are stored in a flat file store in the directory ‘src/data/models’. In the database we store the name of the model, its descriptions and the following parameters defined by our client:
- Version Control
- Release Terms
- Outcome
- Output
- Output to Trigger
- Target Population
- Time of Prediction
- Input data source
- Input data type
- Training details
- Model type
- Outcome
- Output
- Output to Trigger
- Target Population
- Time of Prediction
- Input data source
- Input data type
- Training details
- Model type
We also store the file path of the docker image for sending file responses, and the user ID of the uploader.
Downloads and feedback:
On Request of our client, our system needed the ability for users to provide feedback on models they have tested. To allow for this, whenever a model is downloaded for the first time by a user, we store this download in the database by making a download record containing the user id and model id.
The user can view their downloads, and submit feedback on those models, the feedback data includes:
- Feedback type
- Feedback category
- Feedback
As well as the user ID of the user providing feedback, and the model ID of the model that the user is providing feedback on.
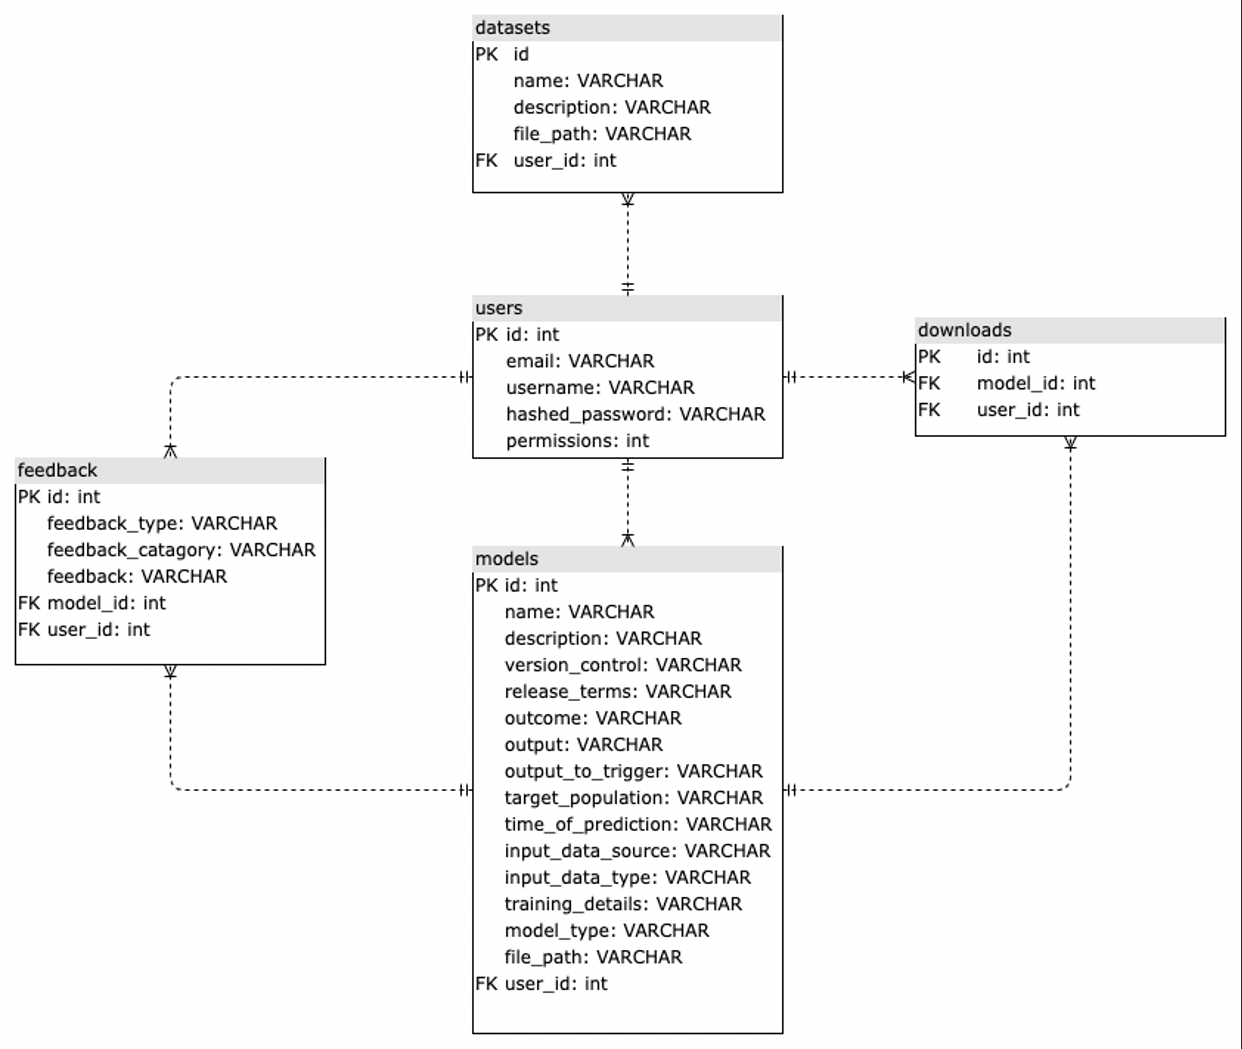
Entity Relatiomship Diagram:
Below is an entity relational diagram of our database; showing the tables, their fields, and their relationships:
Alembic
With a focus on extendibility, we used alembic to manage database migrations. This lets us define our database schema as Python classes with SQLAlchemy, and alembic autogenerates revisions to be applied to the database. That way if we want to change our database schema by adding a new table or field for example, we simply define it in src/api/models and we can generate revisions which can update the schema of our database. Similarly, if we want to revert to a previous schema, we can do so with just one command.
If we look at src/alembic/env.py we can see on line 23:

This points alembic to our database models defined in 'src/api/models'. We use SQLAlchemy for an Object Relational Mapping for our database schema, meaning the Python classes in this directory represent the tables in our database, and when fetching data, each instance of these classes represents a row in that table. If we wanted to change our database schema, we would make changes to the classes defined there, and then generate a revision with alembic with the following command:

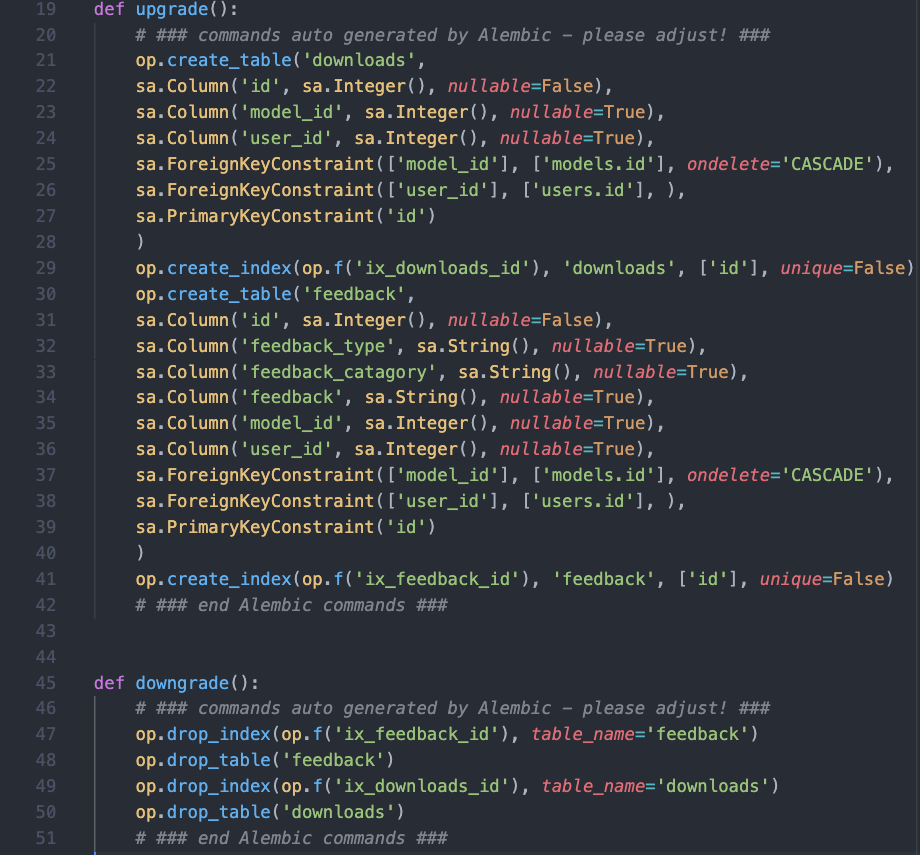
Now in src/alembic/versions there should be a new file containing two functions, upgrade, and downgrade, which contain all the necessary commands for adding the newly defined schema to our database, or reverting to the previous version.
Here is an example for when we added feedback and download tables:
If we look at this new revision, at around line 13, depending on how long your meaningful message was, you’ll find this:

This shows us the ID of that specific revision, and the ID of the previous revision
To run the revision on the database, you would run the command:

or

And just like that the new tables or fields have been added to the database and are ready to be populated with data. This tool is really important because say our new revision was incorrect, or we simply changed our mind, we can just run:

or

And this reverts the changes to the database schema back to the previous version. How useful is that!
Data
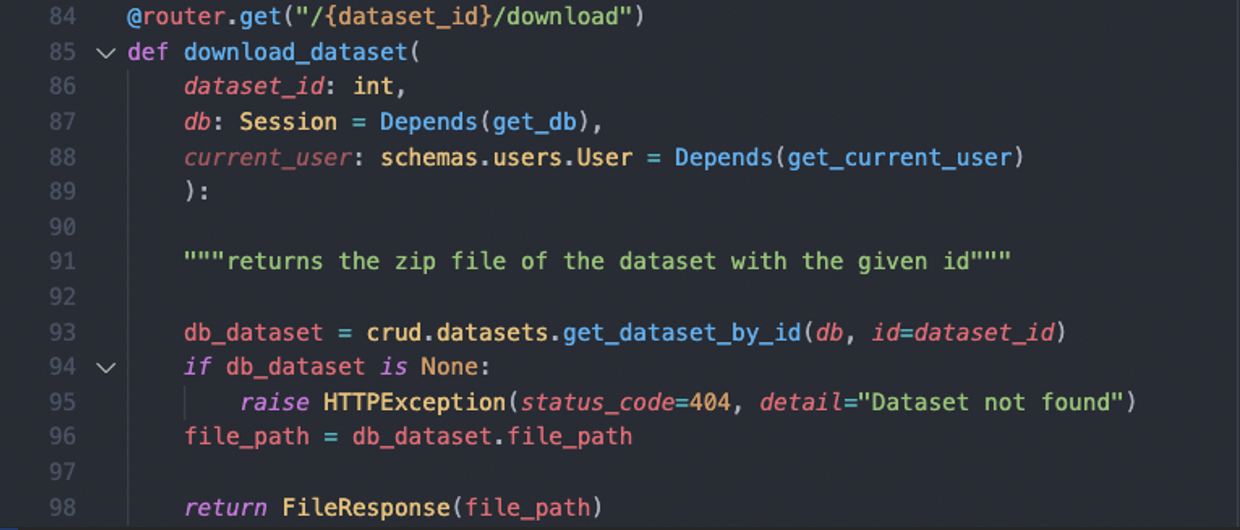
When models or datasets are uploaded, we store them as files in the data directory of our backend repostitory. Their respective file paths and metadata (name, description, VC, etc.) are stored in the database. We then use these file paths in the database to return file responses to the user, for example, here is our endpoint for downloading a dataset:
The data directory looks like this:
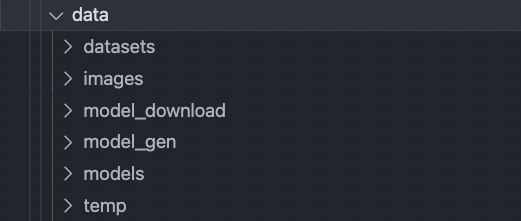
Whenever a dataset is uploaded, it is saved in datasets directory as a zip. When a trained model is uploaded, it is dockerised, and the docker image is saved as a .tar file in the models directory.
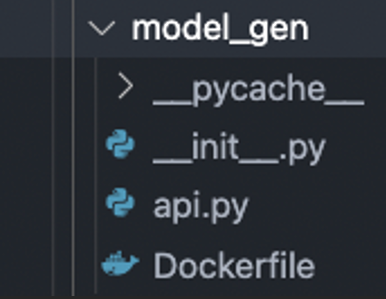
model_gen contains the files needed for building docker images for uploaded models:
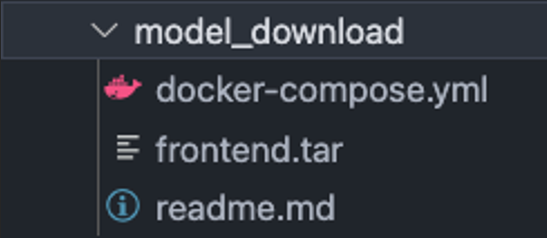
model_download contains the files that are sent along with the model docker files.
The temp directory is where we create temporary directories for model generation and servicing model download. For example, when a model is being generated, we create a temporary directory in temp with the name: [MODEL_NAME]_MODEL_GEN, and then copy over the files necissary for building the docker image from model_gen aswell as the uploaded files from the user. Once generated and saved to the models directory, we delete this temporary directory. Similarly for model download, we create a temporary directory, copy over the files in model_download aswell as the model docker image from the models directory. We zip the file, send it to the user, and delete the temporary directory and the zip file after the response has been served.
The images directory contains the uploaded display images for models and datasets.