After the tutorial of HTML, CSS and Javascript, now you know well of how to creat you own web page. This tutorial shows you how to create a simple lightbox for handling images with CSS and jQuery.
Note :If you don't provide a proper DOCTYPE and the page renders in quirks mode, the lightbox will not display correctly in Internet Explorer.
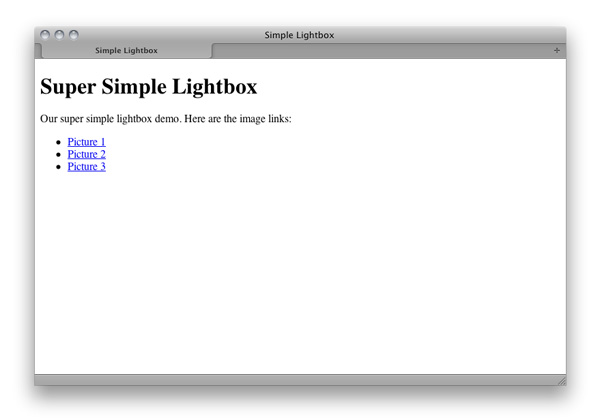
The page will be like that :
Note: In order to target those elements in the script we will write, We used the class lightbox_trigger on every link that has an image we want to show in our lightbox.
Step 2: The CSS
Let's apply some basic CSS styling to our page. For this basic example, we will place all our CSS in tags within the
section.
body {
    margin:0;
    padding:0;
    background:#efefef;
    text-align:center; /* used to center div in IE */
}
#wrapper {
    width:600px;
    margin:0 auto; /*centers the div horizontally in all browsers (except IE)*/
    background:#fff;
    text-align:left; /*resets text alignment from body tag */
    border:1px solid #ccc;
    border-top:none;
    padding:25px;
    /*Let's add some CSS3 styles, these will degrade gracefully in older browser and IE*/
    border-radius:0 0 5px 5px;
    -moz-border-radius:0 0 5px 5px;
    -webkit-border-radius: 0 0 5px 5px;
    box-shadow:0 0 5px #ccc;
    -moz-box-shadow:0 0 5px #ccc;
    -webkit-box-shadow:0 0 5px #ccc;
}
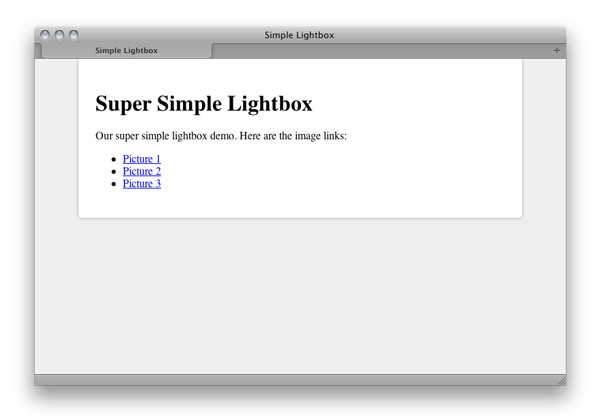
The page will be like that :
Now we have a simple and clear page, and we can test our lightbox window in it.
Note : We used margin: 0 auto; to center our #wrapper div horizontally on the page. This works great for all browsers except...drum roll...you guessed it, Internet Explorer. To fix this issue, we used text-align:center; on the body tag which centers child divs (in our case, the #wrapper div) horizontally on the page.
However, using text-align:center; on the body tag will center align all text in child divs as well. To fix this, we reset text-align:left; in the #wrapper div to restore all further child content to left alignment. Check out communitymx.com if you're interested in learning more about this particular IE issue.
Step 3: Lightbox HTML
Now we should move to lightbox HTML markup. However, we just need to understand it right now and do not insert it into the HTML markup. We will do that dynamically with jQuery. Understanding the lightbox HTML markup allows us to style it with CSS accordingly.
Note : There is no value for the image src because that will be dependent upon which link is clicked by the user. Hence, we will use javascript to insert the value dynamically later on.
Step 4 :Lightbox CSS Black Overlay
Let's go ahead and insert the CSS for our lightbox. By doing this now, our page elements will display properly later on when we dynamically insert our HTML.
First we have our #lightbox div which acts as the black overlay. We want this to fill the user's entire viewport, no matter the screen resolution.
#lightbox {
    position:fixed; /* keeps the lightbox window in the current viewport */
    top:0;
    left:0;
    width:100%;
    height:100%;
    background:url(overlay.png) repeat;
    text-align:center;
}
The page will be like that :
The CSS is pretty straightforward. Here are a few highlights:
position:fixed makes our overlay appear correctly in the current viewport, no matter the user's position on screen (top or bottom of the page). This is where using the right DOCTYPE comes in handy. If IE runs in quirks mode due to the wrong DOCTYPE (or none at all), then our overlay won't appear correctly.
width:100%; height:100%; This makes our #lightbox div, which acts as the black overlay, cover the entire viewport no matter the end user's screen resolution.
background:url(overlay.png) repeat; We could have used RGBa color to make our background color slightly transparent. This would have required something like background: rgba(0,0,0,.7);. However, since this property is fairly new, background color transparency won't work in IE (unless you apply certain hacks). So instead of using CSS3 and IE hacks, we simply create a 1x1 pixel PNG in photoshop with a black background and set the transparency at about 75 percent.
Step 5: Lightbox CSS User Instructions
Just to make sure our users aren't confused, we will add some text in the lightbox overlay stating they can click anywhere to have the lightbox window disappear.
#lightbox p {
    text-align:right;
    color:#fff;
    margin-right:20px;
    font-size:12px;
}
Step 6: Lightbox CSS Image
Now we want to style the image that will appear in the lightbox. I am simply going to give it some CSS3 effects. These obviously won't appear in IE and older browsers, but it still degrades gracefully. You could add other effects here if you wanted, like a white border around the image.
#lightbox img {
    box-shadow:0 0 25px #111;
    -webkit-box-shadow:0 0 25px #111;
    -moz-box-shadow:0 0 25px #111;
    max-width:940px;
}
Step 7: Determining the Logic
If the user clicks a link to image, we want to display the image in a lightbox. To do this, we first want determine the logic behind our functionality:
User clicks link with class lightbox_trigger
Prevent the browser from following the link by default
See if the lightbox div is already inside the document
If it exists:
Find and the existing img tag inside the content div.
Replace the image's src value with the href value of whatever link was clicked.
If it doesn't exist:
insert the lightbox markup into the page with the image's src value set to the href value of whatever link was clicked
Allow any click on the lightbox (when displayed) to make it disappear
Step 8: Javascript Including jQuery
Now that we have our HTML markup, CSS styling, and javascript logic, it's time to delve into the code and get our functionality working.
First we include the jQuery library. I like to add it right before the closing body tag using jQuery's hosted version.
Let's wrap our code in script tags and jQuery's document.ready
We will include our custom script right after including the jQuery library. We setup our jQuery function using the dollar sign "$" in the function parameter, that way we don't have to write "jQuery" every time we want to use jQuery functionality. Instead we can simply use "$".
<script>
jQuery(document).ready(function($) {

    // Our script will go here

});
</script>
##Step 10: Javascript lightbox_trigger Function
As explained earlier in Step 1, for each linked image that will use the lightbox, we assigned it a class of lightbox_trigger. In our script, we create a function that will fire every time a link with the class lightbox_trigger is clicked.
$('.lightbox_trigger').click(function(e) {

    // Code that makes the lightbox appear

});
Step 11: Javascript Inside the Function
First, we want to prevent the default action. This prevents the browser from opening the linked image in a new page.
e.preventDefault();
Next, we get the href of the image we will display in the lightbox from the link that was clicked
var image_href = $(this).attr("href");
This is where our predetermined logic really comes into play. Because we are inserting our lightbox HTML dynamically, we want to first see if it already exists in the document. So, we will run an if/else statement.
If
If the lightbox div exists, we will replace the img tag inside the content div. We will also make sure the src value of the image tag is set to match the href of whatever link was clicked.
if ($('#lightbox').length > 0) { // #lightbox exists

    //insert img tag with clicked link's href as src value
    $('#content').html('<img src="' + image_href + '" />');

    //show lightbox window - you can use a transition here if you want, i.e. .show('fast')
    $('#lightbox').show();
}
Else
If our lightbox div cannot be found in the document, we will create it and insert it. This will only run the first time a lightbox link is clicked.
else { //#lightbox does not exist

    //create HTML markup for lightbox window
    var lightbox =
    '<div id="lightbox">' +
        '<p>Click to close</p>' +
        '<div id="content">' + //insert clicked link's href into img src
            '<img src="' + image_href +'" />' +
        '</div>' +
    '</div>';

    //insert lightbox HTML into page
    $('body').append(lightbox);
}
Step 12: Javascript Hiding the lightbox Window
Lastly we want to hide the lightbox window whenever the user clicks on it. Because the div lightbox is inserted after the DOM is already constructed (the page has already loaded) we have to tell jQuery that we are placing a new div in our page and to watch for clicks on this new elements. We do this by using .live() rather than .click()
Now that we've examined our lightbox script, here is what the whole thing looks like:
<script>
jQuery(document).ready(function($) {

    $('.lightbox_trigger').click(function(e) {

        //prevent default action (hyperlink)
        e.preventDefault();

        //Get clicked link href
        var image_href = $(this).attr("href");

        /*
        If the lightbox window HTML already exists in document,
        change the img src to to match the href of whatever link was clicked

        If the lightbox window HTML doesn't exists, create it and insert it.
        (This will only happen the first time around)
        */

        if ($('#lightbox').length > 0) { // #lightbox exists

            //place href as img src value
            $('#content').html('<img src="' + image_href + '" />');

            //show lightbox window - you could use .show('fast') for a transition
            $('#lightbox').show();
        }

        else { //#lightbox does not exist - create and insert (runs 1st time only)

            //create HTML markup for lightbox window
            var lightbox =
            '<div id="lightbox">' +
                '<p>Click to close</p>' +
                '<div id="content">' + //insert clicked link's href into img src
                    '<img src="' + image_href +'" />' +
                '</div>' +
            '</div>';

            //insert lightbox HTML into page
            $('body').append(lightbox);
        }

    });

    //Click anywhere on the page to get rid of lightbox window
    $('#lightbox').live('click', function() { //must use live, as the lightbox element is inserted into the DOM
        $('#lightbox').hide();
    });

});
</script>
Next lesson
Next lesson we'll be wrapping things up - it's time to put everything together, gather all your knowledge and create an awesome web page.
4. Creating Simple Lightbox with CSS and jQuery
By Honghui Yu
After the tutorial of HTML, CSS and Javascript, now you know well of how to creat you own web page. This tutorial shows you how to create a simple lightbox for handling images with CSS and jQuery.
Live Demo
Click here to view a live demo of what you'll be making
Step 1
Let's start with our HTML markup.
Note :If you don't provide a proper DOCTYPE and the page renders in quirks mode, the lightbox will not display correctly in Internet Explorer.
The page will be like that :
Note: In order to target those elements in the script we will write, We used the class
lightbox_triggeron every link that has an image we want to show in our lightbox.Step 2: The CSS
Let's apply some basic CSS styling to our page. For this basic example, we will place all our CSS in tags within the
section.The page will be like that :
Now we have a simple and clear page, and we can test our lightbox window in it.
Note : We used
margin: 0 auto; to center our #wrapper div horizontally on the page. This works great for all browsers except...drum roll...you guessed it, Internet Explorer. To fix this issue, we usedtext-align:center; on the body tag which centers child divs (in our case, the #wrapper div) horizontally on the page.However, using
text-align:center; on the body tag will center align all text in child divs as well. To fix this, we resettext-align:left; in the #wrapper div to restore all further child content to left alignment. Check out communitymx.com if you're interested in learning more about this particular IE issue.Step 3: Lightbox HTML
Now we should move to lightbox HTML markup. However, we just need to understand it right now and do not insert it into the HTML markup. We will do that dynamically with jQuery. Understanding the lightbox HTML markup allows us to style it with CSS accordingly.
Note : There is no value for the image
srcbecause that will be dependent upon which link is clicked by the user. Hence, we will use javascript to insert the value dynamically later on.Step 4 :Lightbox CSS Black Overlay
Let's go ahead and insert the CSS for our lightbox. By doing this now, our page elements will display properly later on when we dynamically insert our HTML.
First we have our #lightbox div which acts as the black overlay. We want this to fill the user's entire viewport, no matter the screen resolution.
The page will be like that :

The CSS is pretty straightforward. Here are a few highlights:
position:fixedmakes our overlay appear correctly in the current viewport, no matter the user's position on screen (top or bottom of the page). This is where using the right DOCTYPE comes in handy. If IE runs in quirks mode due to the wrong DOCTYPE (or none at all), then our overlay won't appear correctly.width:100%; height:100%;This makes our #lightbox div, which acts as the black overlay, cover the entire viewport no matter the end user's screen resolution.background:url(overlay.png)repeat; We could have used RGBa color to make our background color slightly transparent. This would have required something likebackground: rgba(0,0,0,.7);. However, since this property is fairly new, background color transparency won't work in IE (unless you apply certain hacks). So instead of using CSS3 and IE hacks, we simply create a 1x1 pixel PNG in photoshop with a black background and set the transparency at about 75 percent.Step 5: Lightbox CSS User Instructions
Just to make sure our users aren't confused, we will add some text in the lightbox overlay stating they can click anywhere to have the lightbox window disappear.
Step 6: Lightbox CSS Image
Now we want to style the image that will appear in the lightbox. I am simply going to give it some CSS3 effects. These obviously won't appear in IE and older browsers, but it still degrades gracefully. You could add other effects here if you wanted, like a white border around the image.
Step 7: Determining the Logic
If the user clicks a link to image, we want to display the image in a lightbox. To do this, we first want determine the logic behind our functionality:
User clicks link with class
lightbox_triggerIf it exists:
If it doesn't exist:
insert the lightbox markup into the page with the image's src value set to the href value of whatever link was clicked
Allow any click on the lightbox (when displayed) to make it disappear
Step 8: Javascript Including jQuery
Now that we have our HTML markup, CSS styling, and javascript logic, it's time to delve into the code and get our functionality working.
First we include the jQuery library. I like to add it right before the closing body tag using jQuery's hosted version.
<script src="https://code.jquery.com/jquery-1.6.2.min.js"></script>Step 9: Javascript Custom Script
Let's wrap our code in
scripttags and jQuery's document.readyWe will include our custom script right after including the jQuery library. We setup our jQuery function using the dollar sign "$" in the function parameter, that way we don't have to write "jQuery" every time we want to use jQuery functionality. Instead we can simply use "$".
##Step 10: Javascript lightbox_trigger Function
As explained earlier in Step 1, for each linked image that will use the lightbox, we assigned it a class of
lightbox_trigger. In our script, we create a function that will fire every time a link with the classlightbox_triggeris clicked.Step 11: Javascript Inside the Function
First, we want to prevent the default action. This prevents the browser from opening the linked image in a new page.
e.preventDefault();Next, we get the
hrefof the image we will display in the lightbox from the link that was clickedvar image_href = $(this).attr("href");This is where our predetermined logic really comes into play. Because we are inserting our lightbox HTML dynamically, we want to first see if it already exists in the document. So, we will run an if/else statement.
If
If the lightbox div exists, we will replace the img tag inside the content div. We will also make sure the src value of the image tag is set to match the href of whatever link was clicked.
Else
If our lightbox div cannot be found in the document, we will create it and insert it. This will only run the first time a lightbox link is clicked.
Step 12: Javascript Hiding the lightbox Window
Lastly we want to hide the lightbox window whenever the user clicks on it. Because the div
lightboxis inserted after the DOM is already constructed (the page has already loaded) we have to tell jQuery that we are placing a new div in our page and to watch for clicks on this new elements. We do this by using .live() rather than .click()Step 13: Javascript Final Code
Now that we've examined our lightbox script, here is what the whole thing looks like:
Next lesson
Next lesson we'll be wrapping things up - it's time to put everything together, gather all your knowledge and create an awesome web page.