Appendices
User Manual
This section provides step-by-step instructions for setting up and using our system. The manual is organized in the order that each component should be configured, starting with the ESP32 hardware and progressing through the registration site, Raspberry Pi setup, and desktop application usage.
ESP32
To flash your ESP32, follow the guidelines written on the README.md on the ESP32 repository. Found here: https://github.com/quantum-proximity-gateway/esp32-code. This user manual assumes you have flashed your ESP32 as that is the only step there is with the ESP32 component of our system.
Registration Site
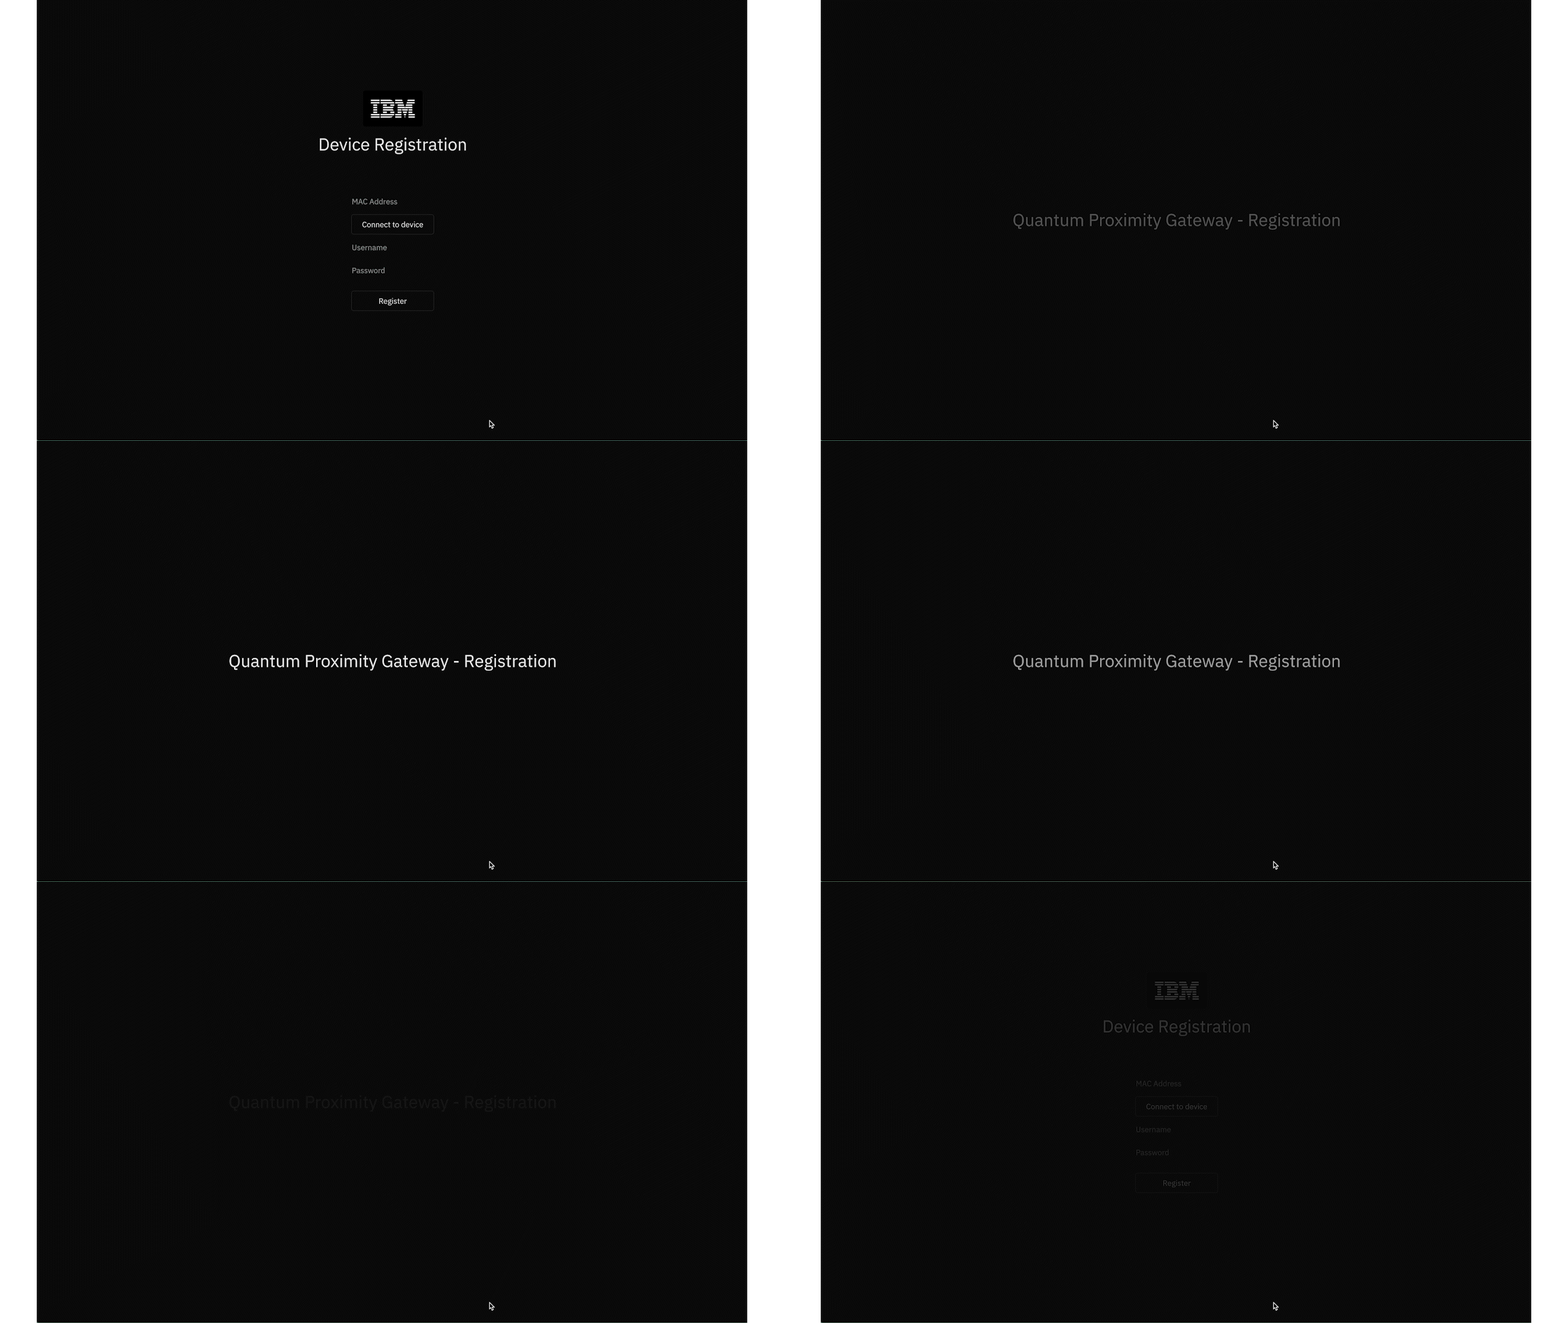
The registration website is the first step to getting setup with the Proximity Gateway, our registration website is hosted on the following link: https://registration-site-ecru.vercel.app/. You will be firstly greeted with a welcome screen stating what the purpose of the website is.

The welcome page initiates the encryption initiliasation, wait while the application establishes a secure connection with the server.

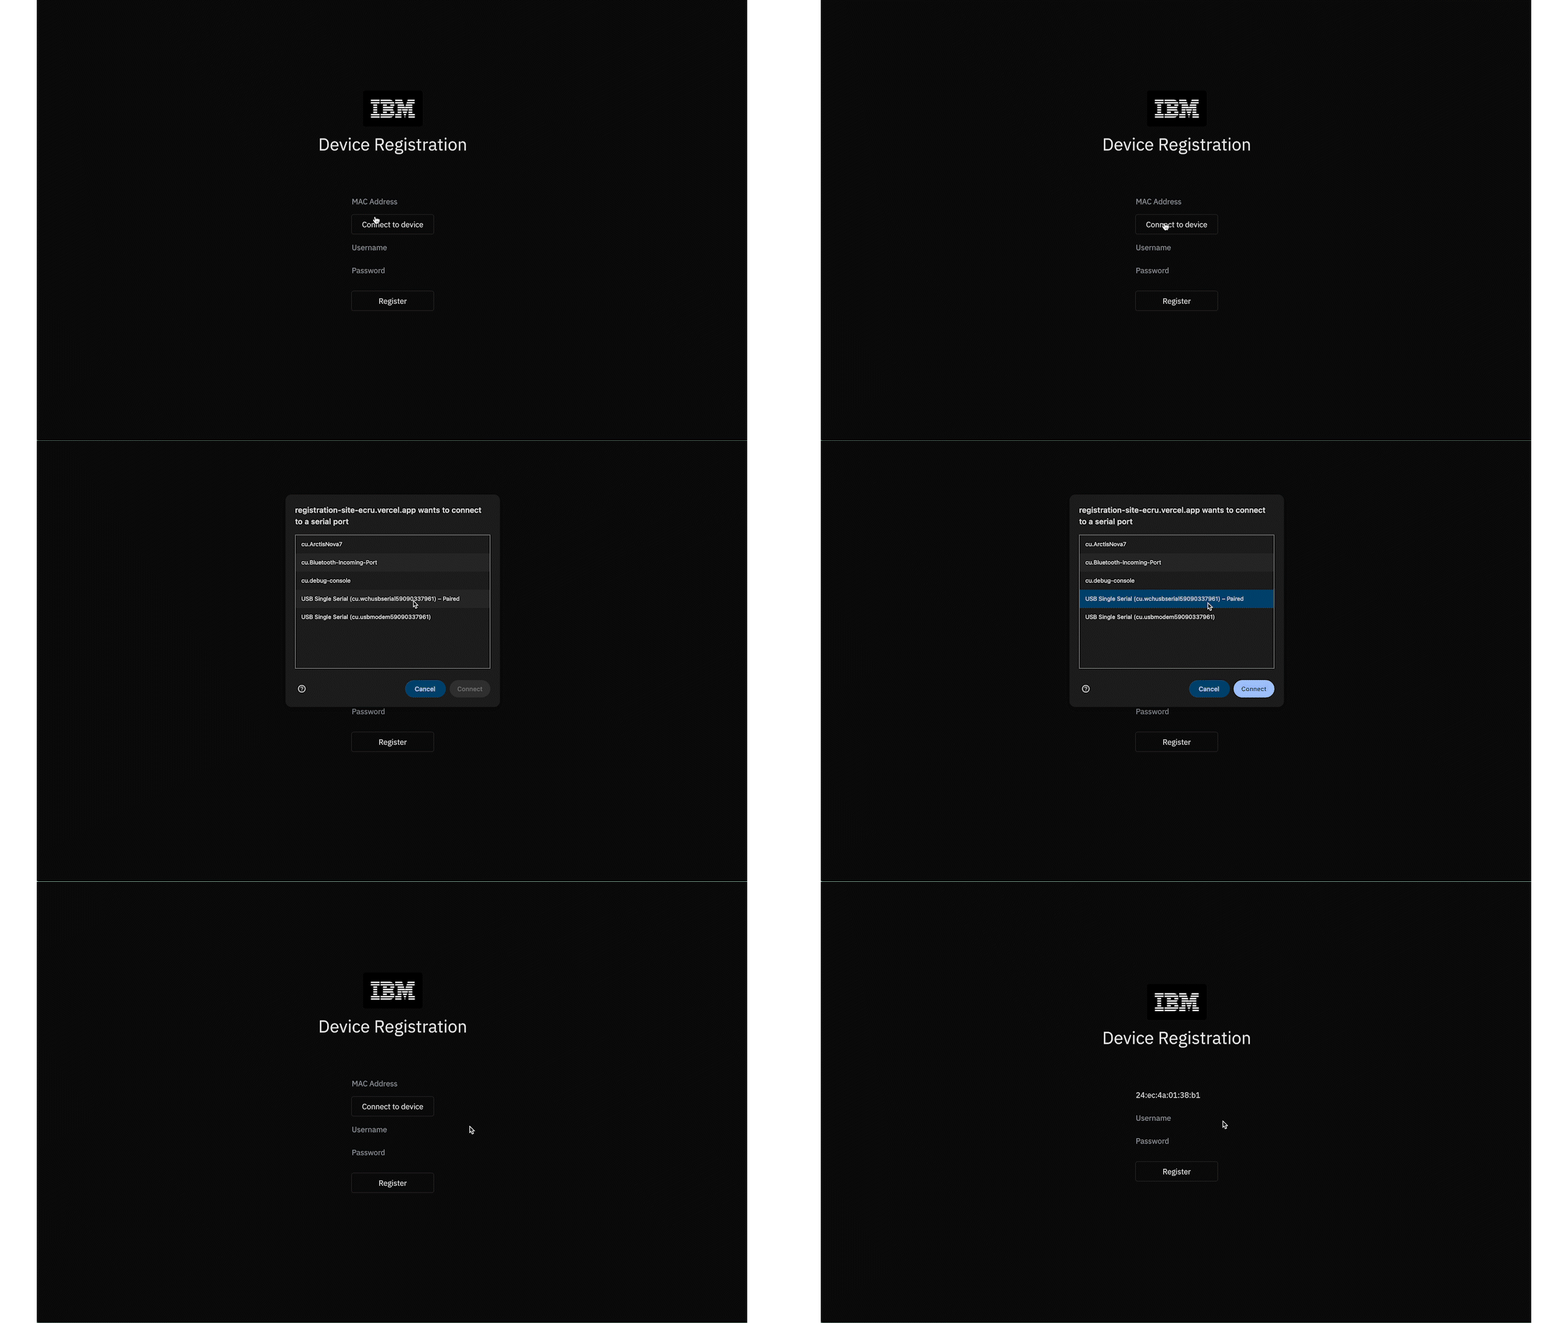
Connect your ESP32 via USB using the right port to your laptop and then click on Connect To Device, then select the new USB device that shows up. This should allow the website to read your MAC address.

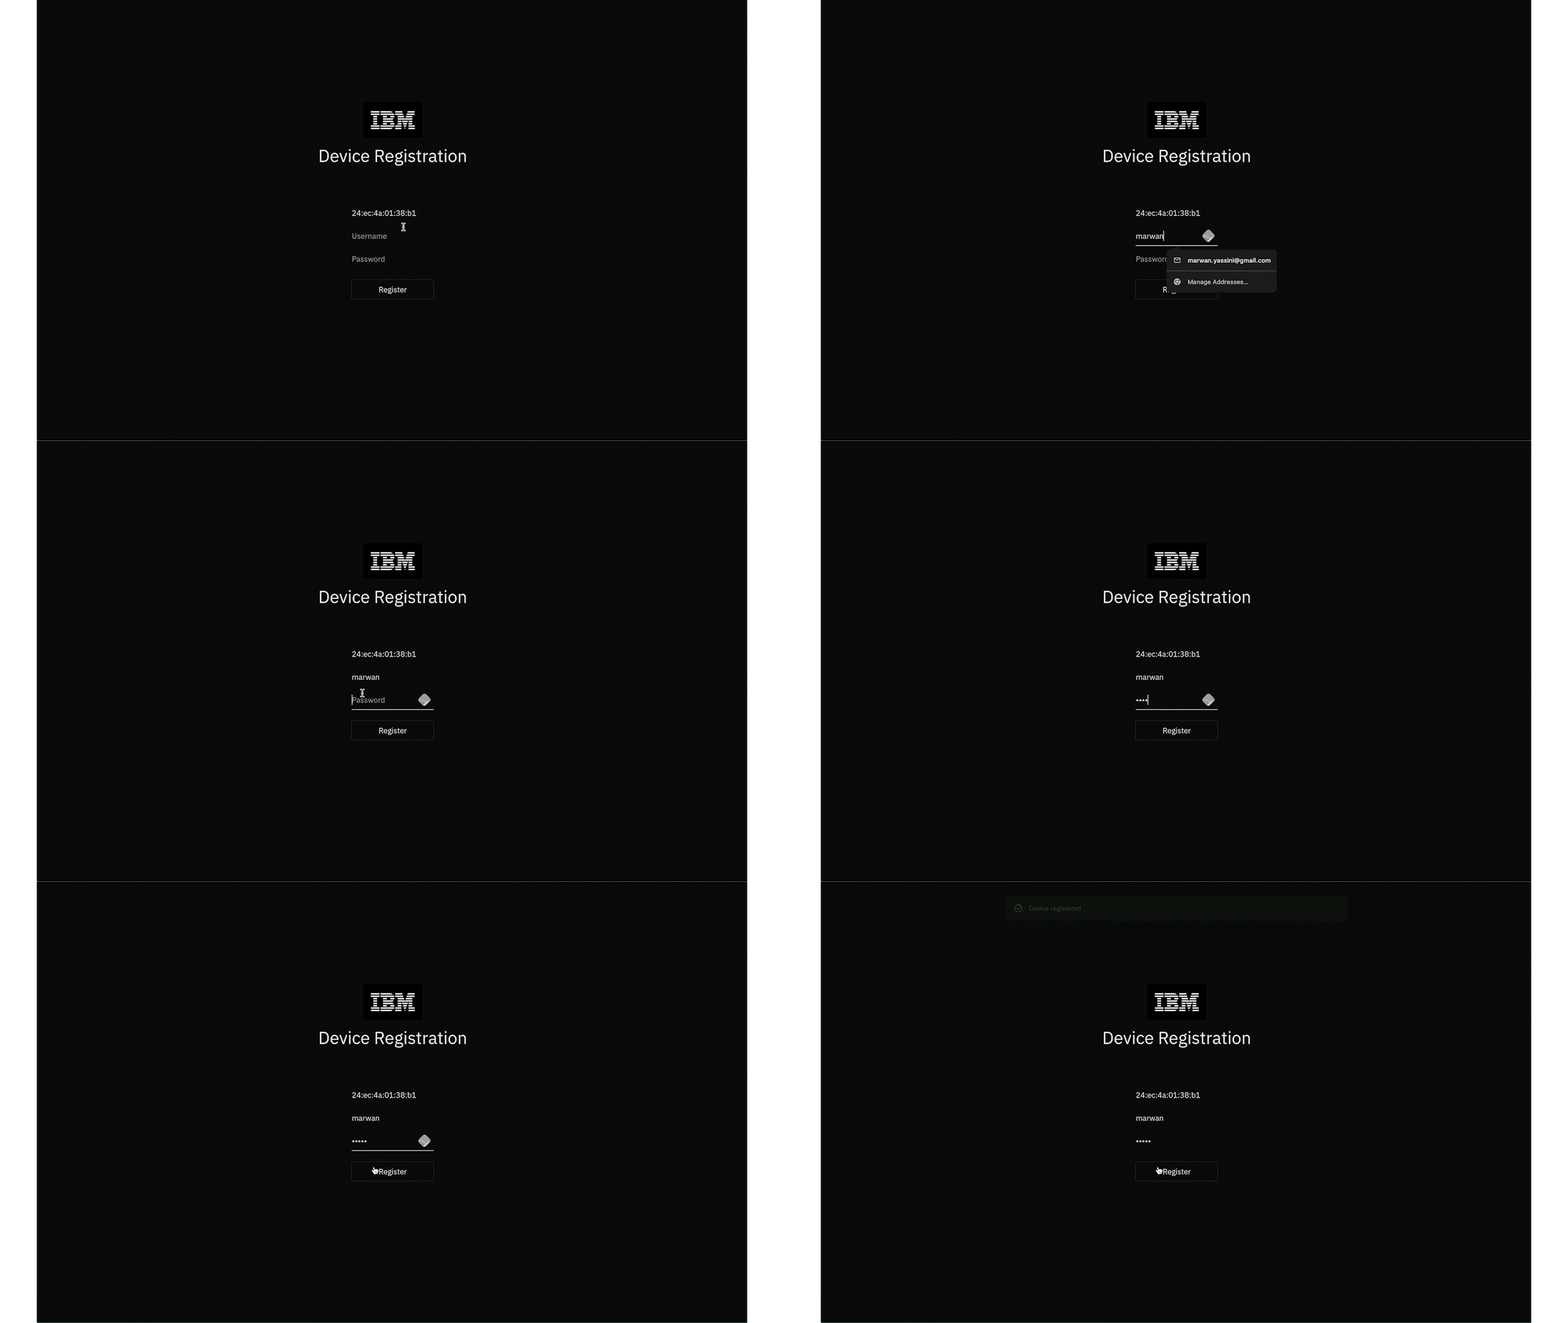
Enter the credentials you want the Raspberry Pi to relay, this includes your username, then your password. These will be encrypted with Post-Quantum Cryptography, once ready click the register button. This will redirect you to record your face encodings.

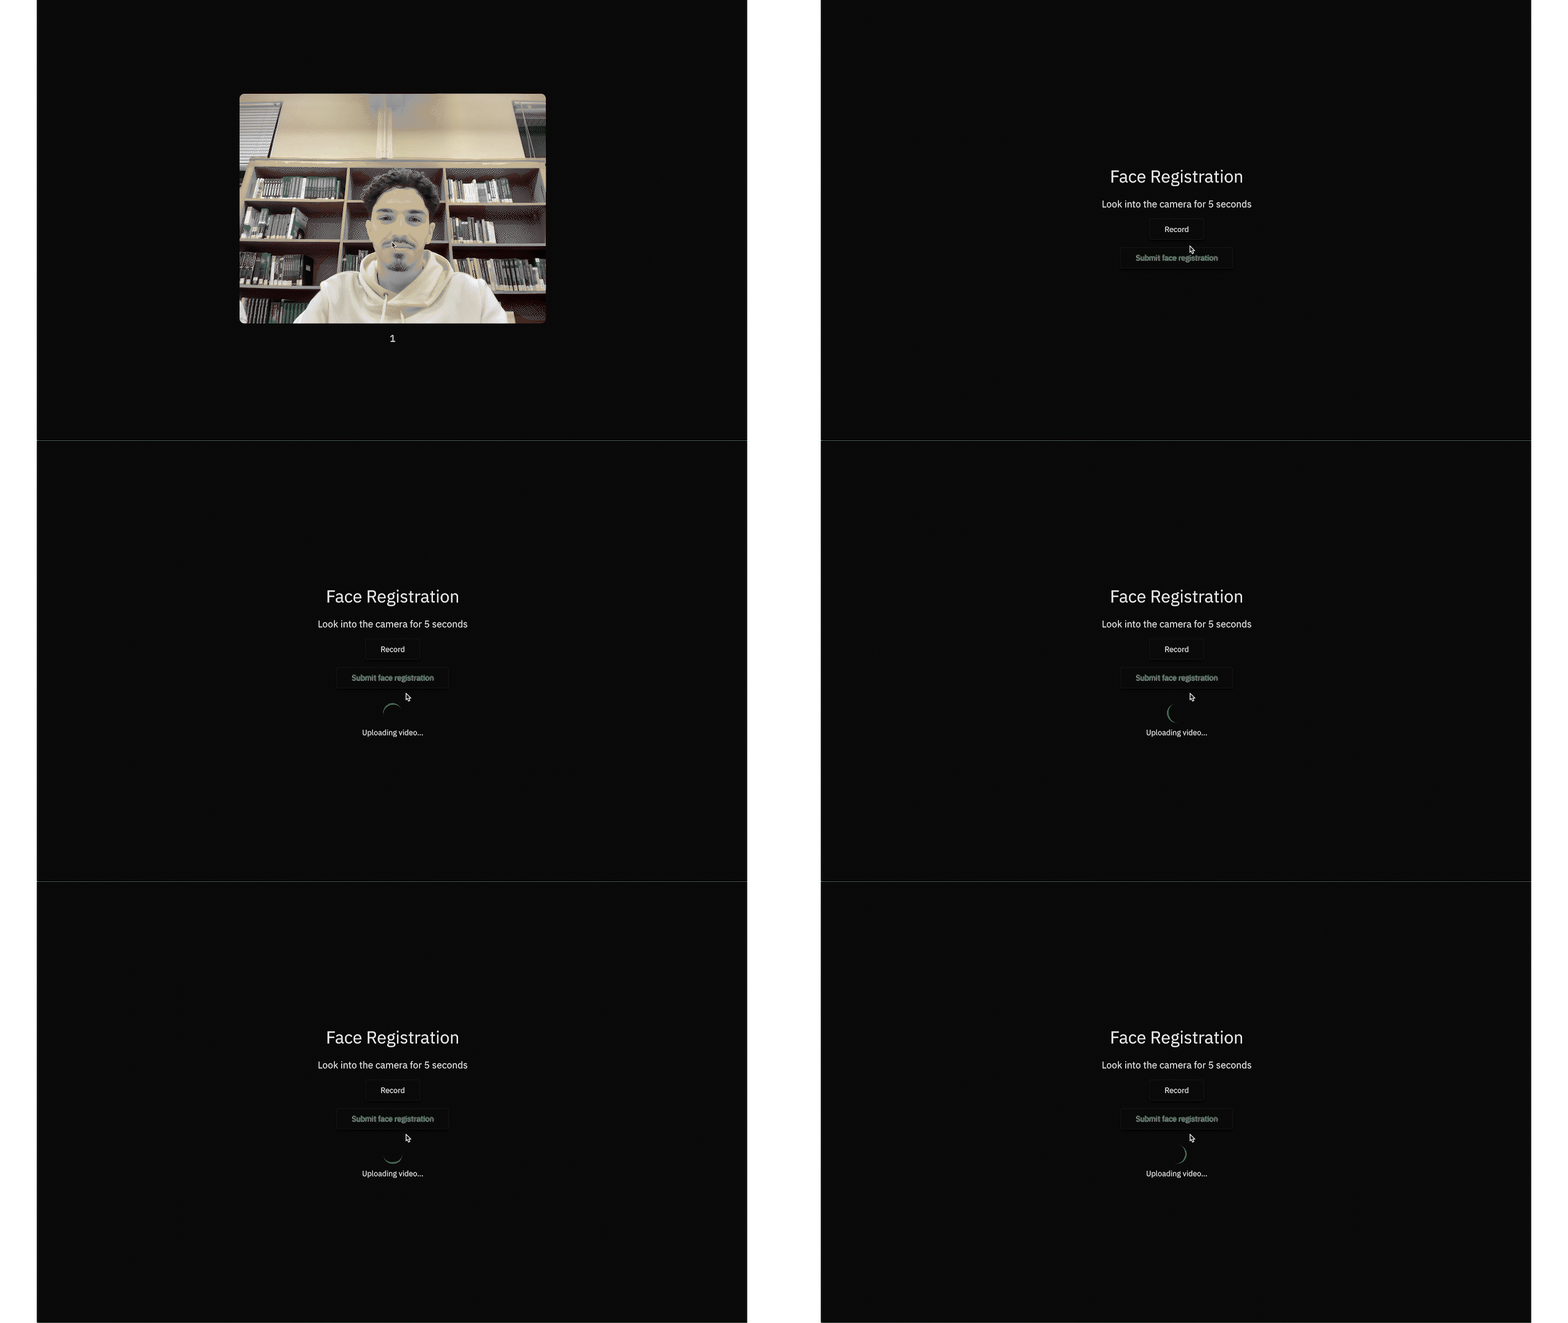
Click the record button to begin the 5 second recording of your facial encodings. Once these 5 seconds are done, you can choose to re-record by clicking on the record button again, or to submit the recording to the server.
Raspberry Pi
The Raspberry Pi brings together the ESP32 and your computer, the codebase is setup in such a way that users do not need to interact with this part of the system. In case of clean installation, refer to the Deployment Manual where instructions to deploy the Raspberry Pi code are available.
IBM Proximity Agents Application
The IBM Proximity Agents application enables you to easily change your settings and set preferred applications to open on start-up depending on the user using the application. This is the final key to our system, it brings all our components together to seamlessly showcase the power that proximity brings.

Similarly to the registration page, the welcome page for the application initiates the encryption initiliasation, wait while the application establishes a secure connection with the server.

As soon as the application opens, your profile applications should automatically open too, allowing you to get on with your day instantly.

To check your current preferences JSON, simply click the "Preferences" button found at the top right of the application. This should display your current JSON preferences.

You can select any model you currently have installed with Ollama using the top model buttons, just simply click a new model to start a new chat with it.

Prompt the model however you want by simply typing into the text-box and clicking the send button or clicking Enter. This will then cause Ollama to infer your prompt and respond accordingly.

If the response of the model includes a command you may want to run, the UI will prompt you to either execute or cancel the command. If you choose to execute the command, the changes will be saved to your preferences and applied to your settings.
Deployment Manual
Legal
Source Code License
This is a proof-of-concept research project, therefore we have decided to open-source all of our codebase under the MIT license to help spread awareness and pioneer the world of proximity-based computing. This MIT license allows anyone to freely use, modify, distribute, and allows for the commercialization of our code with minimal restrictions.
The MIT license also frees us from any liability associated with the use of our codebase:
THE SOFTWARE IS PROVIDED "AS IS", WITHOUT WARRANTY OF ANY KIND, EXPRESS OR IMPLIED, INCLUDING BUT NOT LIMITED TO THE WARRANTIES OF MERCHANTABILITY, FITNESS FOR A PARTICULAR PURPOSE AND NONINFRINGEMENT. IN NO EVENT SHALL THE AUTHORS OR COPYRIGHT HOLDERS BE LIABLE FOR ANY CLAIM, DAMAGES OR OTHER LIABILITY, WHETHER IN AN ACTION OF CONTRACT, TORT OR OTHERWISE, ARISING FROM, OUT OF OR IN CONNECTION WITH THE SOFTWARE OR THE USE OR OTHER DEALINGS IN THE SOFTWARE.
GDPR
Our server is deployed on IBM Code Engine, which is in compliance with GDPR rules. Our implementation follows the EU Cloud Code of Conduct that IBM adheres to.
Our GDPR compliance measures include:
- Data Minimization — We only collect essential data required for the functioning of our authentication system.
- Purpose Limitation — All collected data is used solely for authentication and personalization purposes.
- Storage Limitation — Facial recordings are temporarily stored and immediately deleted after generating encodings.
- Security Measures — We implement Post-Quantum Cryptography for data encryption and secure transmission.
- User Rights — Users can request deletion of their data by contacting any member of the team.
Privacy Concerns
As explained throughout the project, all data associated with the user is encrypted to the highest standards, and we only store the essential data that allows us to log users in and change their preferences. Another concern we would like to address is the face recordings, these are NOT stored and are immediately deleted once the face encodings have been generated, this allow us to ensure we store as little biometric data on users as we can.
Development Blog
Throughout the development of this project, we have been documenting our progress through a series of blog posts on our Hashnode blog. These posts talk about our key decisions, challenges, insights, and milestones from our initial planning to the final implementation of the project. We also discuss how we overcame some obstacles during the implementation, and mention how other developers can learn from our experiences.
You can explore the full list of articles on our blog at qpg.hashnode.dev.
Monthly Videos
Below are our four monthly update videos for our project. Each video dives deeper into our progress and challenges we faced during each month of development.