Web app UI development
Designing the UI
The first stage of designing the user interface was to draw some sketches of how we thought a few of the first pages might look. The original idea was to have a homepage which would then have to links to a log in and a register page however, since the user interface is not designed to be open to everyone, we decided to have the first page as a log in page. This helps to make the web app more private and discourages people who shouldnt't be using the program from attempting to access the page.
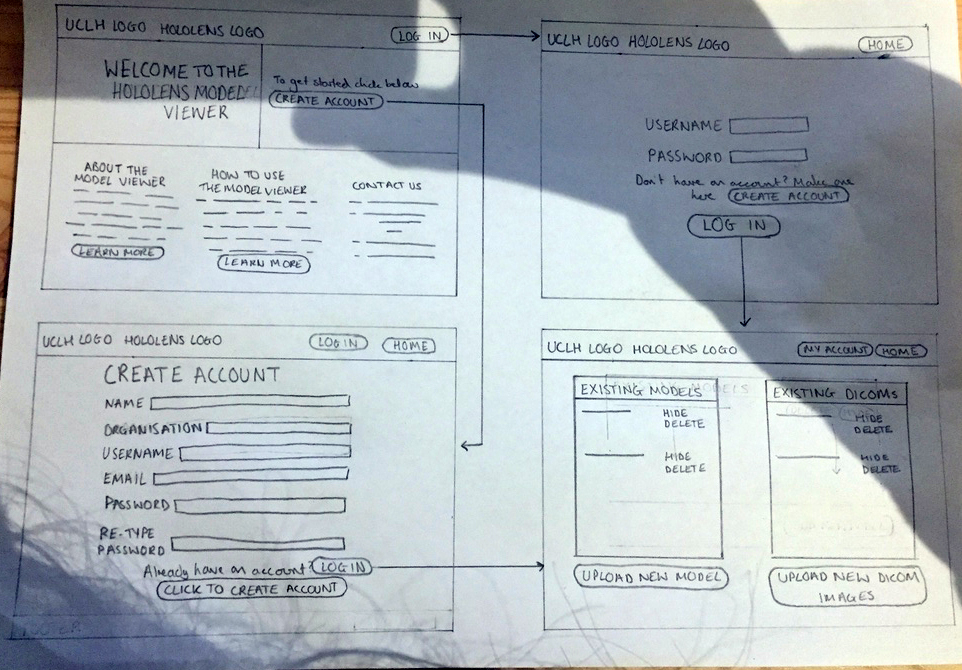 The next stage was then to begin consulting the Peach Project design guide (http://peach-design-guide.webflow.io/) which has all the recommended fonts and formatting for creating a web app which will be part of the peach project. We then used balsamiq (https://balsamiq.com/) to create digital mock-ups of all pages of the user interface. We chose balsamiq because it is a fast way to create professional looking mock-ups using the drag and drop functionality; you can also create links between mockups so that you can see where clicking each button will direct a user.
Mockups
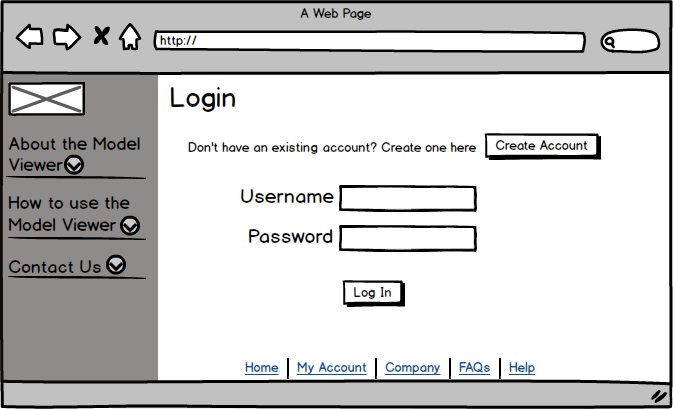
Here are some pictures of a few pages of the user interface. The side menu is designed to imitate the side menu in the Peach design guide but Balsamiq does not have any features which allow you to change the colour or font of any components therefore specifics such as font and colour have to be assumed.
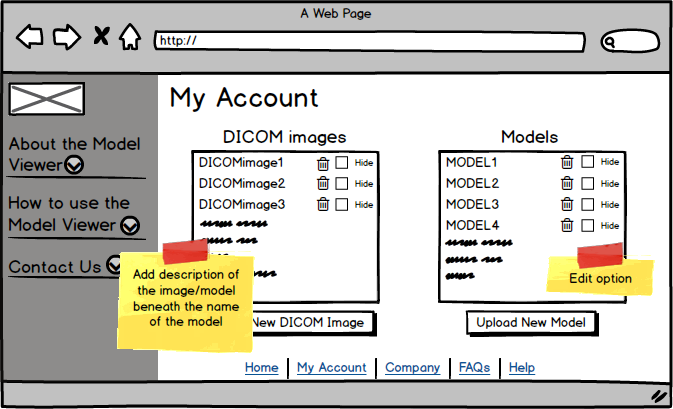
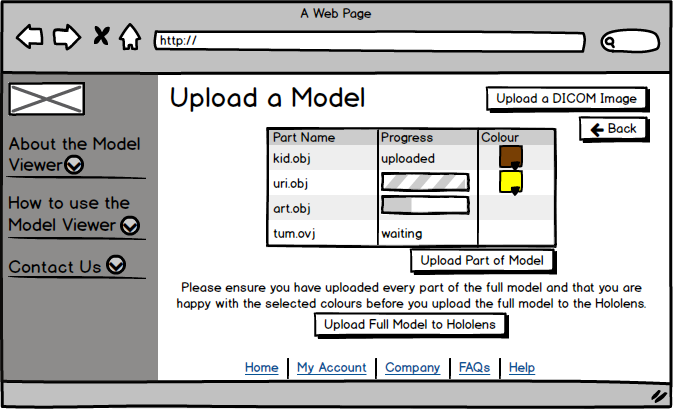
As discussed after the initial sketches; the first page of the web app will be the login page, with a link to register if the user needs to do so. After logging in (or registering) the user will be taken to the "My Account" page which displays all the models and DICOM images they have uploaded to the UI so far. Here they have the option to hide or delete objects, and also to upload new objects. Clicking "Upload new Model/DICOM Image" will take the user to a page which will then allow them to upload a new model or DICOM image respectively.
 After creating the mock-ups we showed them to our client so we could gain some feedback. Whilst showing them to him we made sure to discuss where features from the design guide would be implemented so as to give him an idea of what an actual prototype would look like. He gave a small amount of feedback on the "My Account" page to which we added notes to remind us of the feedback when it comes to creating the prototypes.