Design
UI Design
When designing the GUI we kept in mind the design principles of:
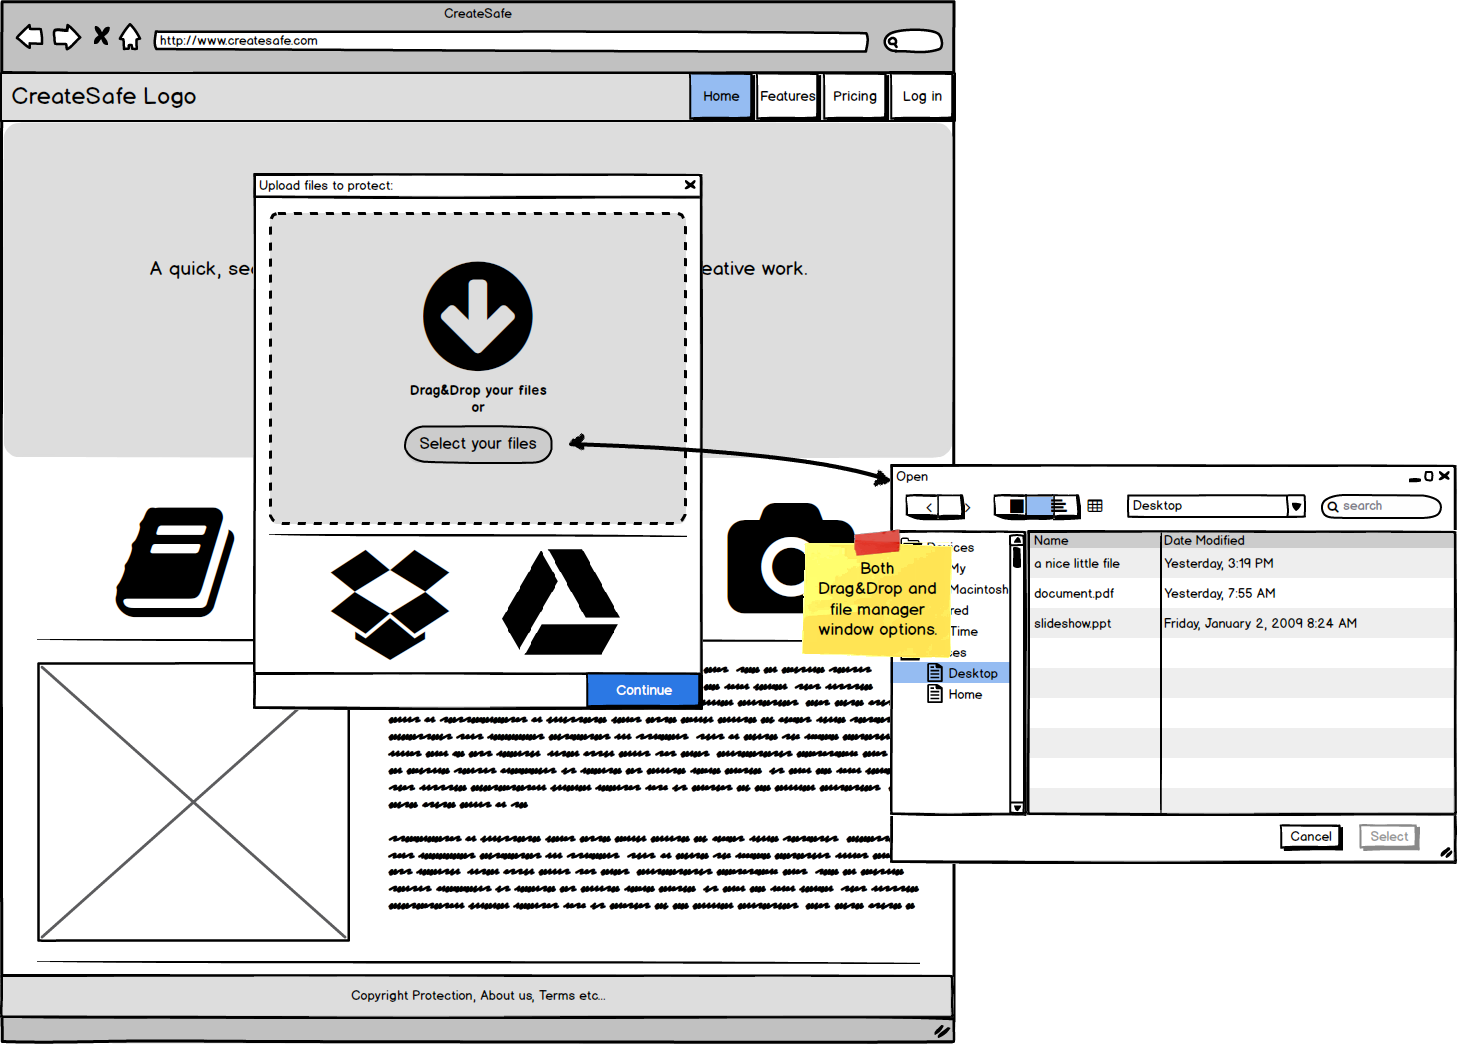
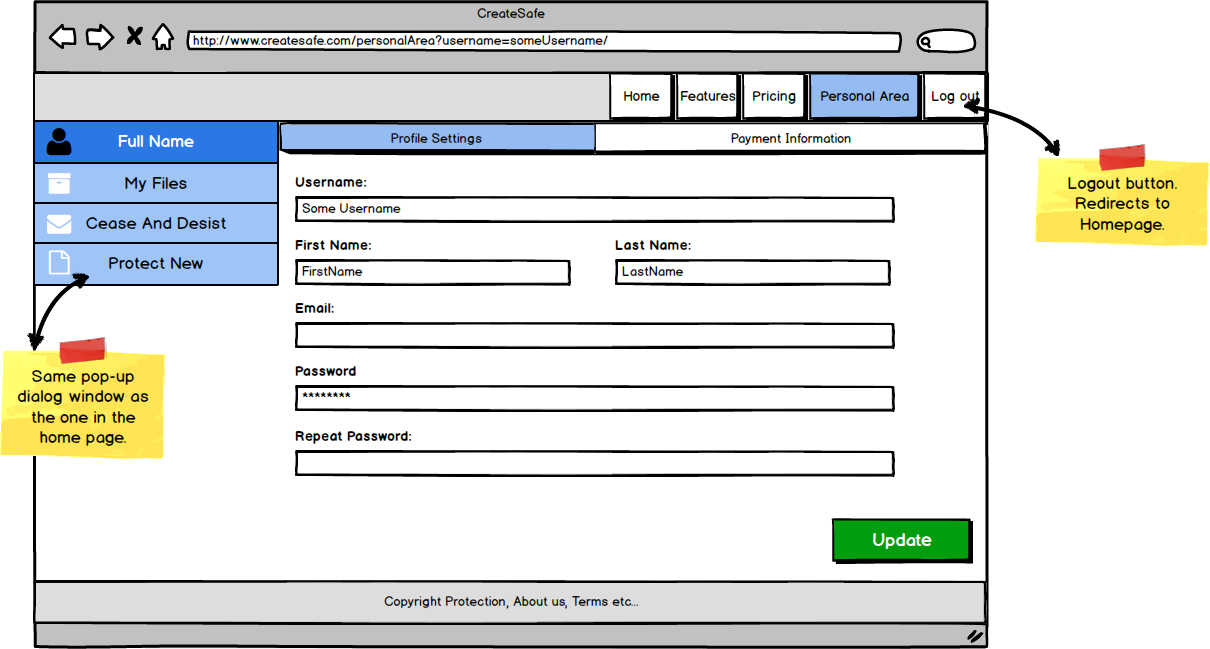
- Visibility: The ‘protect now’ option is available since the very homepage in order to highlight the main functionality of the website (as requested by our client) while all the other options are accessible through a set of layers that keep all functionalities with same priority on the same page.
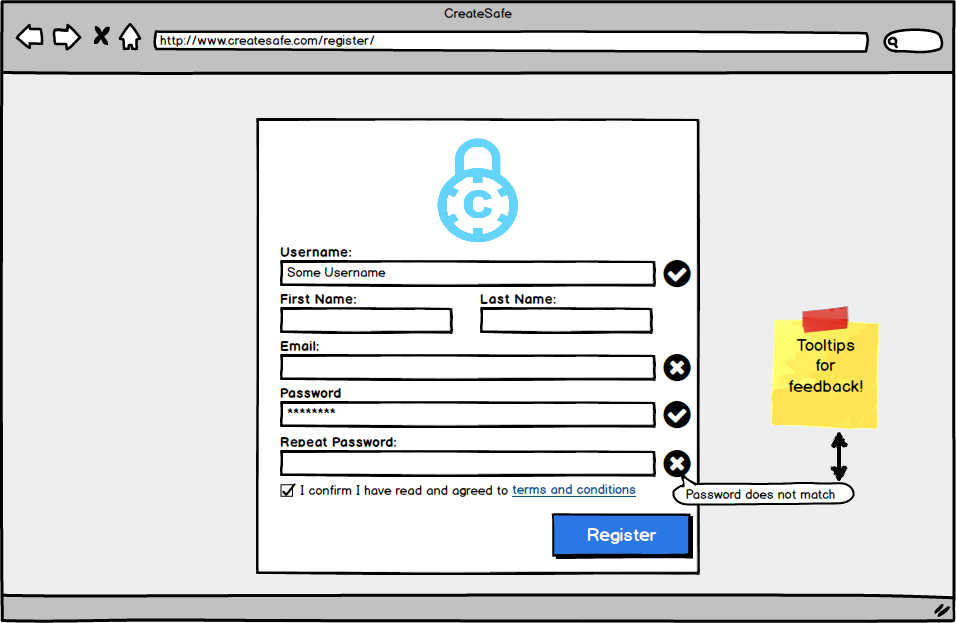
- Feedback: we integrated feedbacks trying to keep a minimalistic design using element such a tooltips to feedback the user of possible error or actions to take (e.g. in the login and registration pages if fields are invalid).
- Mapping: each functionality provides immediate feedback to the User or the expected result.
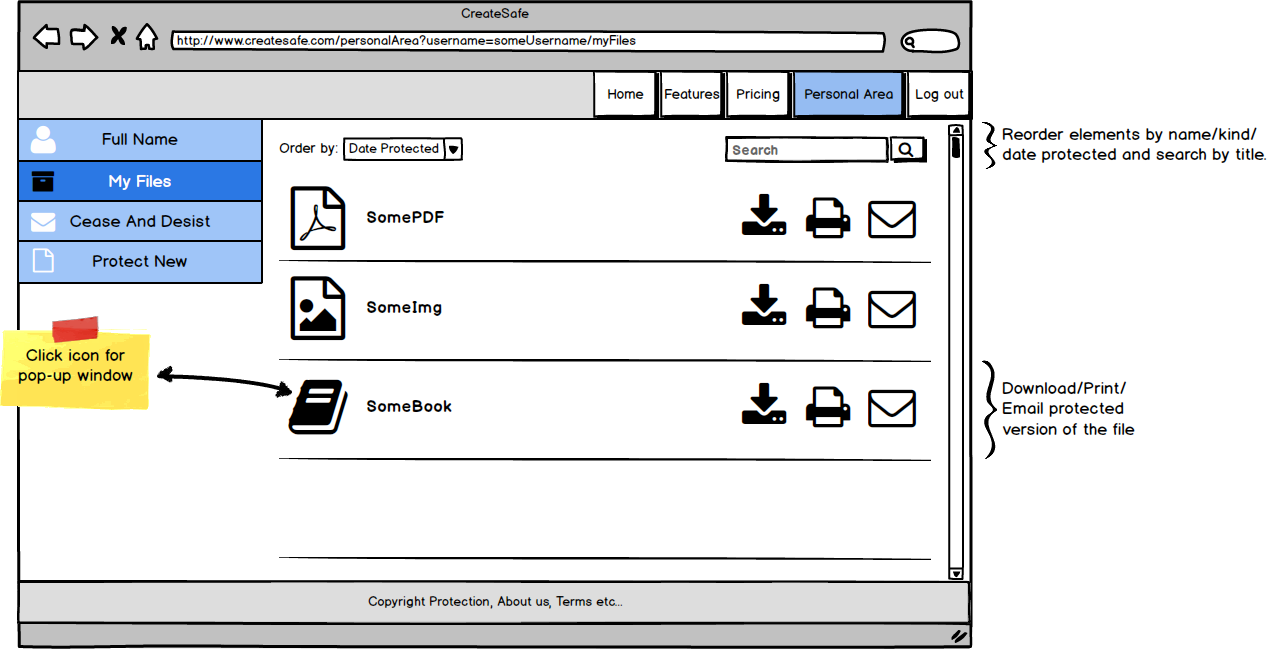
- Consistency: we made use of standards such as the search symbols in the “personal area” when searching for files in order to facilitate the use of the website.
- Affordance: each functionality is clear and when it wasn’t, we provided feedback on how to use the functionality (e.g. the Drag&Drop zone specifies that both dragging and selecting of files is available).
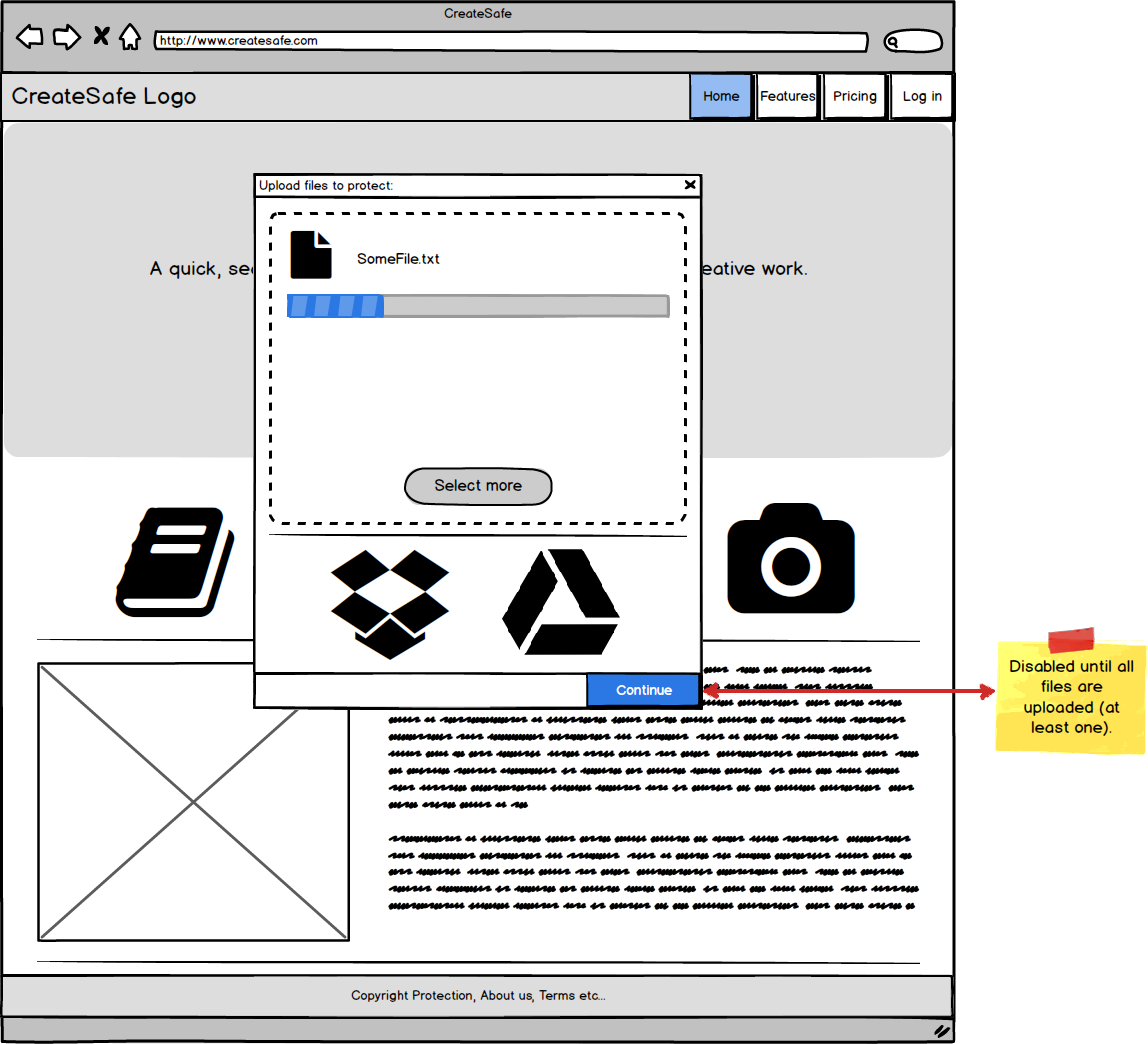
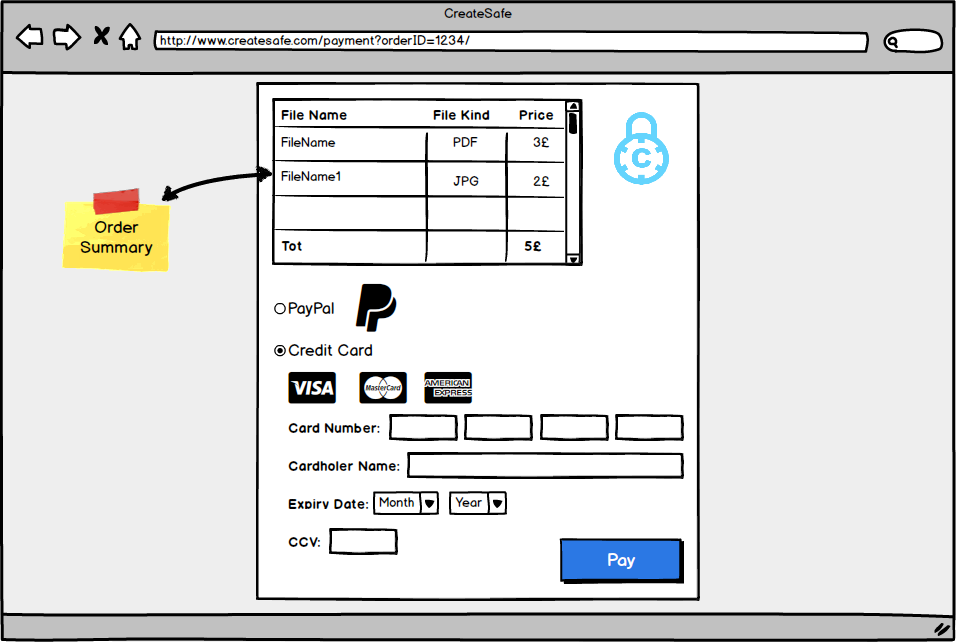
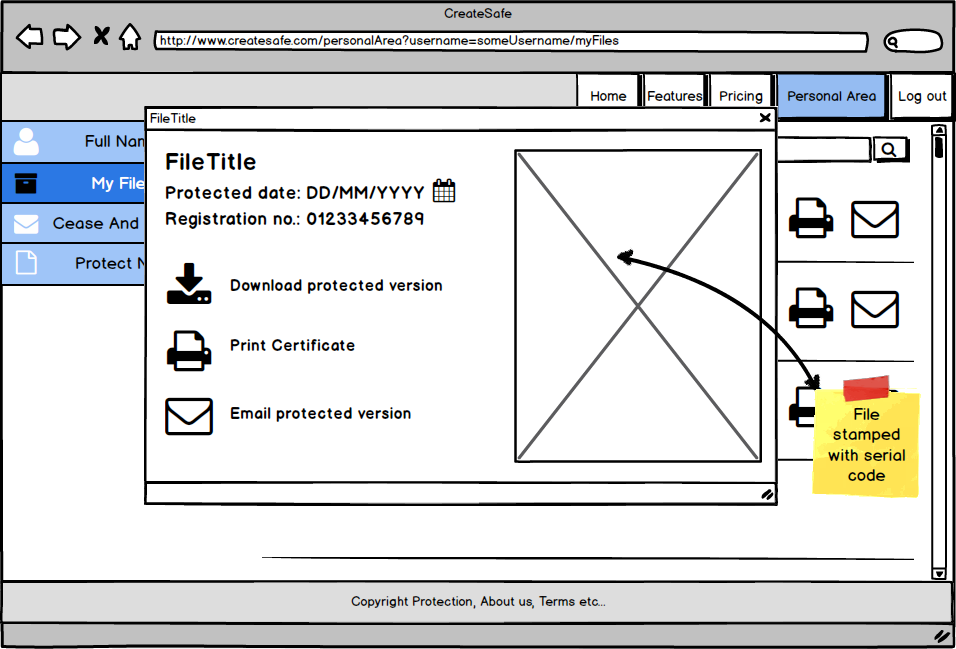
We prepared the mockups using Balsamiq, in order to emphasis the main functionalities and features for each page:
Download:
PDF versionStarting from the above mockups, together with our client, we worked on some graphics in order to delineate the style for the website. We then turned into the final version of our website:
Software Engineering Analysis
Uploading of Files
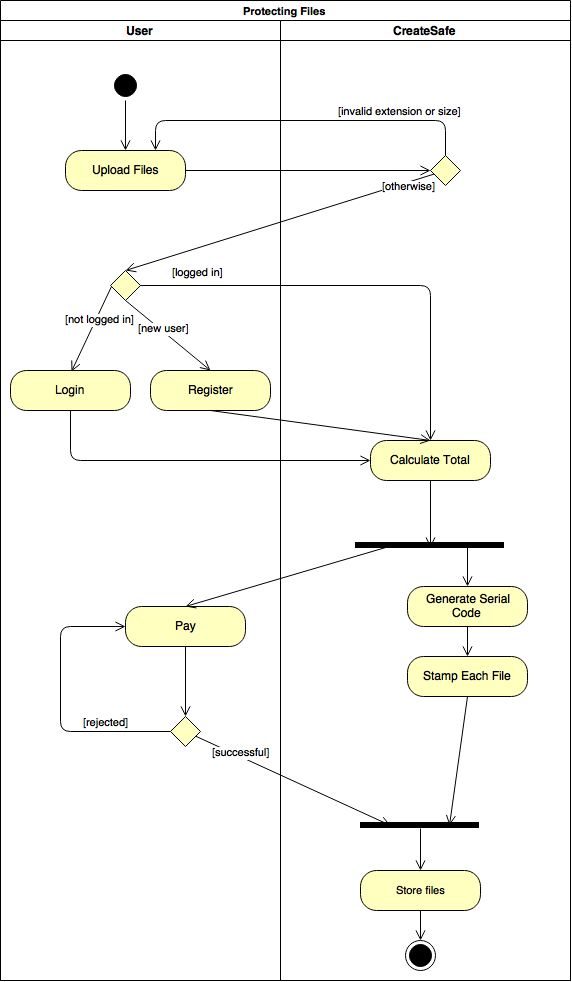
In order to better understand the implementation of the main functionality of the website (i.e. Uploading and Protecting documents) we analysed it taking into account resources used and actors involved. As illustrated in the Activity Diagram,it should be (from the user’s perspective) as straightforward as possible.
As requested from our client, we structured the process so that even anonymous users can upload files, so that the feeling is that of being extremely easy to use. Files are validated and only if the User decides to continue it is requested to Login. Upon payment, the files are stamped and stored and, therefore, protected.
OAuth
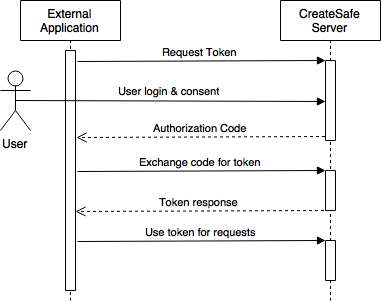
In order to protect our API, we will adopt the OAuth protocol. Since we are planning to implement the Authorisation_Code grant type, the third party application will be provided with a Client_ID and a Client_Secret (“credentials” in order to be able to identify the client application).
In order to be authenticated, the external application will redirect the User to the API authorisation endpoint where the User will have to login using his/her credentials and give consent to the scope requested by the application (whether just downloading documents or uploading as well).
If the User gives consent, the application is redirected to the redirect_URI specified by the application along with an Authorisation_Code.
Then the application can make a request for tokens to the API token endpoint providing Client_ID, Client_Secret and the Authorisation_Code. If the request is valid, the API will return an access_token that can be used in order to send requests to the API and (possibly) a refresh token that can be used to request a new access_token when this one expires.
Once the external application has successfully obtained an access token, it will be possible to use it in order to query the API and send GET and POST request (depending on the scope). For a request to be successful the client application will have to provide in the HTTP header the access token, if the token is expired or invalid it will be returned an “Invalid Token Error”.
RESTful API
We are going to implement the API following the Representational State Transfer (REST) architectural style. This means adhering to its constraints:
- Layered architecture: connection between client and end-server is scalable in order to improve security.
- Separation of concerns: client is not concerned with data storage implementation.
- Stateless requests: no logging of the client requests.
- Uniform interfaces: requests are self-descriptive and they identify individual resources.
Out of the 4 different CRUD (Create, Read, Update and Delete) functions that could be implemented, our API will allow only to Create and Read. In HTTP language, the API will only allow GET (request the representation of the resource) and POST (add entity enclosed in the request as a new resource) requests.
GET requests will allow the third-party application to request either the list of files available for that specific User or a copy of a specific protected file.
POST requests will allow the third-party application to upload a new file to the server, the file will be automatically stamped with a unique serial code and date of upload.
During the first stages of our design we came across the issue of handling payment for each request made to the API, and how we could possibly implement that. After further discussion with the client, he suggested to allow upload of files without payment when requests come from third-party applications. However, only allowed applications will be able to make requests to the API, so that a contract can be stipulated between AuthoRight and the client making use of the API. This restriction is guaranteed by the necessity for the client of the API to be in possess of a client_ID in order to receive tokens to make requests. In other words, each request to the API will have to contain as part of the HTTP header a valid access token.
Prototype
In order to get used to the Symfony network and familiarise ourselves with its functionalities and features, we produced a prototype focused on the first steps of the “Uploading and Protecting documents” functionality (as described in the previous section) using the Dropzone.js package (for the front-end) and the OneupUploader bundle (for the back-end).
The bundle lets us upload multiple files using either a file manager window or using Drag&Drop functionalities.
Since we decided to allow upload of files from anonymous user as well (in order to ease the process and make it more natural), the files are first uploaded in the Cache folder, making use of an orphanage. This way, when the User decides to interrupt the session and to not submit the form, the old files are automatically managed and old files are periodically removed. Each user gets allocated a folder based on his/her session ID (hence, a session has to be started for each user).
The file are validated and only files in PDF, Word format or images are uploaded (all the rest are rejected). Furthermore we applied a 10MB limitation per file.
Files are uploaded using AJAX requests and visual feedback is provided to the User throughout the whole process:
Prototype Testing
A fundamental aspect we took into account when deciding which PHP framework to use for the back-end was testing. Symfony is fully integrated with PHPUnit, a widely used testing framework. Symphony facilitates the process of writing both unit tests and functional tests.
Unit Testing focuses on a single class (unit) and tests its methods and its integrity.
Functional Testing focuses on the overall behaviour of the application and it follows a specific workflow.
The test client object allows us to simulate a HTTP client (like a web browser) and make request to the website. Each request returns a Crawler object that we use to traverse the HTML document and interact with it. Moreover, PHPUnit provides a set of useful assertions in order to evaluate the state at the end of the test case.
For our first prototype we just developed a few tests in order to familiarise ourselves with thePHPUnit and functional testing.
For example, to test the correct uploading of the files, we created a test that creates a dummy file and tries to send the AJAX request to the server, it then checks that the response is successful (that it returns a successful code):
//test that the uploading of files is successful
public function testUploading()
{
	$client = static::createClient();
	$crawler = $client->request('GET', '/');

	//create dummy file
	$photo = new UploadedFile(
	    '/Users/daniele/Desktop/dan.jpg',
	    'dan.jpg',
	    'image/jpeg',
	    123
	);

	$crawler = $client->request('POST', '/_uploader/gallery/upload', array('file' => $photo), array(), array(
		'HTTP_X-Requested-With' => 'XMLHttpRequest'
	));

	$this->assertTrue($client->getResponse()->isSuccessful());
}
Running tests (both unit and functional) is completely automated in Symfony and can be done just by running the “phpunit” command from the terminal:

Symfony Testing Documentation


