Testing Strategy
Testing with the Bot Framework Emulator
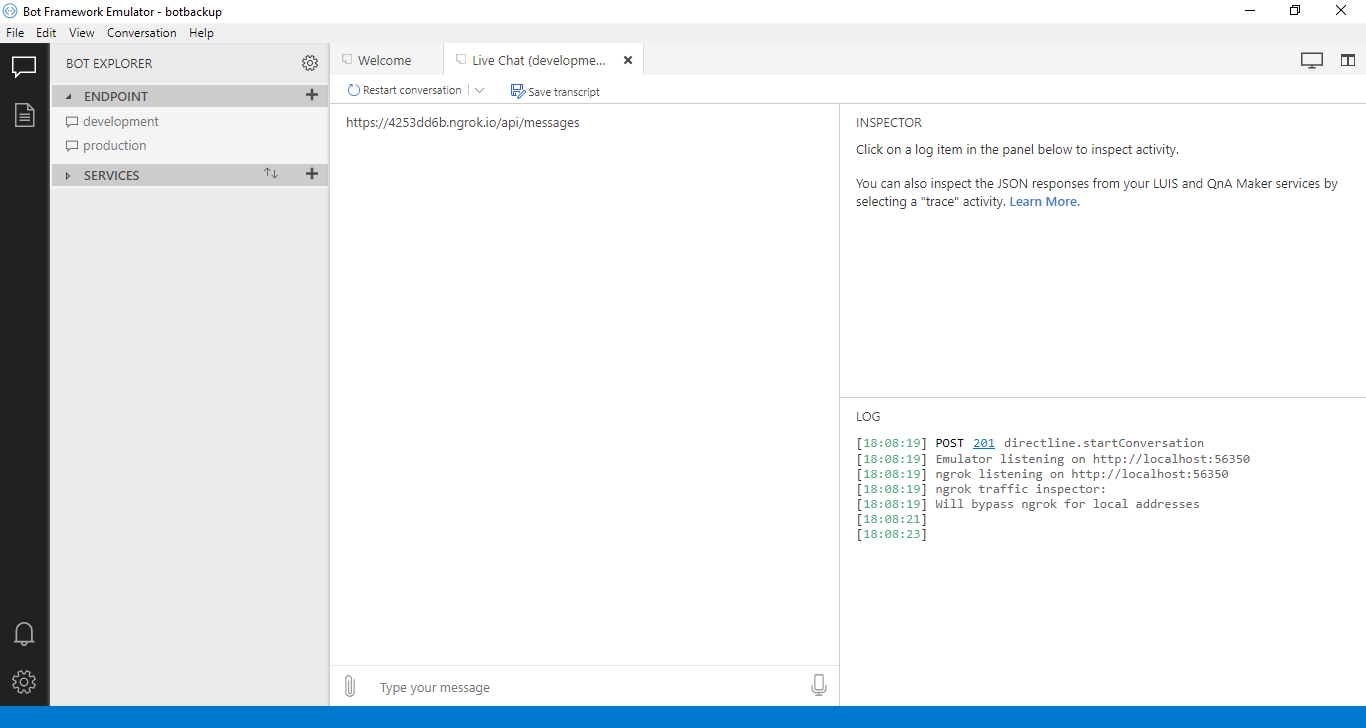
The Bot Framework Emulator is a desktop application that allowed us to test and debug our bot locally. It allows us to chat with the bot and inspect the messages using the LOG and the INSPECTOR. We tested the bot after adding any feature to make sure it is working as intended. The INSPECTOR provided a detailed JSON activity about a selected message which have eased the debuging process when an error was encountered.
Testing and Debugging with Transcripts
To make sure the bot runs as intended, we started with unit tests to make sure that our bot is fully functionally as intended and that there is not any undetected bugs. However, as we worked on the tests, we realised that testing the bot framework was a complicated task. AuthPrompt is used in the bot for authentication, this does not work in WaterFall Dialog, which is essential for our bot. Our progress with the unit tests came to a halt. After reaching out to the client, he suggests us to use transcripts for testing as that is also how he has done it before. Therefore, after learning about transcripts, most of our testing and debugging are done with them.
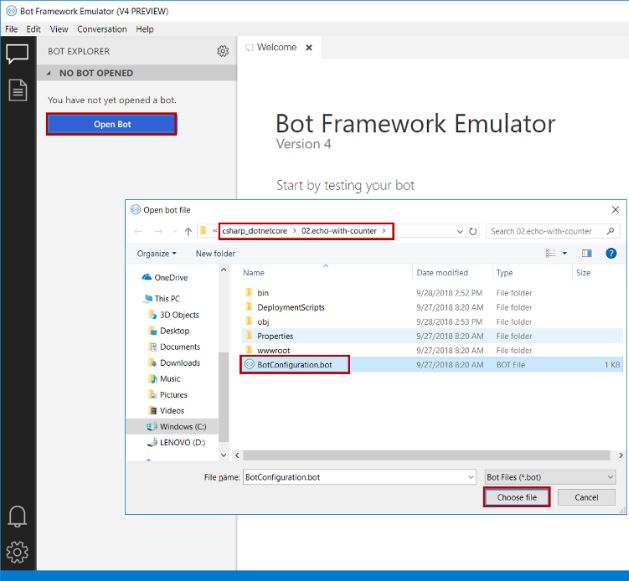
As we run the bot, the emulator can be connected to the code's bot configuration file as shown in the image below.
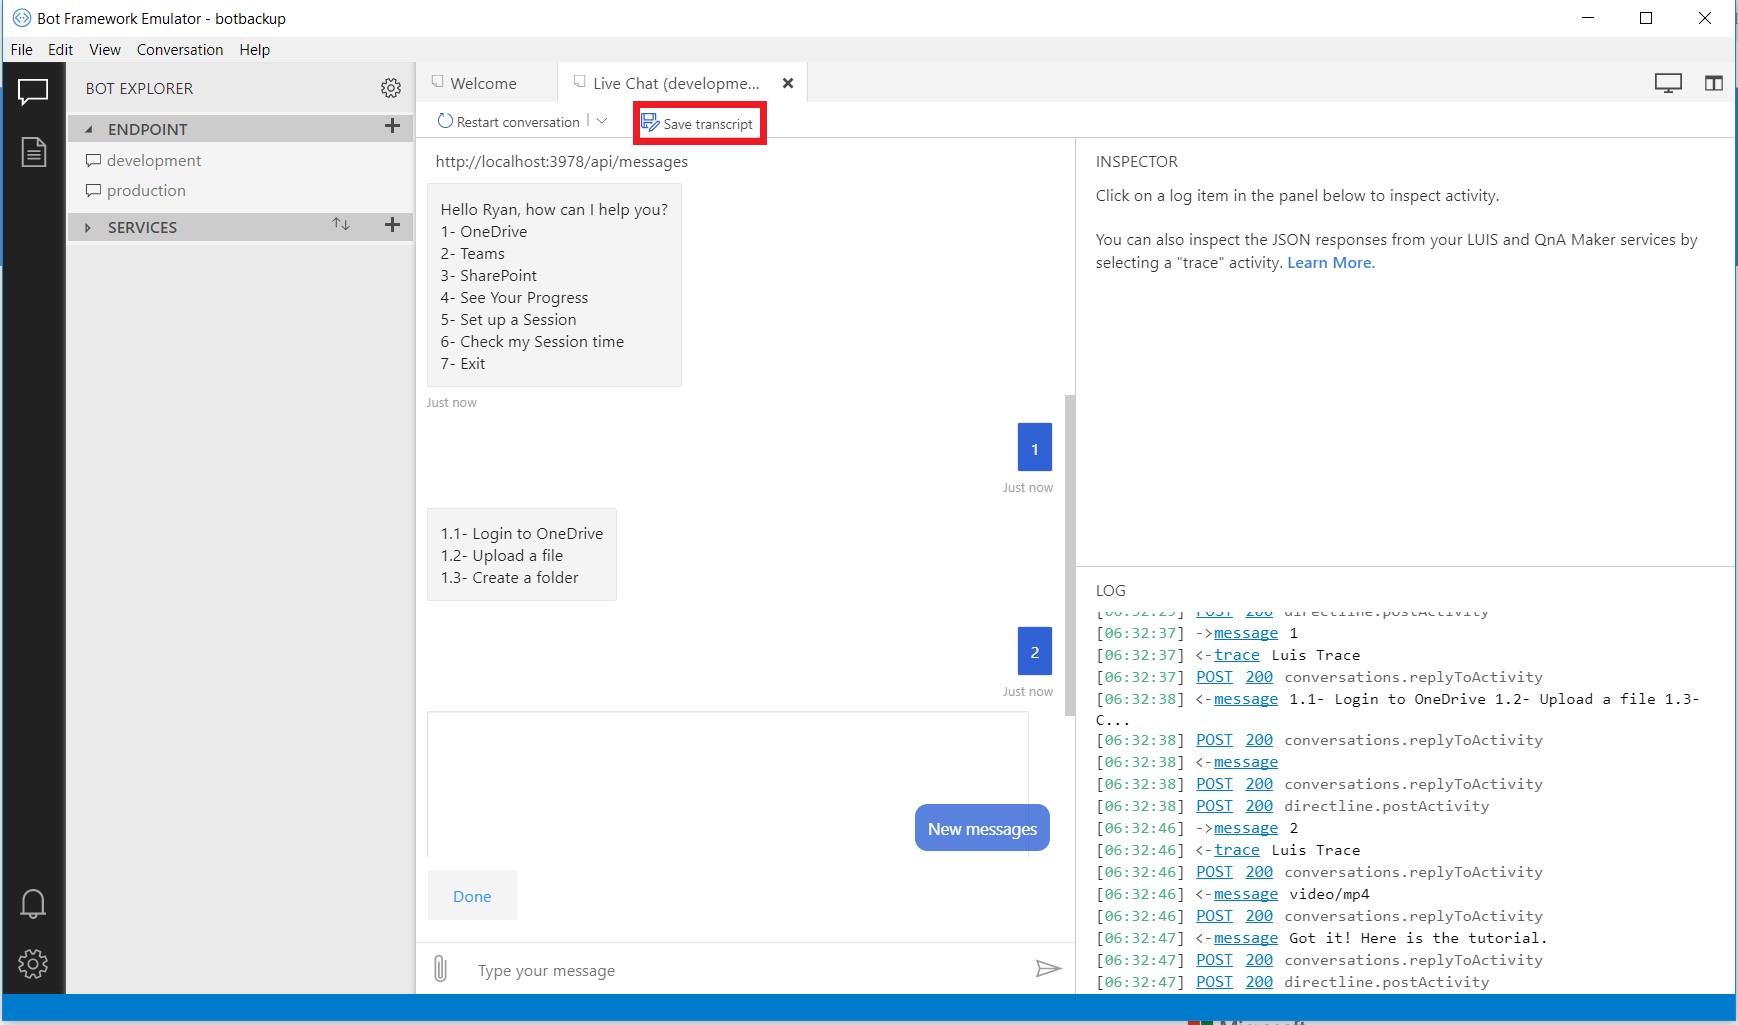
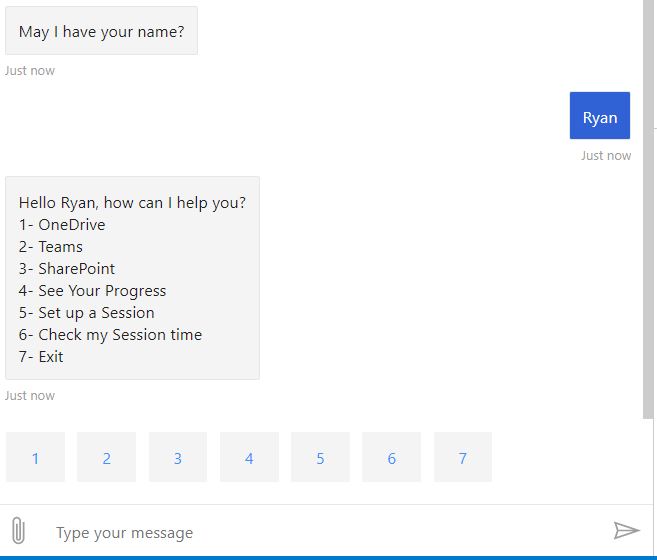
The code can then be tested by sending simulated user interactions to the bot. After simulating a conversation with a bot, by pressing the Save transcript button within the live chat tab, a transcript file will be saved.
All the user interactions that were entered for testing and the bot’s responses have now been saved into a transcript file. Upon loading the transcript file on the RESOURCES section in the upper left corner of the emulator, the conversation can later be reloaded to help debug interactions between a user and the bot.

Here, a message displaying options for the user is clicked on. All the information in the transcript file concerning this specific interaction is displayed in the emulator's INSPECTOR window in JSON format, and more information about it is displayed below.
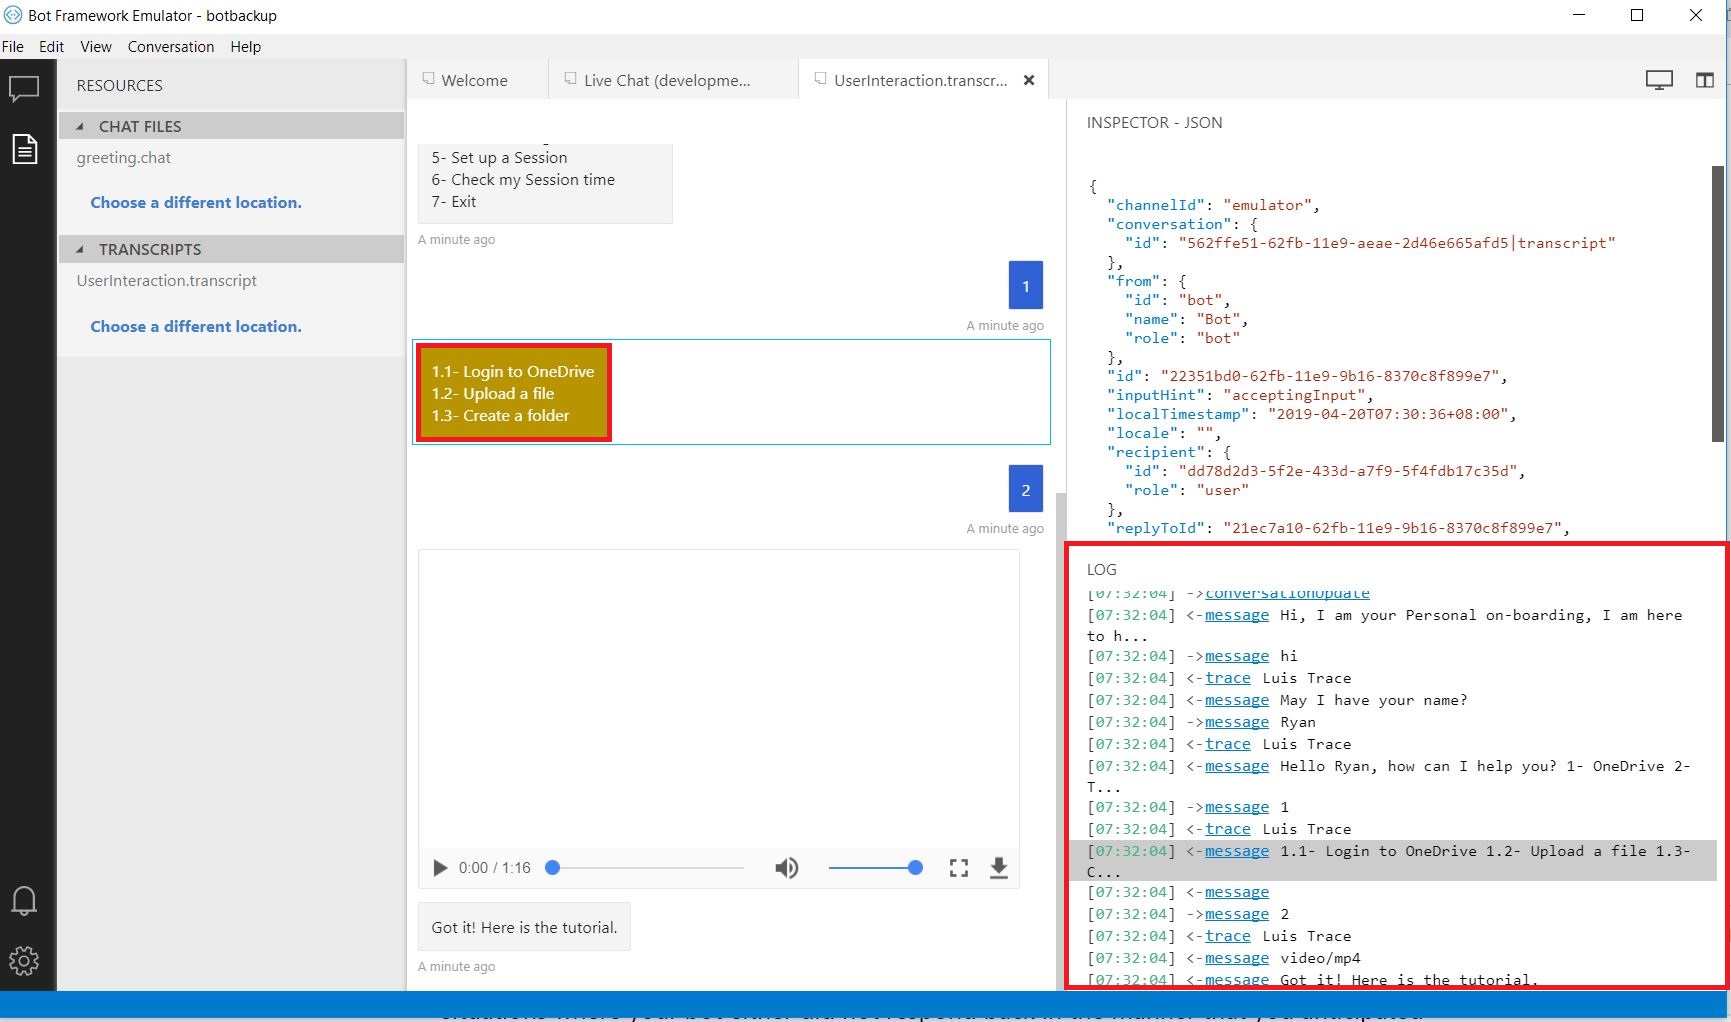
The detailed information let us follow the step-by-step interactions between the user's input and the bot's response, which is useful for debugging situations where the bot either did not respond back in the manner that you anticipated or did not respond back to the user at all. Having both these values and a record of the steps leading up to the failed interaction allows you to step through the code, find the locations where problems occur, and resolve those issues.
The transcripts also allow potential developers who work on the bot see the tests and understand the step for each functionality.
Power BI testing
As our bot requires a Microsoft account for a user to be created for logging, it is hard to test Power BI’s data visualisation as it would mean gathering many real users or making multiple accounts to test the logging.
To solve this, when we were testing for Power BI, we altered our code so it would allow the user to enter his name instead, and the name would be saved as the UserID. (instead of the user’s Microsoft account). This allowed us to simulate many users using the bot with different progresses in on-boarding, allowing us to test and work on Power BI flexibility and easily.
User Acceptance Testing
The project was demonstrated regularly to our supervising TA and client as it was getting developed. It was also shown to our end users who are mainly employees and recently graduated students. To identify any bugs and improve our bot according to the users' recommendations, we let the users first freely use our bot And then we gave them a series of test cases to execute. This allowed us to see if the bot works as intended and if it is easy to use.
Test Cases
- Authenticate using your Microsoft account
- Watch a tutorial by following the options
- Request a tutorial by requesting it from the bot directly
- Watch a video from each tool
- Watch 2 videos from the same tool and check if the first one watched is ticked
- Check your progress without watching any video
- Watch videos then check your progress
- Before finishing a video close the bot reopen it, check if the bot suggest to continue the video
- Set up a session, check if it is in your diary
- Set up a session earlier than the actual time
- Set up a session, check if it is in 'Check my Session time'
- Delete your session, check if it is deleted from your diary
- Check your session time before setting a session, and set a session using the 'Yes, please' button
- Check you session time before setting a session, and use the 'Maybe later' button
- Watch a video and then end the session, after choosing your next session check if it is in your diary
- Quit the bot using the 'Exit' option
- Use the 'Go back' button
- Write any random sentence
Feedback was considered to improve existing elements of the bot, or include new functions to improve the bot. In particular, the client’s and TA’s suggestion after trying out our bots had helped us tremendously and helped us gain insights on how to improve the bot.