Design
Overview
We developed the game in Unity, using two assets from the Unity Asset Store. - the Unity Tobii Eye Tracking SDK and the Water2D fluid simulation asset. We customised the Water2D asset to meet the requirements of our game and we also extended the functionality of the Tobii Eye Tracking SDK with the Eye Tracking 2D Package, which we have submitted to the Unity Asset Store. More information about this asset can be found here.
Main Technologies
- Unity was used as the development platform for the game.
- The C# scripts to implement the behaviour of GameObjects were written in Visual Studio Code.
- The Tobii Eye Tracker was used to collect eye tracking from the user.
- The Tobii Eye Tracking SDK was used to receive the eye tracking data from the eye tracker and to transform the data into a more usable format.
- Eye Tracking 2D used the input data to enable eye tracking functionality for 2D Game Objects. Eye Tracking 2D allowed us to detect which GameObject is being gazed upon and to then perform the appropriate game action.
System Architecture Diagram
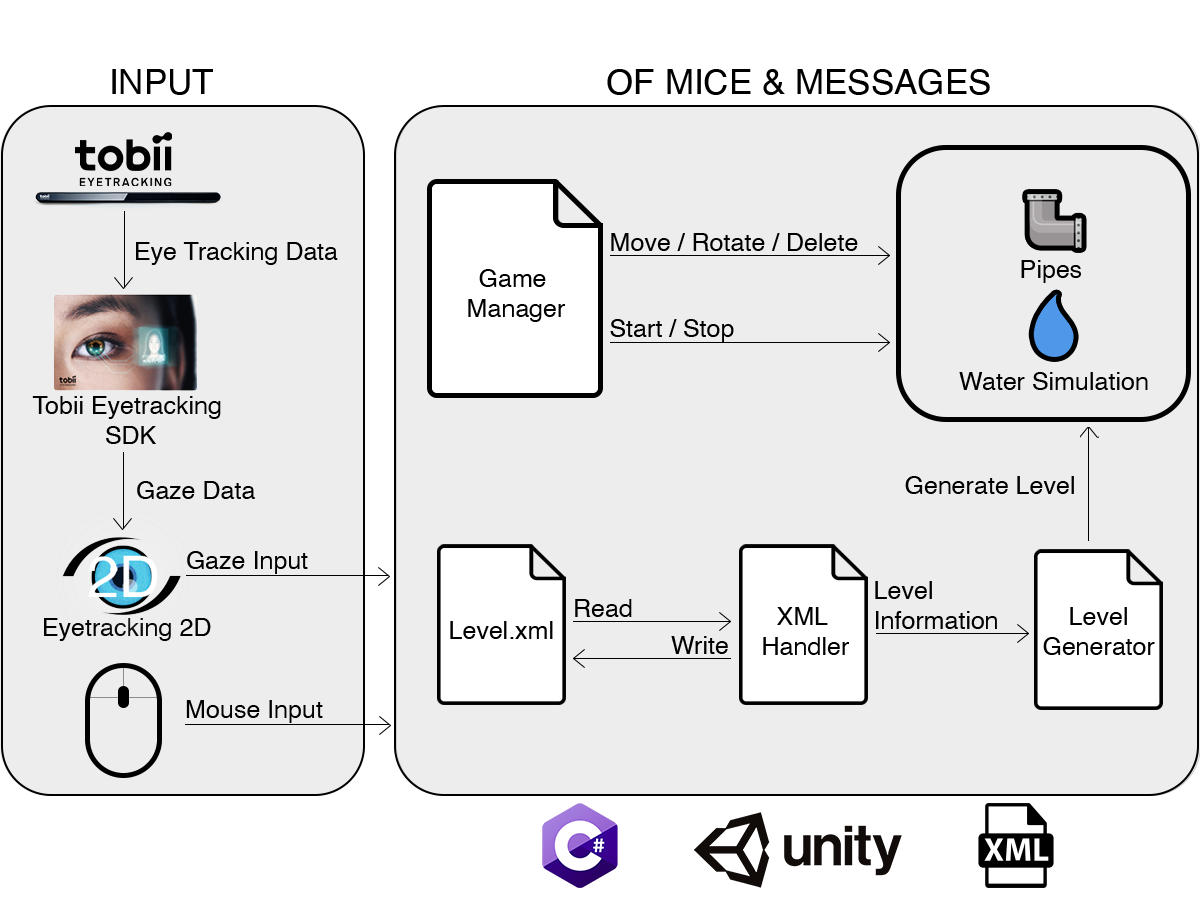
The Tobii Eye Tracker captures gaze point data from the user and passes this data to the Tobii Eye Tracking SDK, which makes the data accessible through its API.
This data is accessed by Eye Tracking 2D to determine whether an object is currently being gazed upon by a user. Alternatively, mouse input can be used to select an object. The GameManager class holds the current state of the game as a whole and controls each of the main functional concepts of the game for example, the Water Simulation, Pipes and the UI of the game.
Additional information about the game's scripts and class diagrams can be found here.
Implementation of Key Functionality
We have implemented full support for both eye control and mouse control to increase accessibility for users. We have implemented this by adding a Collider2D component to each object and then writing a script that controls the functionality of the GameObject when a mouse click is registered (OnMouseDown). The Eye Tracking 2D asset enables us to then use the Collider2D component to determine whether the user is dwelling on the game object, so that the appropriate methods can be called when a successful gaze selection has been made.

We have used the water particles from the Water2D asset for the prototype, but we have completely customised the water mechanics. We created the in-game physics and water simulation by modelling the water as a stream of particles that each have a small trail, which then generates the appearance of a flow of water to the user. Each water particle has a collider and a script to limit the velocity of each particle. The water particles are held by a DropletPool, enabling us to reuse the water particles rather than destroying them between pipes and when they fall of the game screen.
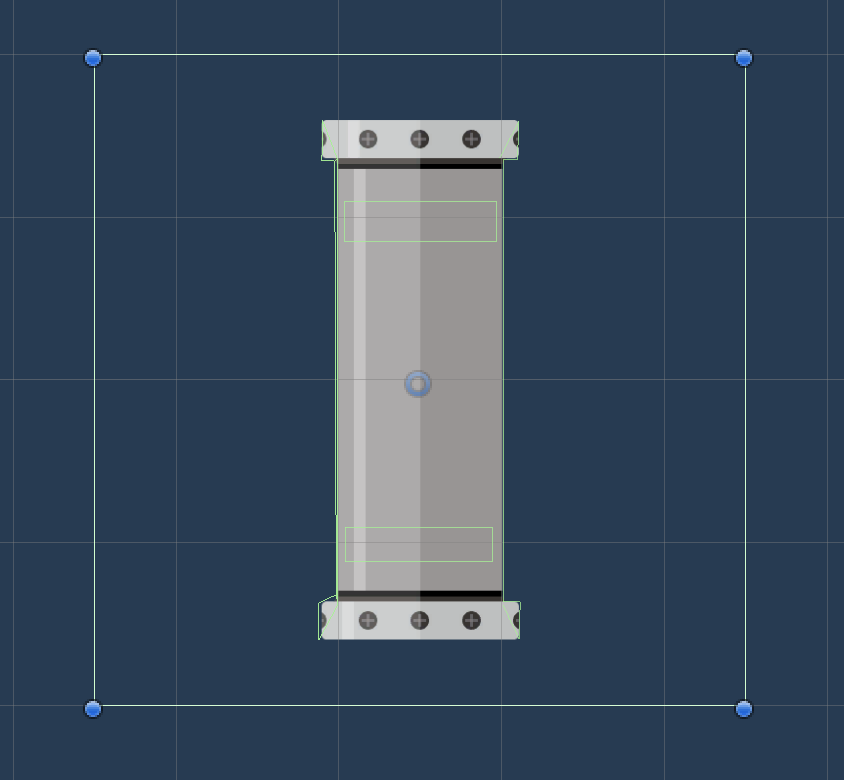
Each pipe is a single sprite with a number of colliders (shown by the green lines) that allow water to 'pass through' the pipe but bounce off the sides. A trigger collider is used to cover the surface of the pipe, the fact it is a trigger collider means that it will not make the water particles bounce off the pipe. The trigger collider is used to detect whether the pipe is being dwelled upon or being clicked.
There are colliders on both outer edges of the pipe to ensure that the water will not enter the pipe from the sides. The final two colliders inside the pipe are used to detect water droplets entering the pipe so they can be can be spawned on the opposite end of the pipe. When a water particle enters one side of the pipe, it is disabled and the new water particle is 'spawned' from the DropletPool and appears on the other side of the pipe. This creates the impression that the water particles are flowing through the pipe. The other types of pipes work in the same way.
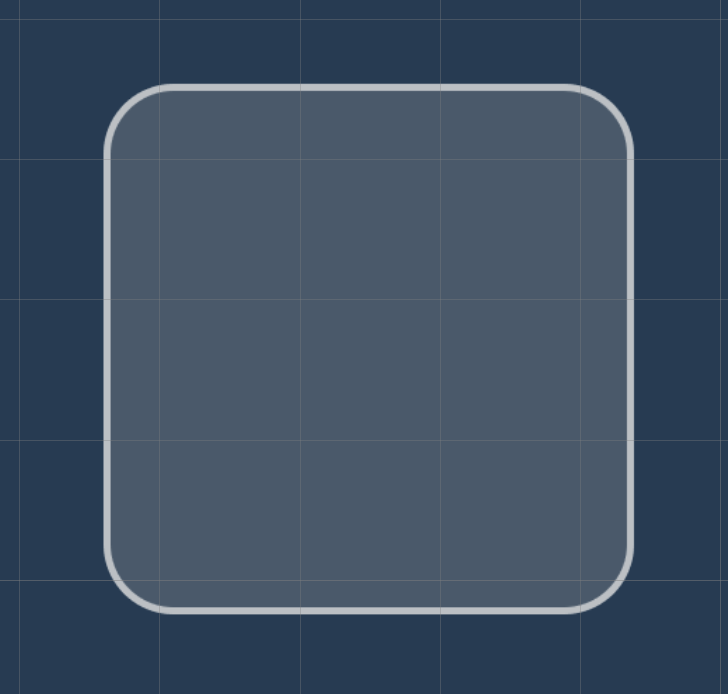
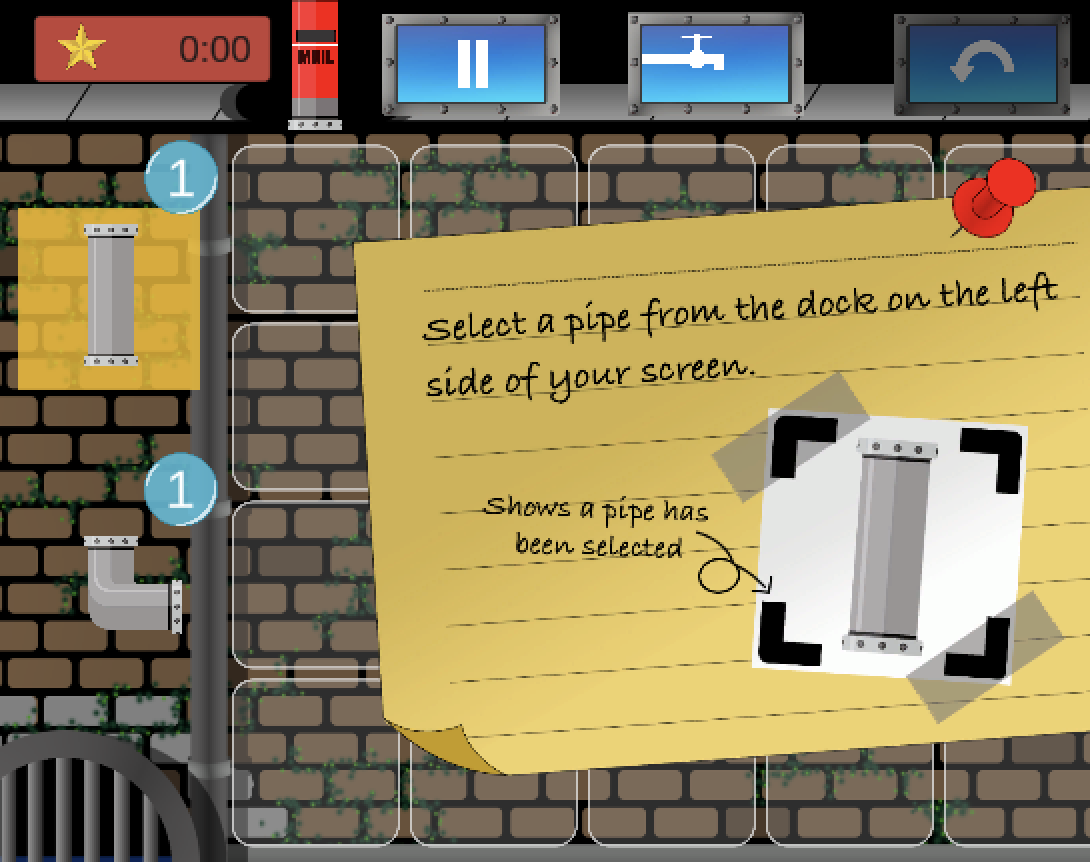
The user is able to place pipes onto a grid to direct the flow of water to the target mail pipe. The grid is formed from a series of squares arranged into a rectangle, with each grid block acting as a button. When a grid block is selected, its script communicates with the GameManager to update the current state of the game. We decided to make the grid blocks semi-transparent with a bright outline so that the user can clearly see each grid block, whilst ensuring that the background is not obscured. If an obstacle or pipe is placed on a grid block, the grid block is disabled and can no longer be selected. Note, only a single grid block is shown in the image on the left.

For the normal levels, pipes are stored in a dock on the left side of the screen. The user selects pipes from the dock and places them onto the grid. We implemented this functionality by instantiating a new pipe when the user has selects a grid block after choosing the desired pipe. The GameManager handles the communication between the grid blocks and the dock and when the new pipe is instantiated by the dock, the GameManager moves the pipe to the correct position and the number of that pipe type in the dock is decremented. When a pipe is deleted from the grid using the bin button, the currently selected pipe is destroyed and the number of available pipes for that pipe type is incremented by one. The dock has access to the number of pipes available for the user via a dictionary and this is displayed next to each pipe type. The information about the number of pipes available at the start of each level is retrieved from an XML file.
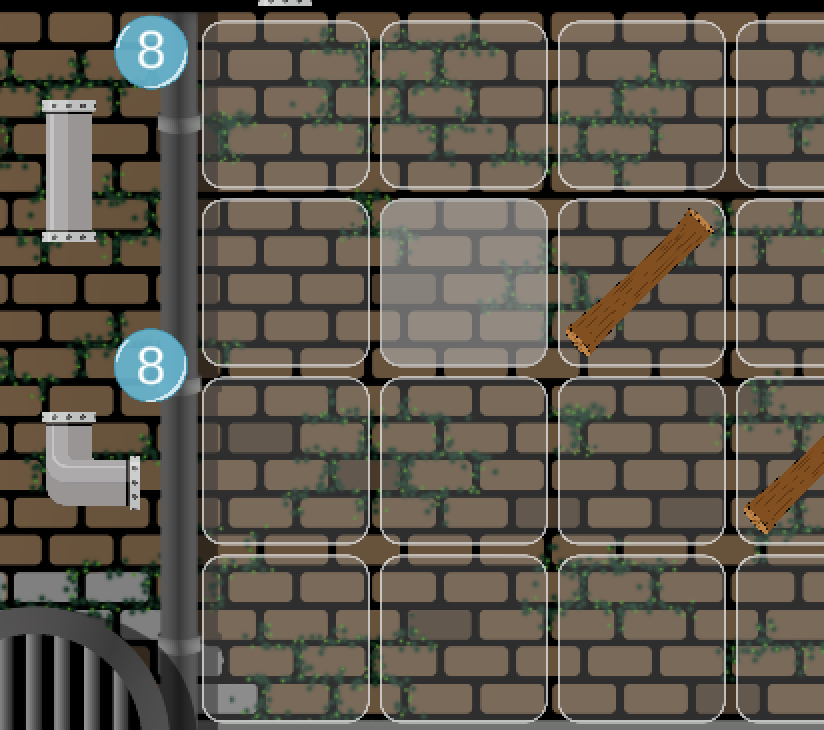
Visual feedback is important in ensuring that users are aware of the object that they are currently dwelling on, as well as providing confirmation of selection to avoid user uncertainty. We implemented this by changing the appearance of a GameObject (either the transparency of the object or the colour of the button) as the dwell time increases, until the object has been selected, at which point the object no longer changes colour. As soon as the user looks away from the object, the object's colour returns to its original colour. In addition, buttons also flash when selection occurs and toggles change both colour and appearance when they have been activated.
On the image shown, the user is gazing at one of the grid blocks and this can be clearly see by the difference in transparency for that grid block. When a pipe is selected, a selection box appears.
We have created an interactive tutorial to help the user learn the game's concepts and mechanics. The tutorial has been implemented through a script which extends the GameManager and allows it to check the current state of the game to see what the user has done and if the next part of the tutorial should be initiated. For information only parts of the tutorial, there is a 'next' button the user can select so that they can move on when they are ready.

All levels are stored in an XML file which is read by a static class called XMLHandler that extracts information about each level. For example, the LevelGenerator class requests information about the obstacles in a specific level, using the XMLHandler class, in order to place the obstacles onto the level grid before a level begins. The XMLHandler also enables the writing of Level Completion data to the XML file for example, whether a level has been completed and the time taken to complete a level (if it is the first time the level has been completed or if it is a better time than any of the previous attempts of the level).