Appendices

User Manual
Mood Questionnaire
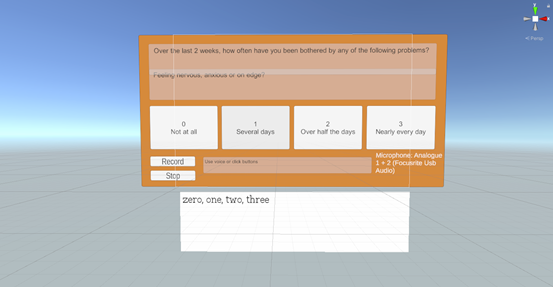
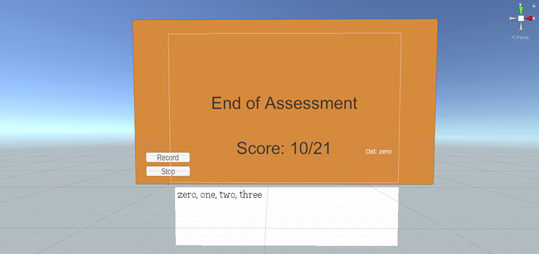
- Upon opening the application, you will be greeted by a mood questionnaire you will need to complete.
- Read the question and make a decision as to whether you would like to choose option 0, 1, 2, or 3.
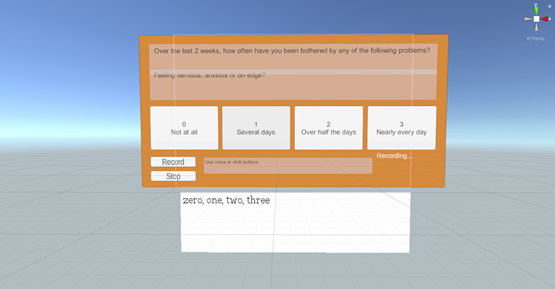
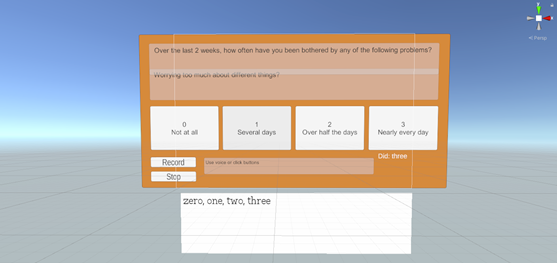
- If you would like to use the speech-to-text functionality:
Once you are ready to answer the question, hold down the B button on the right controller and speak the number corresponding to your chosen option (shown in the white field below the questionnaire) into the headset microphone. Then, release the B button. - Repeat the previous step for the remainder of the questionnaire and your score will then be displayed on the screen.
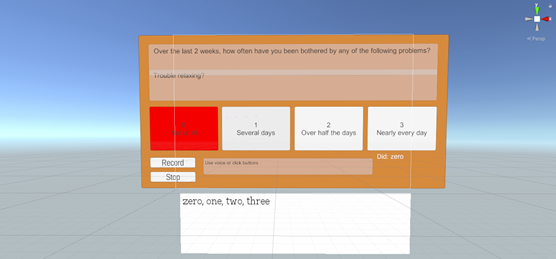
- If you would not like to use the speech-to-text functionality:
Point the right controller towards the button on screen corresponding to your chosen option (highlighted in red) and press the trigger button. - Repeat the previous step for the remainder of the questionnaire and your score will then be displayed on the screen.
Deployment Manual
Speech-to-Text Implementation
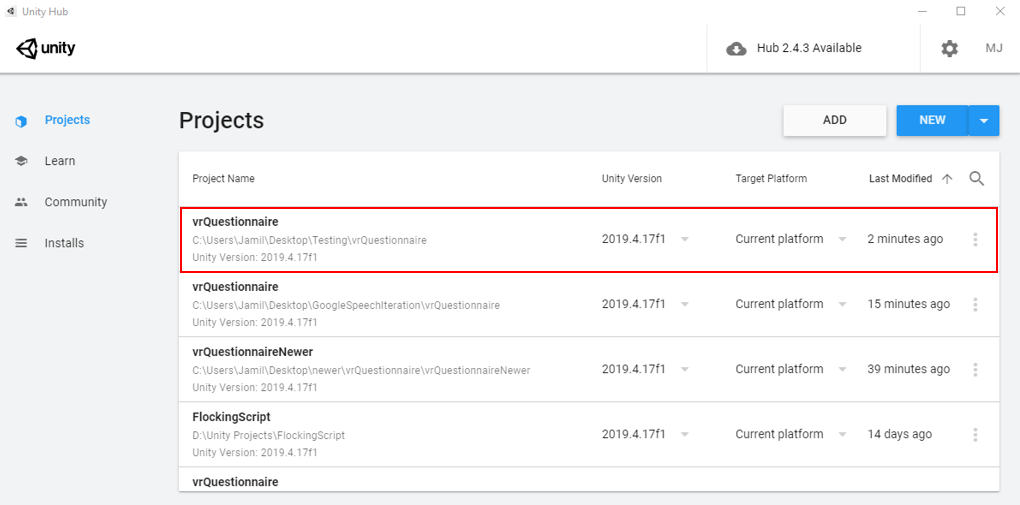
- Open the Unity Hub and press the ADD option. Navigate to where the project folder is located on your drive and select it. You should be able to see it in your list of projects and will be able to open it.
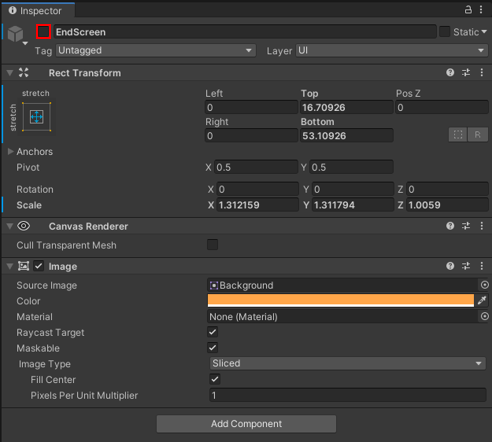
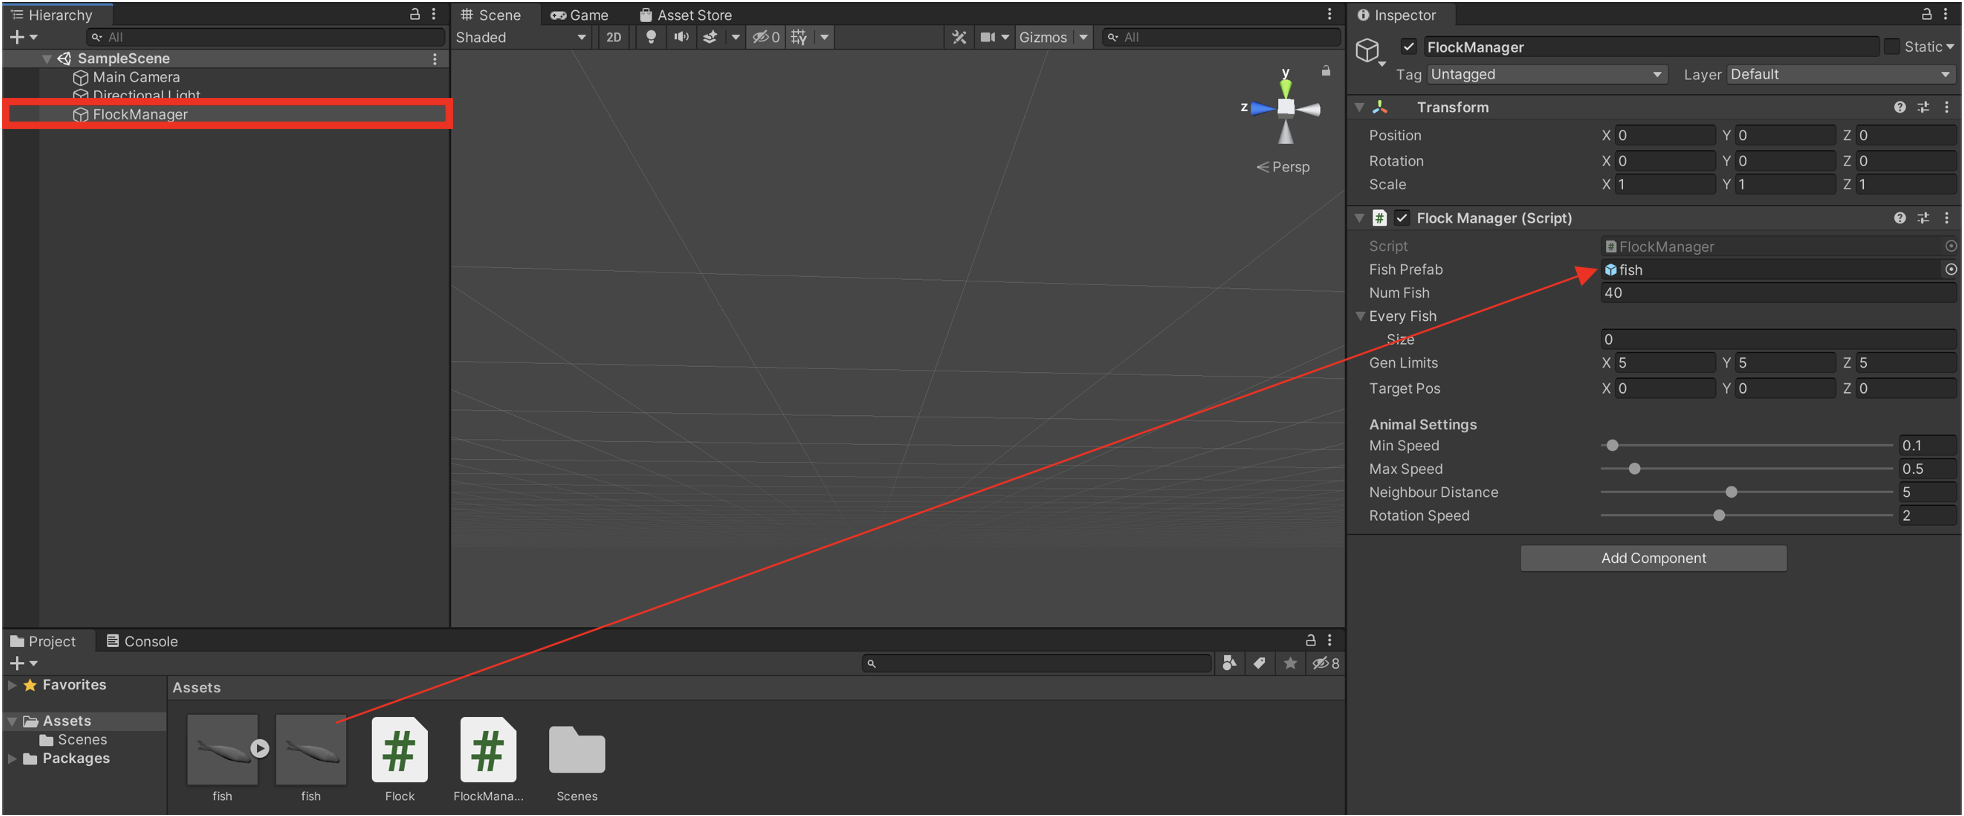
- Within the Hierarchy of the project, navigate to SampleScene > Canvas > EndScreen. Press the tick in the top left of the inspector tab (red square below) to disable it so you no longer see the “End of Assessment” screen in your Scene or Game windows.
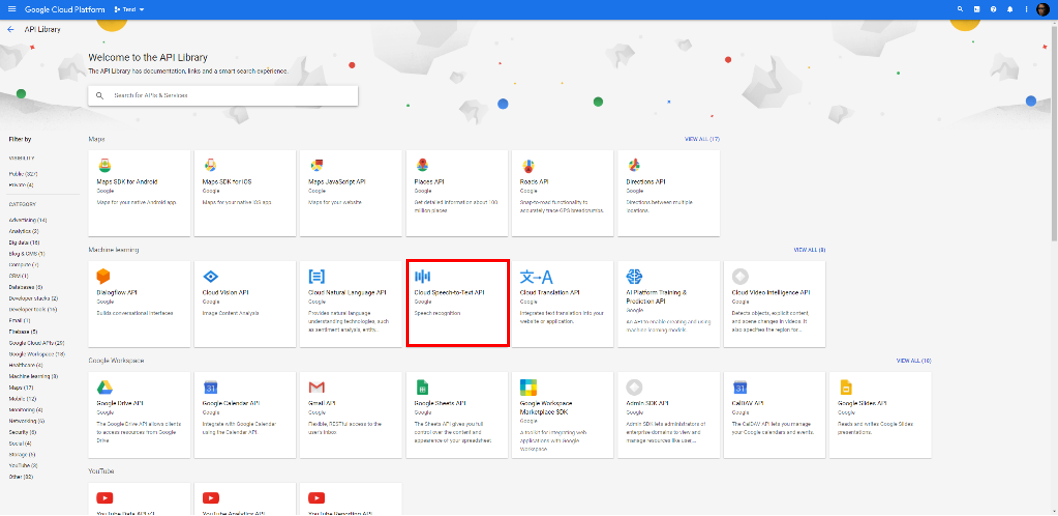
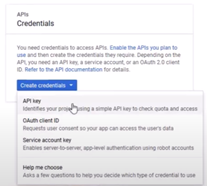
- In your web browser, go to console.cloud.google.com, sign into your Google account and navigate to Navigation Menu > APIs & Services > API Library, select the Cloud Speech-to-Text API option and press Enable.
- Next, head to the Navigation Menu > APIs & Services > Credentials. This is where you are going to generate an API key to use within the Unity editor. Press “Create credentials” and select the “API key” option. You will be given a long string that you will need to copy.
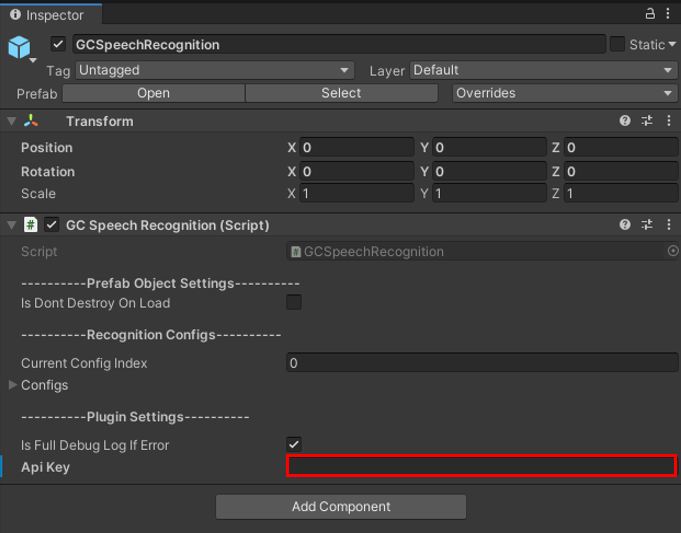
- Back to the Unity editor, in the Hierarchy tab, navigate to SampleScene > GCSpeechRecognition. In the Inspector tab, insert your copied API key into the field.
- You should then be able to plug and play with your VR headset (refer to the User Manual for instructions on how to use the application itself.
Flocking Behaviour
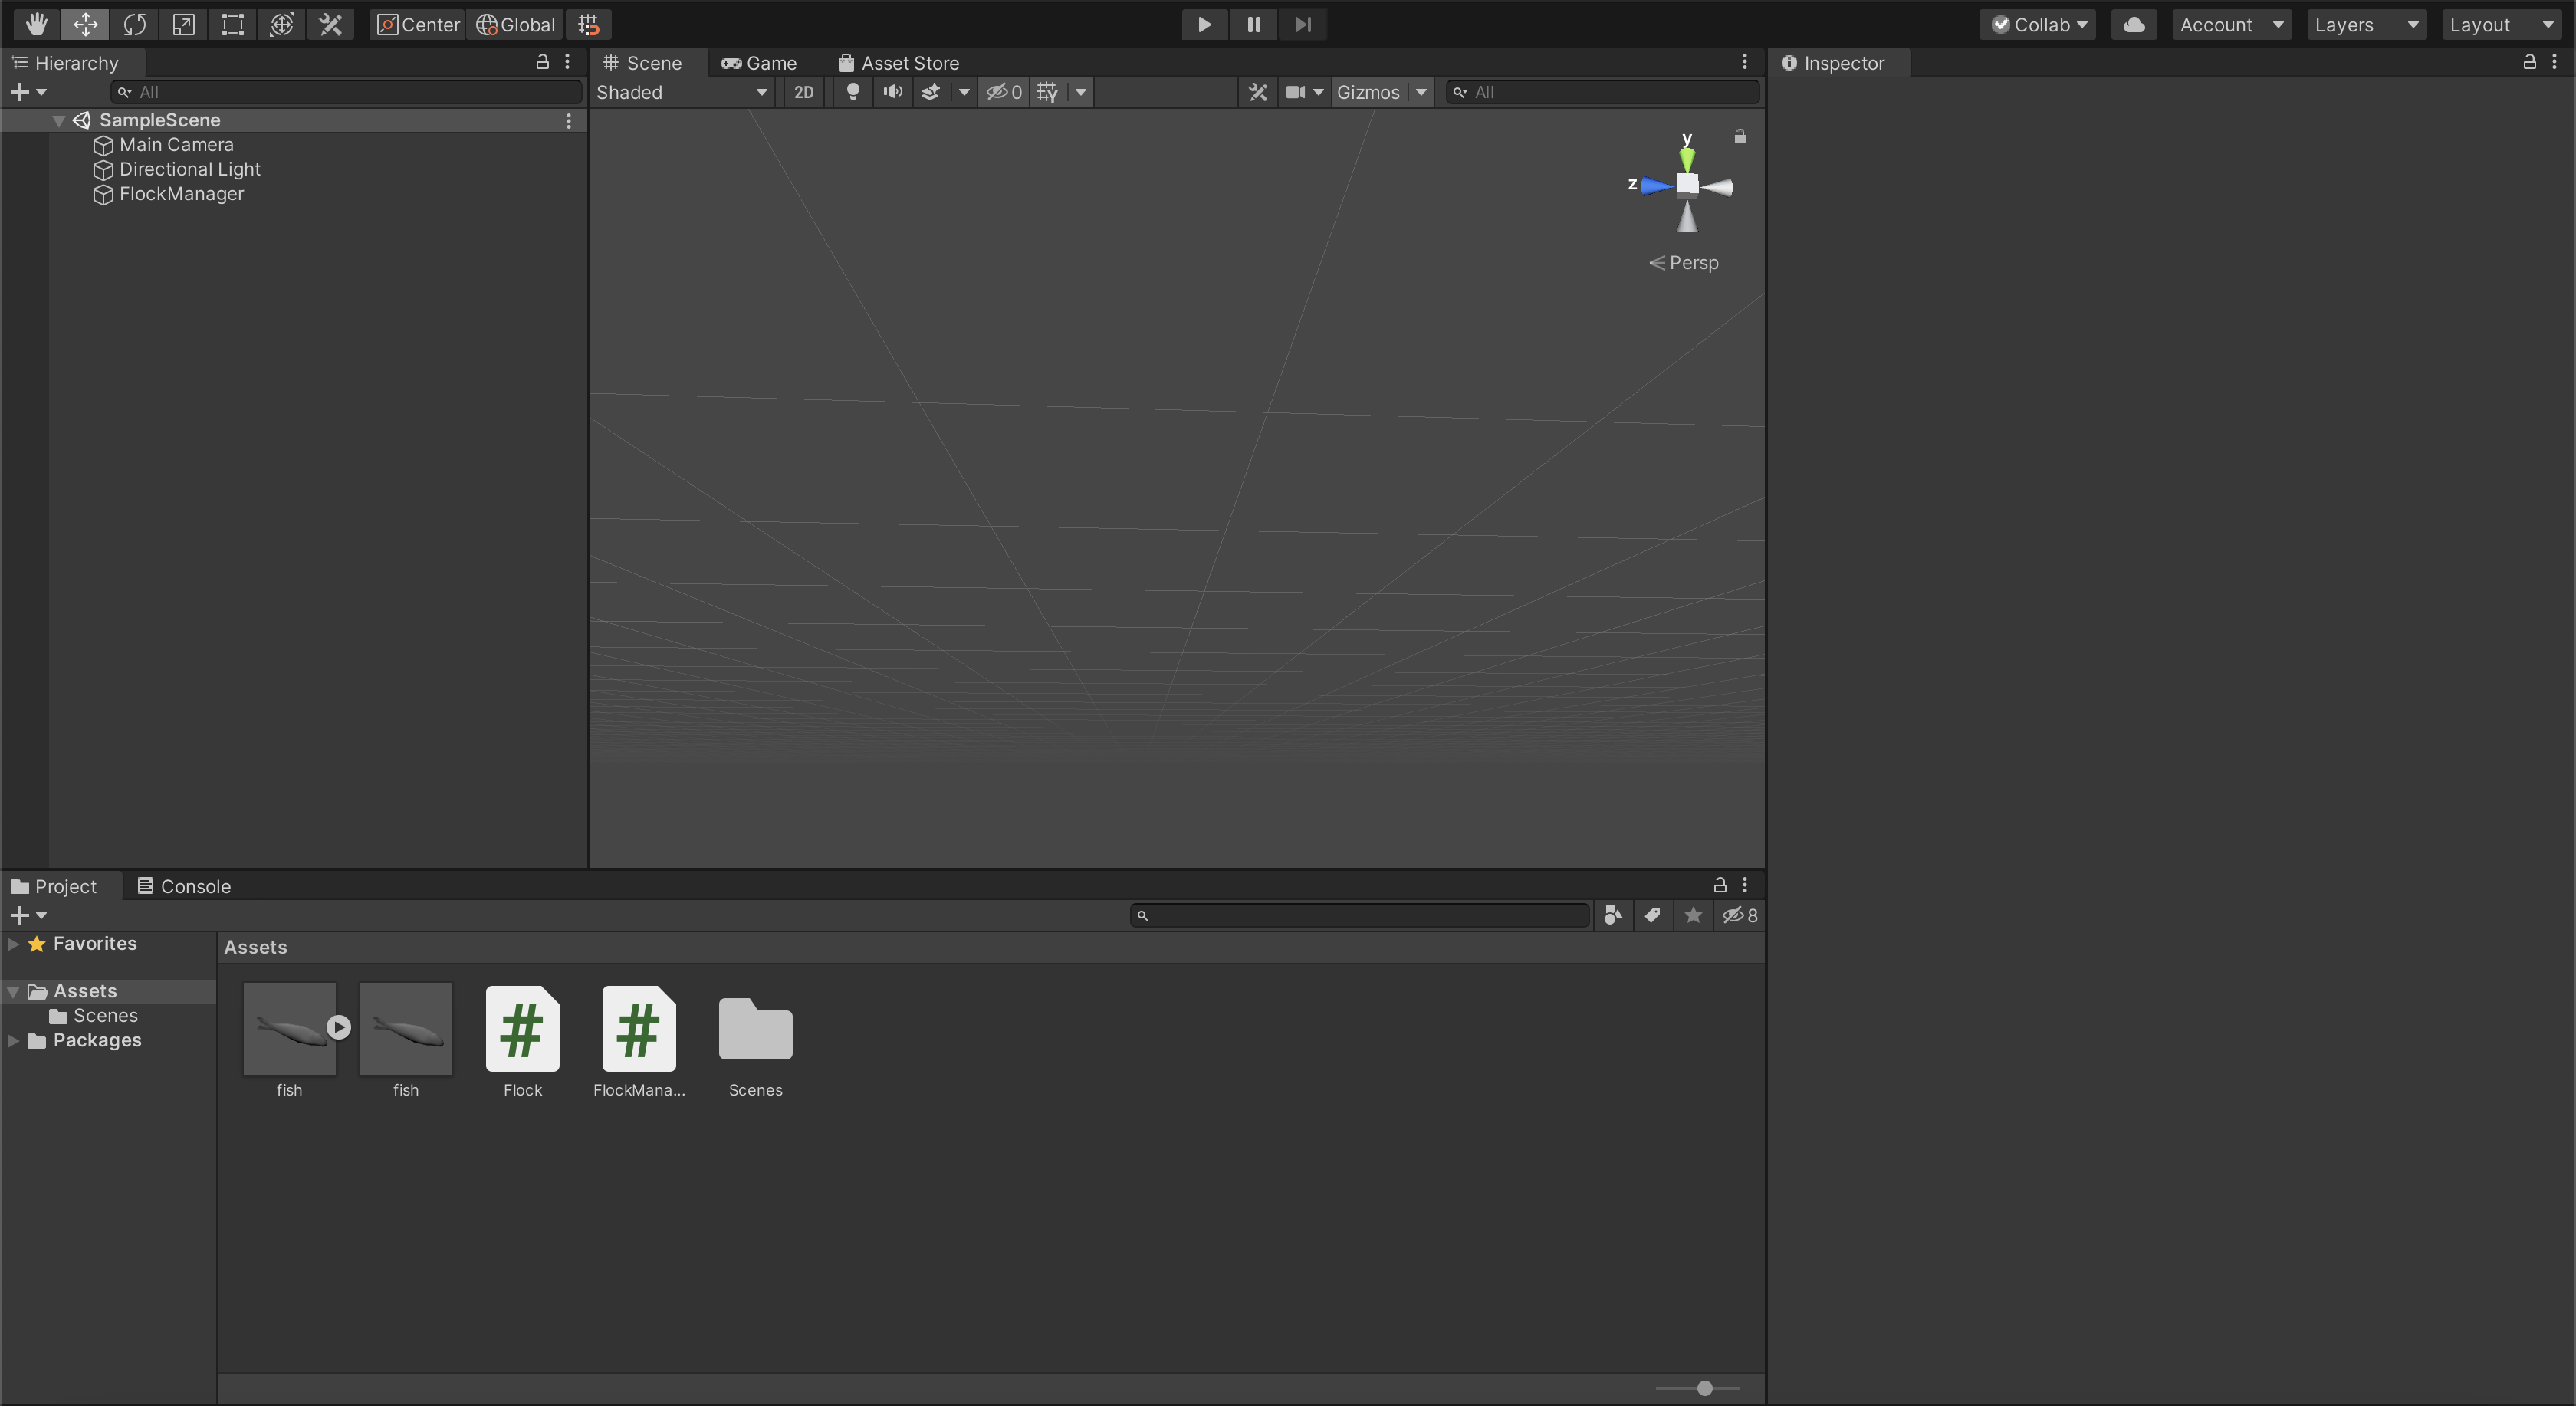
Upon opening the project in unity you will be faced with this screen.
I currently have the fish model on the left below as the set prefab for the flocking. However, if you want to use a different model you drag and drop it into the assets folder within your project and then proceed to drag the ‘Flock.cs’ script onto the model to attach it to that model.
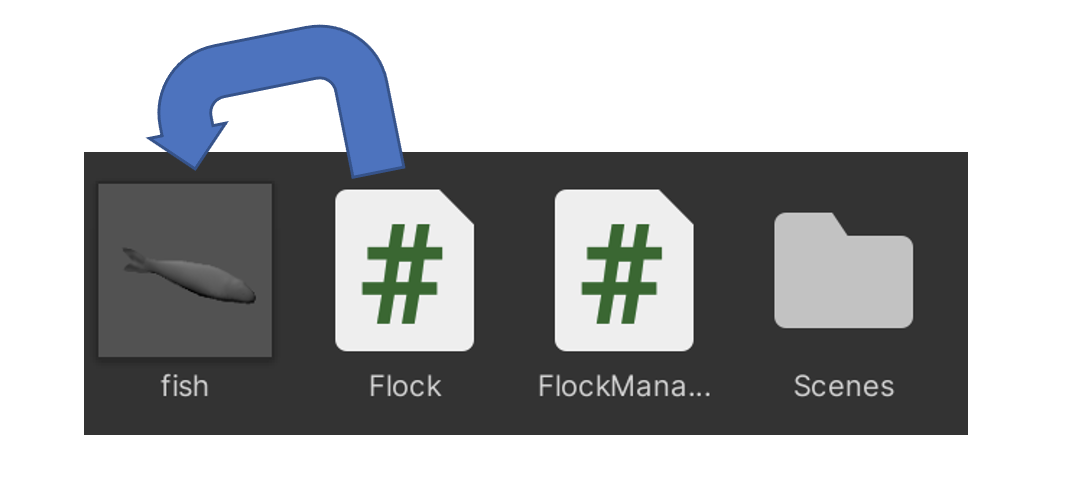
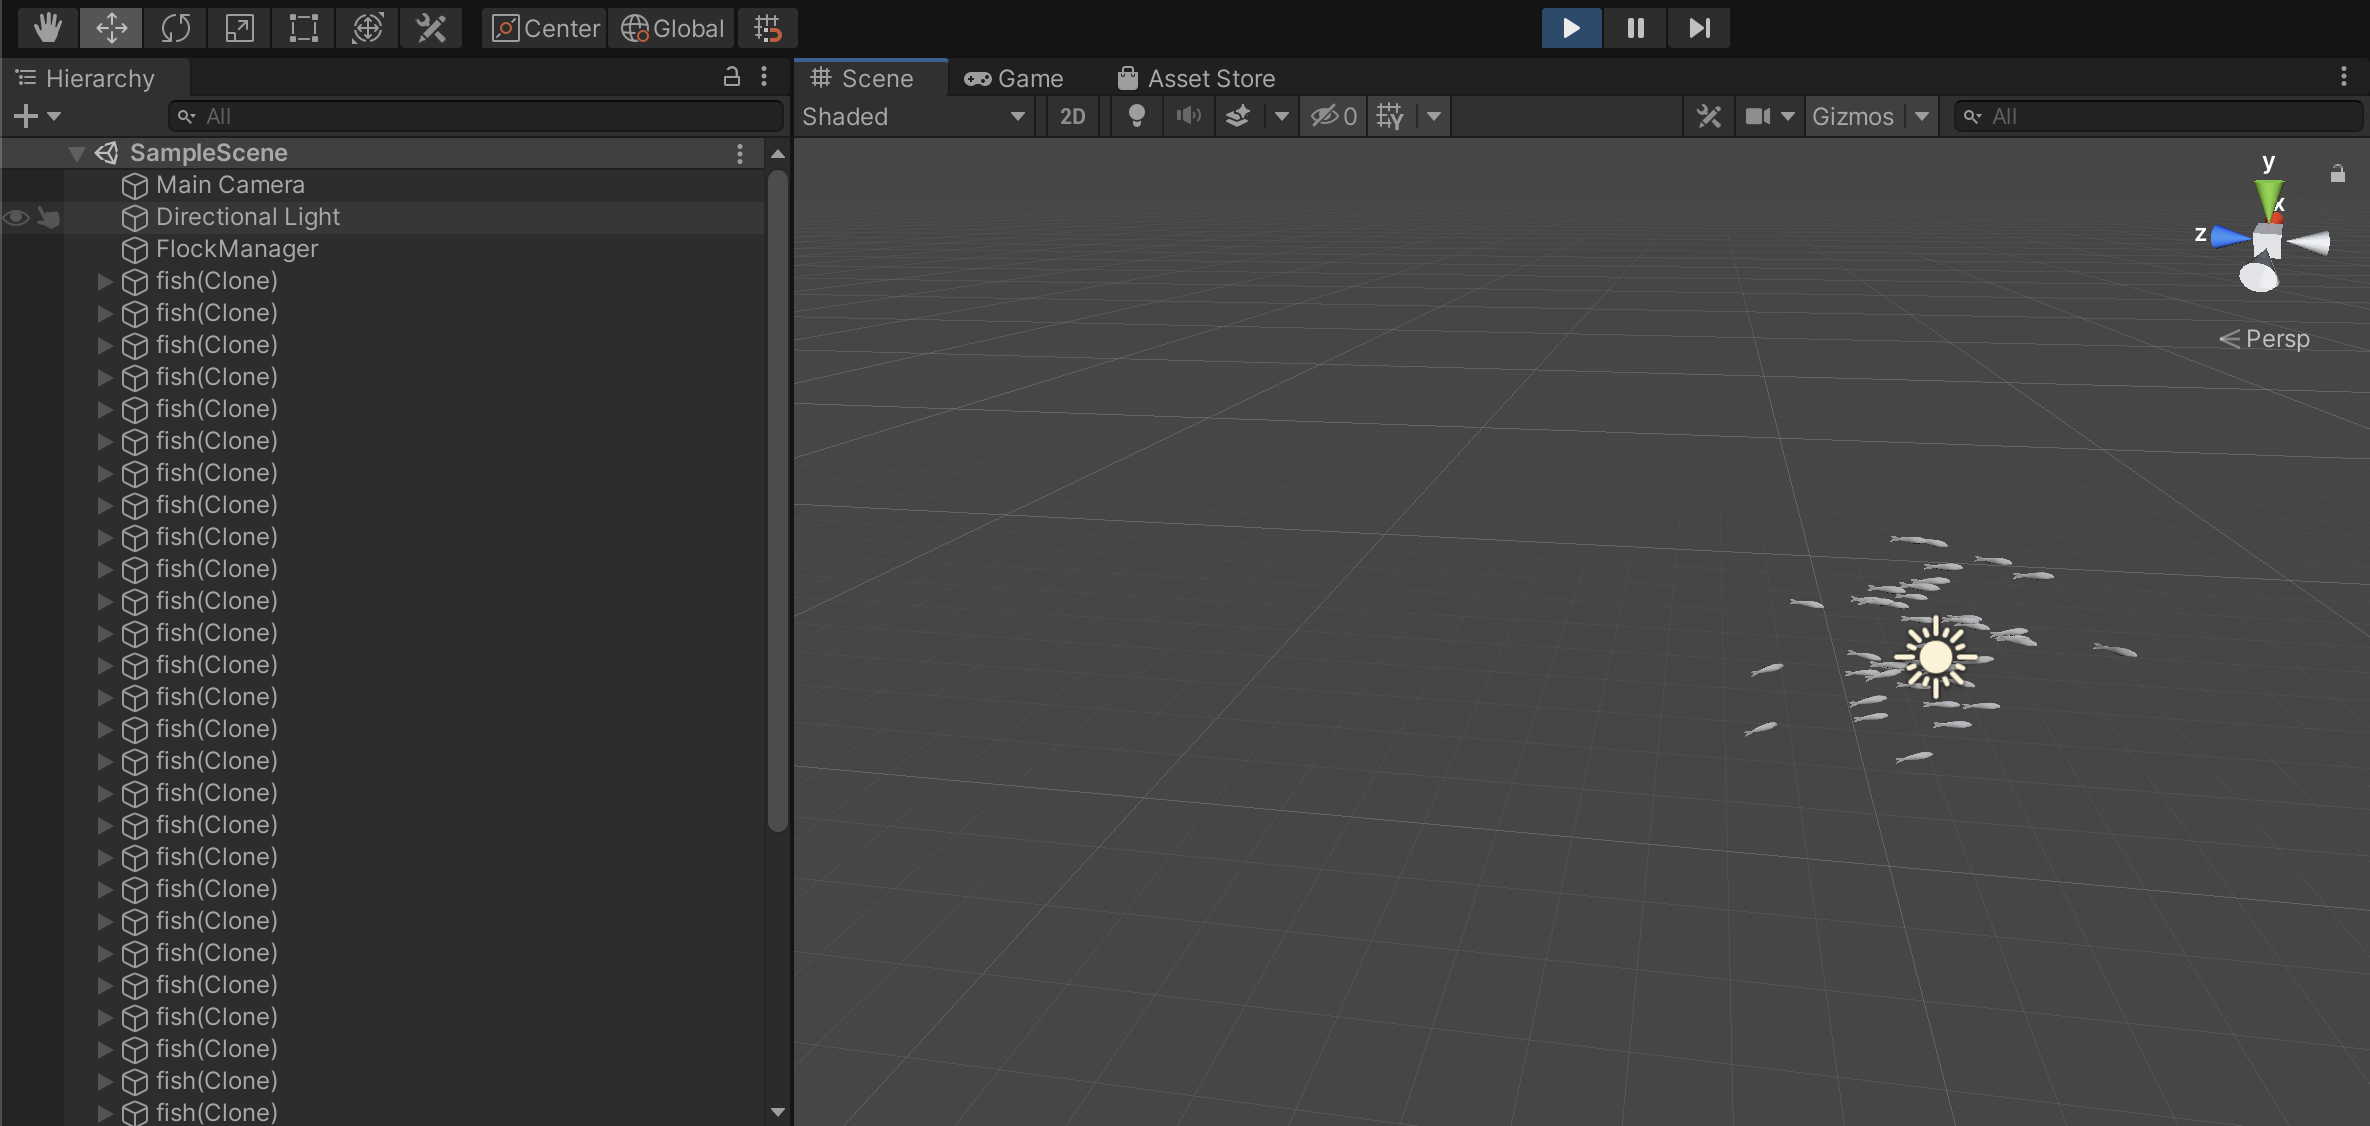
You then select ‘FlockManager’ in the hierarchy (highlighted in red below), and drag and drop whatever model you want to use into the fish prefab. You can also adjust how many animals (in this case fish) are created under where you dragged your model.
Once that is done you get now get to editing how you want your flock to act by adjusting the sliders under ‘Animal Settings’ within the Flock Manager.
- The Min and Max speed sliders refer to the minimum or maximum speed a fish can have once is it created.
- The Neighbour Distance slider is used to determine how far a fish looks to register a neighbour within a flock.
- Rotation speed is used to adjust how quickly each fish can turn.
After playing around with the sliders I found that the certain values you can see below work the best to emulate real world flocking behaviour.

Once you have settled your preferred slider values you can go ahead and click play (at the top) and see your animals flock!
Water Ripple Shader
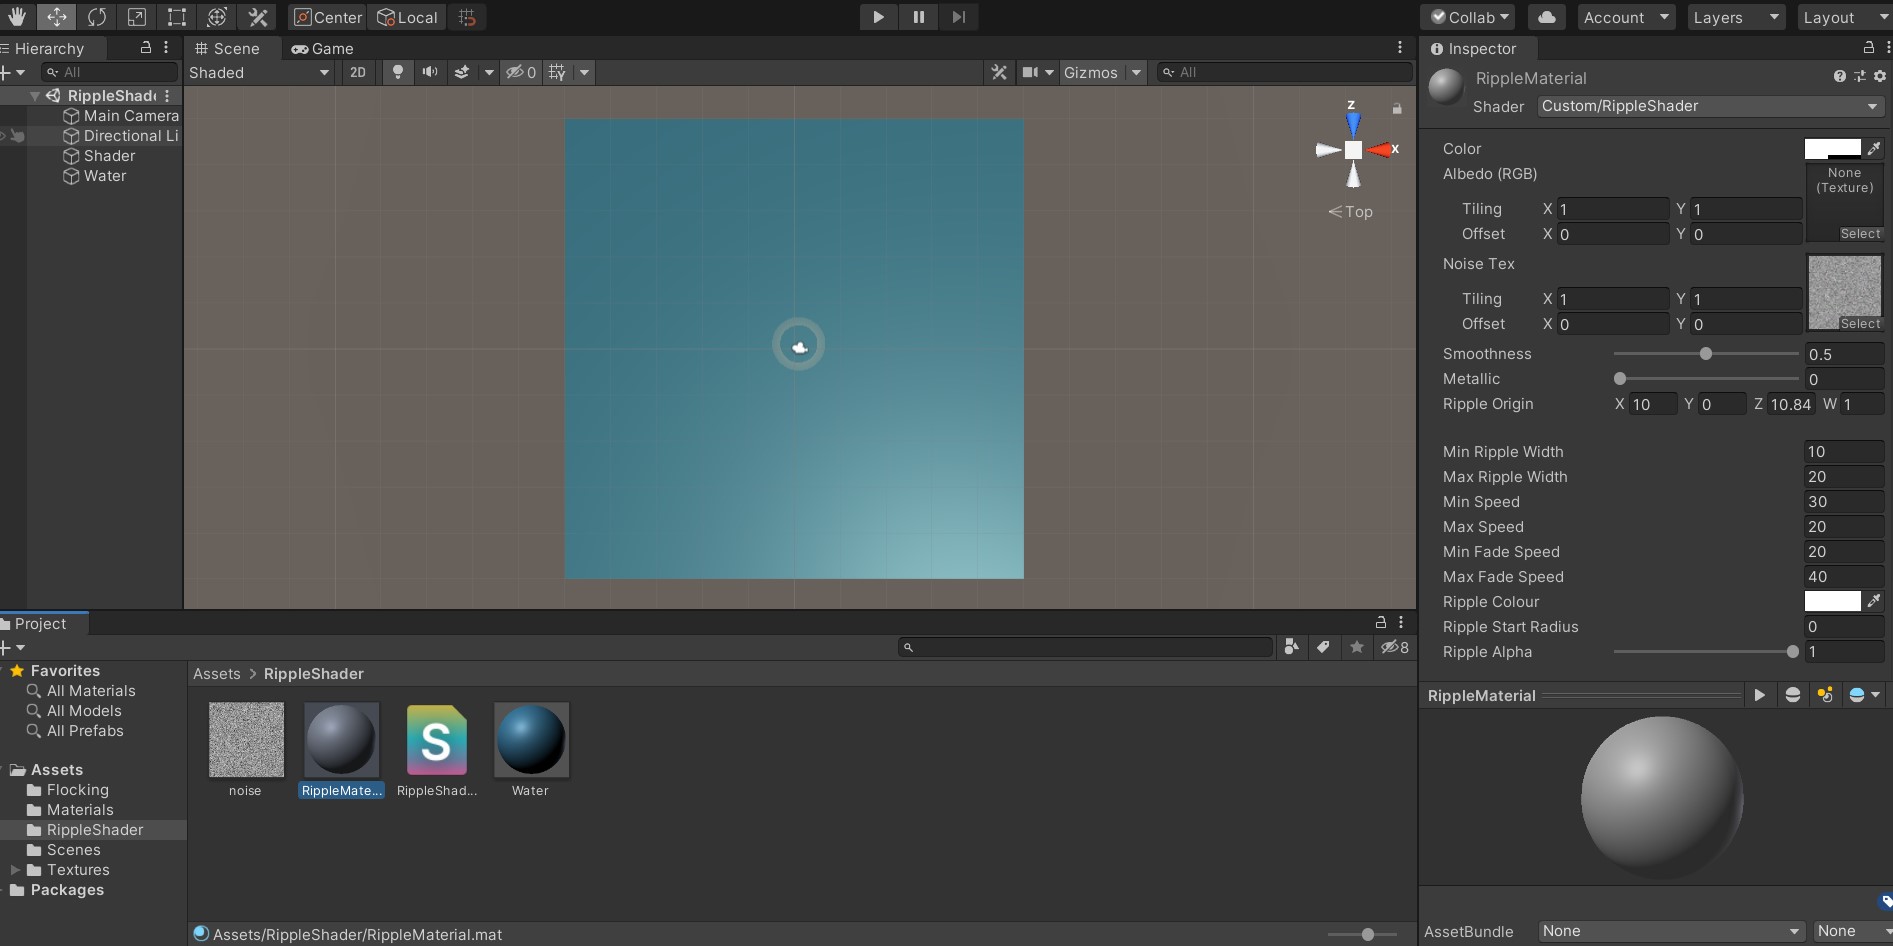
After opening the Unity project, open the RippleShader scene. Inside the project will be the code for the shader and the material that the shader is applied to, called RippleMaterial. This material can be added to any object in the Unity scene, and the shader will then be applied on it.
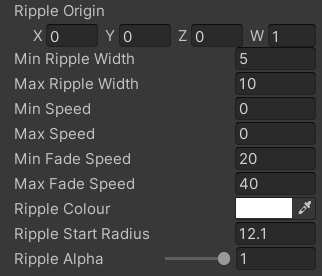
Using the inspector and selecting the RippleMaterial, the properties of the ripple can be viewed. These properties can then be edited to change the ripple's width, speed, fade speed, colour, starting radius or alpha(transparency). The world position of the ripple's origin point can also be changed.
Some properties allow a min and max value. Property will be given a random value between the min and max values, which is generated using a process involving the noise texture, which is a texture with random pixel rgb values.
Legal Statement
Legal Issues
The software is an early proof of concept for development purposes and should not be used as-is in a live environment without further redevelopment and/or testing. No warranty is given and no real data or personally identifiable data should be stored. Usage and its liabilities are your own. This software is licensed under the AGPLv3 license. We have worked hard to ensure our project is not violating any licensing, copyright or GDPR law. Throughout this project, no data was collected under GDPR, but have used various libraries and technologies that have already been made publicly available and do not constitute a need for any confidentiality.
Legal Processes
The speech-to-text functionality of our project involves the use of the Google Cloud Speech-to-Text API, which is a paid service that charges 0.017GBP per minute of processed audio after the first 60 minutes used in a given 30-day period. The current API key being used is on a 90-day trial period with a £250 excess due to expire on 14/04/2021.
- Google Cloud Speech-to-Text API
- Newtonsoft
- Frostweep Games Google Cloud Speech Recognition [VR\AR\Mobile\Desktop] Pro
- System developed by Rowan Kiam, Mohamad Jamil, Konstantine Siokos
- Clients and organisations: Tend Vr
- Supervisors and Teaching Assistants: Dr Dean Mohamedally, Dr Yun Fu, Steven Hirschmann
- university college london