Implementation
As part of our project, as described in the research section, we have used React as our primary frontend framework and Django as our backend framework. TailwindCSS has been incorporated to enhance the visual appeal and responsiveness of the web application.
Packages and Frameworks
Frontend Technologies
React
React is a powerful JavaScript library developed by Facebook for building user interfaces, particularly for single-page applications. It allows us to create reusable UI components that update efficiently in response to data changes. We use React for managing the user interface of our web application, ensuring a smooth and interactive experience for users.
Vite
For optimising the development experience, we utilised Vite, a modern build tool that significantly improves development speed. Vite provides fast hot module replacement (HMR), allowing us to see changes in real-time without having to reload the entire application. By leveraging Vite, we benefit from faster builds and a more streamlined development process, enabling our frontend team to work more efficiently and improve overall productivity.
Tailwind CSS
We used Tailwind CSS, a utility-first CSS framework that allows us to design custom user interfaces quickly without writing much custom CSS. Tailwind CSS provides a wide range of pre-defined classes, making it easy to create highly responsive, flexible layouts while maintaining full control over the design and styling of the application. By using Tailwind CSS, we were able to achieve a unique and modern design with less effort and greater flexibility.
Backend Technologies
Django
For the backend, we utilised Django, a high-level Python web framework that encourages rapid development and clean, pragmatic design. Django helps us manage the application’s database, authentication, and API structure effectively. It provides us with built-in tools for handling requests, routing URLs, and interfacing with a database using Django ORM. With Django, we are able to create a secure and scalable backend to support our web application.
Dependencies & Tools
Throughout the development process, we also integrated several essential dependencies and tools to assist us in building, testing, and deploying our project effectively.
Axios
Axios is a promise-based HTTP client for JavaScript. We use Axios to make asynchronous requests to the Django API and handle the responses efficiently. By using Axios, we ensure that our React frontend can interact seamlessly with the backend to retrieve and send data.
Django REST Framework
To build a robust API, we utilised Django REST Framework (DRF). DRF is a powerful and flexible toolkit for building Web APIs, allowing us to easily serialise and parse data between the frontend and backend. With DRF, we were able to develop a RESTful API that integrates effortlessly with our React frontend, ensuring a smooth communication process.
ESLint
For maintaining code quality and consistency in the frontend, we incorporated ESLint. ESLint is a tool that helps identify and fix potential issues in our JavaScript code by enforcing coding standards and detecting patterns that may lead to bugs. It ensures that our code is clean, maintainable, and follows best practices.
Pylint
On the backend side, we used Pylint, a static code analysis tool for Python. Pylint checks our Python code for errors, enforces coding standards, and helps improve the readability and quality of the codebase. By using Pylint, we ensure that our Django backend is optimised for readability and follows Python’s best practices.
Local artificial intelligence (AI)
Our project features a large language model running in the browser, on the user's device.
It is used to:
- Provide responses to search queries
- Generate reports from prompts
- Summarise reports
- Generate content for the business
This page focuses on the implementation of the in-browser AI engine.
Research
One of the tenets of our project from the outline was
...to utilize Gen AI to create new kinds of customer engagement as opposed to traditional designs. This includes the ability guide customers on the various processes, finding information, FAQs etc. through intelligent virtual agents.
The initial project brief
However, another requirement we were given was to
...to build the portal with the least environmental impact as possible using Green software principles.
The initial project brief
Further, a focus of this module (Systems Engineering) as a whole is to be conscious with user data, not taking more than is necessary when it comes to privacy.
As a result, a large language model (LLM) was deemed necessary to generate content, summarise content, and (as it was decided on later) make intelligent decisions.
It was also decided to run this LLM locally if possible.
This would be to minimise user inputs being sent to third parties, along with minimising costs for the business deploying our application as they would not have to pay for an API to a cloud artificial intelligence AI Service.
This approach also has the opportunity to be more sustainable by running the AI Models locally and not using cloud services, however it is hard to quantify both approaches to compare.
However, it is trivial to modify AIContext.jsx to provide getReply as a method that returns a model response from a cloud service, if one decided to be inclined to do so.
The in-browser AI implementation is described below.
LLM Engine
The library we are using to provide an in-browser LLM is called WebLLM. They provide thorough documentation to enable others to adapt their system [3].
They provide a working implementation of their system to provide in-browser inference. [4]
Here is an example of Llama 3.2 1B Instruct model running in-browser on WebLLM Chat.
This was quite encouraging and by January we had a working prototype for the in-browser AI.
Unfortunately, the implementation suffered from a few key problems.
Hallucination
When semantic search was implemented, search results would show up, but the model would act as if it had not seen them being passed into its prompt, and hallucinate search responses.
Crashes
Many team members reported their computers crashing after using the site for moderate amounts of times. This puzzled me (Ibrahim) because WebLLM Chat did not have this effect.
Reloads between pages
The LLM Engine did not persist between page changes on the site. This meant it would have to be reloaded every time the user switched to a different page such as the events page or reporting page.
How to know when the model is available
WebLLM provides documentation to console log the progress of the model loading, but this is not feasible in an end-user application.
Mobile platforms
The site would slow down on mobile platforms due to their lack of power as they were trying to load the LLMs.
Improved LLM Engine
In March, Ibrahim performed refactoring of the AI-related code to improve performance.
Web Worker
Following from the WebLLM documentation, we were able to offload model loading to a web worker [5] [3] to improve performance.
AIContext
The WebLLM documentation recommends Shared Workers to persist the LLM between page loads [3]. This was not working with our project at the time so we decided on a custom solution.
/* eslint-disable react-refresh/only-export-components */
import React, { createContext, useState, useEffect } from "react";
import { CreateWebWorkerMLCEngine } from "@mlc-ai/web-llm";

// Create a context
export const AIContext = createContext();

// Create a provider component
export const AIProvider = ({ children }) => {
  const [engine, setEngine] = useState(null);
  const modelToUse = "Qwen2.5-1.5B-Instruct-q4f16_1-MLC";
  const [progressModelLoaded, setProgressModelLoaded] = useState(null);
  const [modelDisabled, setModelDisabled] = useState(false);
...
  return (
    <AIContext.Provider
      value={{ getReply, engine, progressModelLoaded, modelDisabled }}
    >
      {children}
    </AIContext.Provider>
  );
};
AIContext.jsx instantiates one LLM Engine when the site is open. It exposes the engine variable and getReply methods to other components. We decided on the Qwen2.5-1.5B-Instruct model, as it had the best results for its size in terms of generating content and making decisions.
The getReply method can be seen as an interface that any component can get a reply from the LLM engine, for any purpose. It resets any existing chat and responds given a userQuery and systemPrompt.
Here is SearchBar.jsx utilising the AIContext
...
const SearchBar = () => {
...
   const { getReply, engine, progressModelLoaded, modelDisabled } = useContext(AIContext);
...
    await getReply(userQuery, systemPrompt, setModelReply, setIsStreaming);
This approach has many benefits.
- The LLM Model is instantiated once and only once. This was the root cause of crashes on the January build. When navigating to and from a component that instantiated an LLM engine, it would cause the engine to attempt to load twice, then three times and as many times as it was navigated to/from. This would cause memory to fill up and the application (and machine) to crash.
- The LLM model is persistent across page loads. Because the engine is not tied to any component, it does not get re-loaded or unloaded, leading to the model being ready much earlier and makes it feasible to use across different pages such as Reporting and Manage.
- Code reusability. Because we have abstracted AI logic into one component, other components can very simply call AI APIs (as seen above with
SearchBar.jsx).
Progress notifier + Mobile Platform
AIContext.jsx also exposes the progressModelLoaded state, which SearchBar.jsx uses to display a progress notifier on the Ask AI section.
It also recognises when the machine loading the site is a mobile, and disables the engine from instantiating due to performance limitations.
...
useEffect(() => {
    if (isMobileDevice()) {
      setModelDisabled(true);
      return; // Exit early if on mobile
    }
...
Home Page
Ask AI
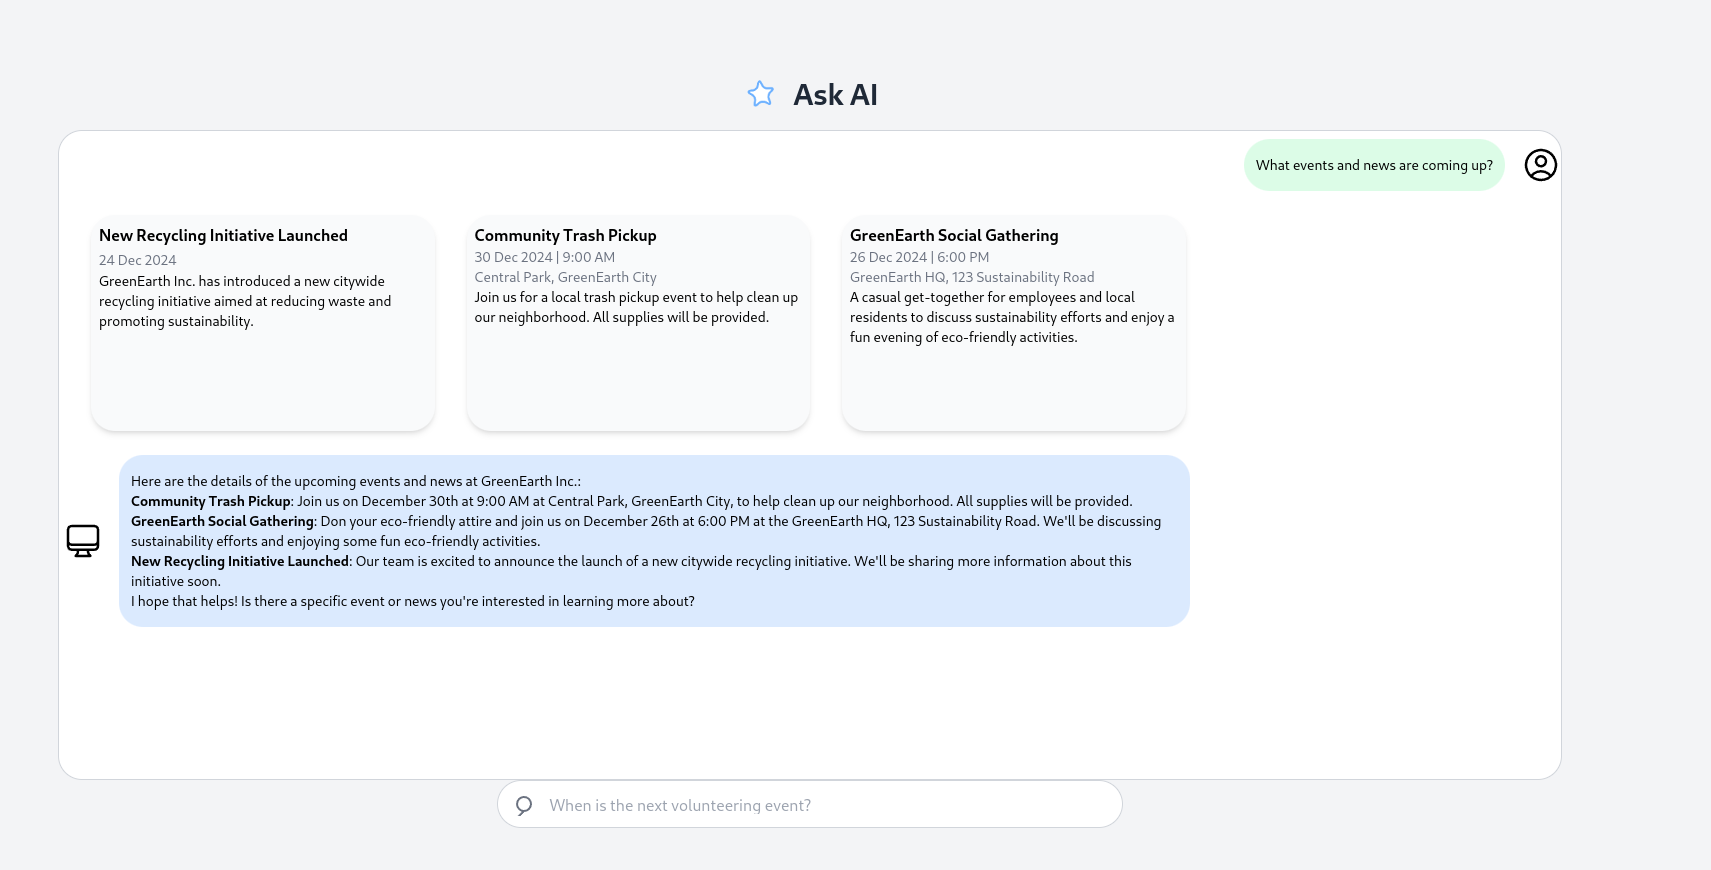
The Ask AI section is where the user can perform a search, or generate a report.
When the user submits a query into the input box, the large language model (LLM), if it is loaded, will make a decision to search the site or generate a report. See the Agentic Decisions section for more information on this.
Search
If a search was executed, the:
- Backend performs a semantic search and turns the search result.
- The LLM generates a response based on the search result.
- The frontend displays the response.
Backend
If a search result is chosen to be executed, the user query is sent to the backend search/ endpoint.
The backend performs a semantic search on the content of the site to then reply with the 3 most relevant search items.
Expand Code
...
def perform_semantic_search(query, datasets):
    """
    Perform semantic search across multiple datasets.
    """
    query_embedding = model.encode([query])
    results = []
...

def search(request):
    """
    Main search function.
    """
    query = request.GET.get("query", "")
    ...
    return JsonResponse({"query": query, "results": results})
See the Semantic Search section for more information on how the Python backend performs this search.
LLM
Given the relevant search items from a user query, the LLM, if it is loaded, will be prompted to respond with a friendly message about the news, events or reports that were returned.
Expand Code
...
const systemPrompt = `You are an AI assistant chatbot for ${name}, a company.

              Your role is to provide visitors with quick, accurate, and helpful responses related to the company's events, news, articles, and initiatives.
              Be polite, professional, and ensure responses are concise and user-friendly.

              ---

              Today's date: ${new Date().toISOString().split("T")[0]}

              ---
              **Data (JSON Format)**
              ${JSON.stringify(extractEventDetails(searchResult), null, 2)}

              Based on this data, answer the user's question appropriately.
              `;

    await getReply(userQuery, systemPrompt, setModelReply, setIsStreaming);
...
Frontend
When a search is performed, there are 3 frontend pieces:
- The user input field + user input messages
- The card results
- The LLM response
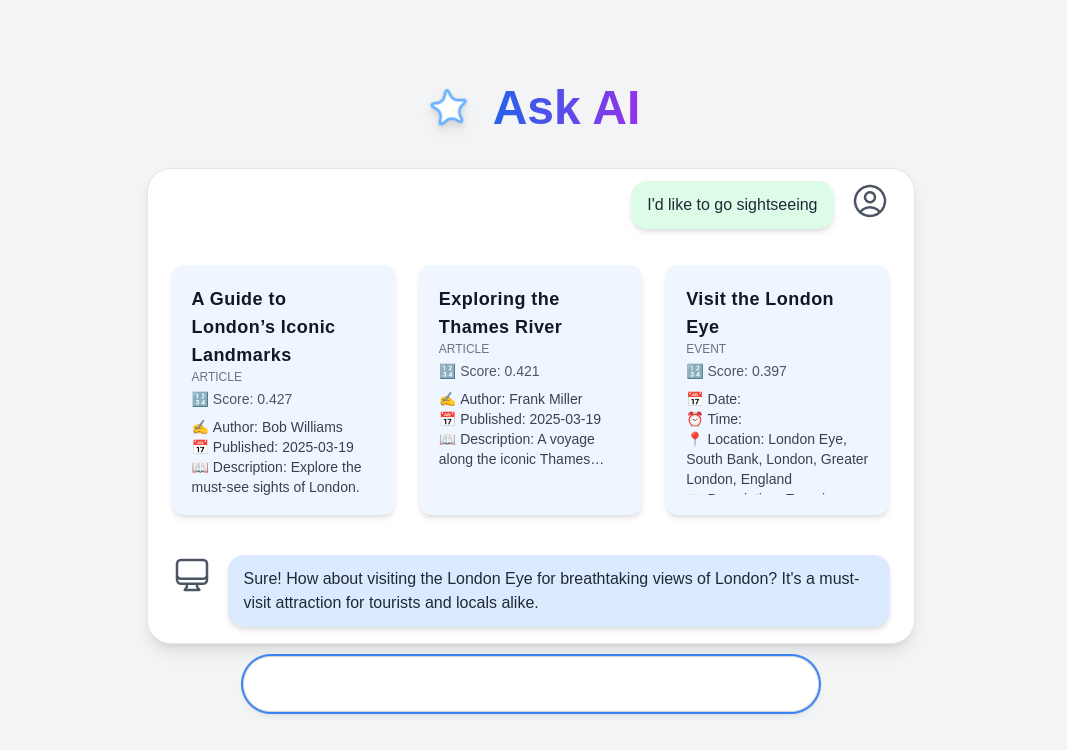
Effort has been focused to improving the UI design, speed, and accuracy of these pieces. It is fully responsive, and user feedback has improved the alignment of items and smoothness.
Before

After

Expand Code
...
 {/* Input Box */}
      <div
        className={`mt-3 flex h-14 w-full max-w-xl items-center bg-white border border-gray-300 rounded-full px-4 shadow-md transition-all ${isFocused ? "ring-2 ring-blue-500" : ""
          }`}
      >
        <form
          onSubmit={handleSubmit}
          className="w-full h-full flex items-center"
        >
          <input
            type="text"
            placeholder={
              isFocused ? "" : "When is the next volunteering event?"
            }
            className="w-full h-full outline-none bg-transparent text-gray-900 px-3"
            value={userQuery}
            onChange={(e) => setUserQuery(e.target.value)}
            onFocus={() => setIsFocused(true)}
            onBlur={() => setIsFocused(false)}
            aria-label="Search for volunteering events"
          />
        </form>
...
 {/* Card results */}
 {Array.isArray(searchResult)
              ? searchResult.map((item, index) => (
                <div
                  key={index}
                  className="w-full h-[250px] p-5 bg-blue-50 rounded-xl shadow-md hover:shadow-xl transform hover:scale-105 transition-all flex flex-col justify-between overflow-hidden"
                  onClick={() => handleRedirect(item)}
                >
                  {/* Title */}
                  <p className="font-bold text-lg text-gray-900 tracking-wide break-words">
                    {item.title}
                  </p>
                  {/* Source */}
                  <span className="text-xs font-medium text-gray-500 uppercase">
                    {item.source}
                  </span>
                  {/* Score */}
                  <p className="text-sm text-gray-600 mt-1">
                    🔢 Score:{" "}
                    <span className="font-medium">
                      {item.similarity_score.toFixed(3)}
                    </span>
                  </p>
...
            {/*Model Reponse*/}
            <div className="max-w-full px-4 py-3 bg-blue-100 rounded-2xl shadow-md">
              <ReactMarkdown className="text-gray-800">
                {modelReply}
              </ReactMarkdown>
            </div>
Generate Report
If a report was executed:
- The LLM generates a report.
- The frontend displays the report as a clickable card.
LLM
As stated previously, see the Agentic Decisions section for how the report is decided to be written.
To write the report, the LLM is prompted similar to the search component, but with more specific requirements.
Expand Code
 const systemPrompt = `You are a local resident near ${name}, a company.

              Create a report from the following userQuery.
              Output in JSON according to this structure:

              "title": "",

              "description": "",

              `;
The backend and frontend depend on a report having at least these fields filled in. The LLM will respond in this JSON format. Once finished, it will be displayed on the frontend.
Frontend
The frontend will display the generated report as a clickable card. When the user clicks on the card, it will redirect them to a detailed view of the report. The card will display the title, description and be placed on the map, ready to submit.
Expand Code
...
const handleRedirect = (item) => {
    if (item.source === "report") {
      navigate("/reporting", { state: { selectedIssue: item } });
    } else if (item.source === "event") {
      navigate(`/events/${item.id}`);
    } else if (item.source === "article") {
      navigate(`/articles/${item.id}`);
    } else if (item === "generatedReport") {
      const generatedReportWithLocation = createGeneratedReportWithLocation(generatedReport);
      navigate(`/reporting`, { state: { newIssue: generatedReportWithLocation } });
    }
    else {
      console.log("Did not match any source");
    }
  };
...
            {/* AI-Generated Report box */}
            {generatedReport ? (
              <div
                className="w-full h-[250px] p-5 bg-blue-50 rounded-xl shadow-md hover:shadow-xl transform hover:scale-105 transition-all flex flex-col justify-between overflow-hidden"
                onClick={() => handleRedirect("generatedReport")}
              >
                <h3 className="text-xl font-semibold text-gray-800">{generatedReport.title}</h3>
                <div className="flex flex-wrap gap-2">
                  {generatedReport.tags}</div>
                <p className="text-gray-600">{generatedReport.description}</p>
              </div>
            ) : null}
Semantic Search
See the Algorithms section for how we developed the search algorithm. Here we will discuss the algorithm's specific implementation to the database, the frontend, and the backend.
- The SentenceTransformer library loads a pre-trained model (paraphrase-MiniLM-L6-v2) that generates semantic embeddings for the text in the databases (replaces text with a numerical representation).
- The user's query is also transformed into an embedding vector.
- Cosine similarity is calculated between the query embedding and each document embedding. Cosine similarity measures the angle between two vectors, the closer the vectors, the higher the similarity score (-1 to 1).
- The 3 documents with the highest score are outputted.
Data Preprocessing
GET requests are made to the backend to retrieve the data from each database. The data is then preprocessed to concatenate the relevant text-based fields for semantic search. Concatenating the fields allows the model to generate embeddings for the entire document.
def preprocess_data(articles, events, reports):
    """
    Preprocess the data for semantic search by concatenating relevant fields.
    """
    datasets = []

    if articles:
        datasets.append({
            "source": "article",
            "documents": [
                (
                    f"{a['title']} {a['description']} {a['content']}"
                    f"{a['author']} {a['published_date']}"
                )
                for a in articles
            ],
            "entries": articles
        })

    if events:
        datasets.append({
            "source": "event",
            "documents": [
                f"{e.get('title', '')} {e.get('event_type', '')} {e.get('description', '')} "
                f"{e.get('location', '')} {e.get('date', '')} {e.get('time', '')} "
                f"{e.get('opening_times', '')} {e.get('poi_type', '')}"
                for e in events
            ],
            "entries": events })
    if reports:
        datasets.append({
            "source": "report",
            "documents": [
                (
                    f"{a.get('title', '')} {a.get('description', '')} {a.get('content', '')} "
                    f"{a.get('author', '')} {a.get('tags', '')} {a.get('published_date', '')}"
                ).strip()
                for r in reports
            ],
            "entries": reports
        })
    return datasets
Performing Semantic Search
The semantic search is performed by calculating the cosine similarity between the query embedding and the embeddings of the documents in the databases. The top 3 documents with the highest similarity scores are returned.
def perform_semantic_search(query, datasets):
    """
    Perform semantic search across multiple datasets.
    """
    query_embedding = model.encode([query])
    results = []

    for dataset in datasets:
        if not dataset["documents"]:
            continue

        embeddings = model.encode(dataset["documents"])

        if not embeddings.any():
            continue
        similarities = cosine_similarity(query_embedding, embeddings).flatten()

        top_3_indices = similarities.argsort()[-3:][::-1]
        for idx in top_3_indices:
            try:
                result_entry = dataset["entries"][idx]
                result_entry["similarity_score"] = float(similarities[idx])
                result_entry["source"] = dataset["source"]
                results.append(result_entry)
            except IndexError:
                pass


    results = sorted(results, key=lambda x: x["similarity_score"],reverse=True)[:3]
    return results
Search Function
The search function is the main function that handles the search request. It fetches the data from the databases, preprocesses the data, and performs the semantic search. The results are then returned as a JSON response to the frontend.
def search(request):
    """
    Main search function.
    """
    query = request.GET.get("query", "")
    if not query:
        return JsonResponse({"error": "Please provide a query."}, status=400)

    try:
        articles = get_articles()
        events = get_events()
        reports = get_reports()
    except Exception as e:
        return JsonResponse(
            {"error": "Failed to fetch data.", "details": str(e)},
            status=500
        )

    if not articles and not events:
        return JsonResponse({"error": "No data available for search."}, status=404)

    datasets = preprocess_data(articles, events,reports)
    results = perform_semantic_search(query, datasets)

    return JsonResponse({"query": query, "results": results})
Problem Encountered
I began by implementing the semantic search algorithm within each database, then gather the scores and merge it all together. However, this approach was inefficient and slow. I then decided it would be better to create a single endpoint that would handle the search across all databases. This approach was more efficient and faster.
Initially:
backend/articles/views.pyincluded asearch_articlesfunction that performed the semantic search on the articles database.backend/events/views.pyincluded asearch_eventsfunction that performed the semantic search on the events database.backend/search/search.pymerged the results from the two functions, and returned the top 3 results.
Final implementation:
backend/search/views.pyfetches the data from all databases, preprocesses the data, and performs the semantic search.- The
searchfunction returns the top 3 results directly.
Frontend Implementation
The frontend sends a GET request to the backend with the user's query. The backend performs the semantic search and returns the top 3 results. The frontend then displays the results to the user.
The SearchBar.jsx component handles the user's query and the search results. The getSearchResult function sends the user's query to the backend and sets the search results.
const getSearchResult = async (userQuery) => {
    try {
        const token = localStorage.getItem("token");
        const response = await axios.get(API_URL + `search/`, {
            params: { query: userQuery },
            headers: token ? { Authorization: `Bearer ${token}` } : {},
        });

        if (response.data && response.data.results) {
            setSearchResult(response.data.results);
            return response.data.results;
        } else {
            setSearchResult([]);
            return [];
        }
    } catch (error) {
        console.error("Error while fetching search results:", error);
        return [];
    }
};
The search results are displayed as cards, each card contains its title, source, similarity score, and additional information based on the source.
{Array.isArray(searchResult)
    ? searchResult.map((item, index) => (
        <div
            key={index}
            className="w-full h-[250px] p-5 bg-blue-50 rounded-xl shadow-md hover:shadow-xl transform hover:scale-105 transition-all flex flex-col justify-between overflow-hidden"
            onClick={() => handleRedirect(item)}
        >
            {/* Title */}
            <p className="font-bold text-lg text-gray-900 tracking-wide break-words">
                {item.title}
            </p>
            {/* Source */}
            <span className="text-xs font-medium text-gray-500 uppercase">
                {item.source}
            </span>
            {/* Score */}
            <p className="text-sm text-gray-600 mt-1">
                🔢 Score:{" "}
                <span className="font-medium">
                    {item.similarity_score.toFixed(3)}
                </span>
            </p>
            {/* Conditional Content based on source*/}
            <div className="overflow-hidden text-ellipsis flex-grow">
                {item.source === "event" && (
                    <>
                        <p className="text-sm text-gray-700 mt-2">
                            📅 <span className="font-medium">Date:</span> {item.date}
                        </p>
                        <p className="text-sm text-gray-700">
                            ⏰ <span className="font-medium">Time:</span> {item.time}
                        </p>
                        <p className="text-sm text-gray-700">
                            📍 <span className="font-medium">Location:</span> {item.location}
                        </p>
                        <p className="text-sm text-gray-700 line-clamp-2">
                            📖 <span className="font-medium">Description:</span> {item.description}
                        </p>
                    </>
                )}
                {item.source === "article" && (
                    <>
                        <p className="text-sm text-gray-700 mt-2">
                            ✍️ <span className="font-medium">Author:</span> {item.author}
                        </p>
                        <p className="text-sm text-gray-700">
                            📅 <span className="font-medium">Published:</span> {item.published_date}
                        </p>
                        <p className="text-sm text-gray-700 line-clamp-2">
                            📖 <span className="font-medium">Description:</span> {item.description}
                        </p>
                    </>
                )}
                {item.source === "report" && (
                    <>
                        <p className="text-sm text-gray-700 mt-2">
                            📅 <span className="font-medium">Date:</span> {item.published_date}
                        </p>
                        <p className="text-sm text-gray-700">
                            🏷️ <span className="font-medium">Tag:</span> {item.tags}
                        </p>
                        <p className="text-sm text-gray-700 line-clamp-2">
                            📖 <span className="font-medium">Description:</span> {item.description}
                        </p>
                    </>
                )}
            </div>
        </div>
    ))
    : null}
Example Query
The user types "I'd like to go sightseeing" into the search bar. The backend receives this query and performs the semantic search, returning the top 3 results. The frontend displays the results as cards. The titles of the results are: "A Guide to London's Iconic Landmarks", "Exploring the Thames River", and "Visit the London Eye". These results are all very relevant to the query, achieving scores of 0.427, 0.421, and 0.397 respectively.
For You Section
Overview
The For You section serves as a central hub on the homepage where users can engage with a variety of content types such as events, articles and forum posts. It is designed to be the first point of contact for users, offering a diverse stream of content that is both dynamic and interactive. Users can engage with content in this section directly by:
-
Viewing posts: Content from multiple sources are displayed as cards with images, titles, snippets of text, and additional meta-data like creation dates.
-
Interacting with posts: Users can like posts, view comments, or expand a post for more detailed content.
-
Filtering and sorting: Users can filter by content types (forum, article, event) and liked posts, and sort them by date (newest or oldest), or most liked and most commented posts.
-
Creating new posts: Users have a built-in interface to create forum posts directly from this section.
Frontend Implementation
The primary component, called ForYouCard, is implemented in React and manages the display and interactions of all posts. This component is responsible for handling the state of the posts, maintaining the visibility of various modals (such as those for creating posts, filtering content, and expanding posts), and applying local filter options and sort orders. The component utilises Axios to fetch data from several API endpoints, which include forum posts, articles, and events. Once the data is retrieved, it is transformed into a consistent format using helper functions like transformForumPost, transformArticle, and transformEvent.
Fetching Data
A particularly important part of the implementation is the function responsible for fetching all posts. The code snippet below illustrates how the component retrieves and processes forum posts, articles, and events. The function begins by retrieving the authentication token and setting up appropriate headers.
For each post type (forums, articles, and events) it makes a GET request and then makes an additional request for the number of comments associated with each post using the comments/ endpoint with the appropriate content_type and object_id.
After merging the posts into a single list, they are sorted by creation date (newest first by default). If a user is authenticated, the code then updates each post's like count and whether the current user has liked it. The final list is stored in the component’s state.
// Fetch all posts.
  const fetchAllPosts = useCallback(async (user) => {
    try {
      const token = localStorage.getItem("token");
      const authHeader = token ? { Authorization: `Bearer ${token}` } : {};

      // Forums
      const forumRes = await axios.get(`${API_URL}forums/`, { headers: authHeader });
      const forumPostsRaw = forumRes.data;
      const forumPosts = await Promise.all(
        forumPostsRaw.map(async (post) => {
          try {
            const commentRes = await axios.get(`${API_URL}comments/`, {
              params: { content_type: "forums.forumpost", object_id: post.id },
              headers: authHeader,
            });
            return transformForumPost({
              ...post,
              commentCount: commentRes.data.length,
            });
          } catch {
            return transformForumPost({ ...post, commentCount: 0 });
          }
        })
      );

      // Articles
      const articlesRes = await axios.get(`${API_URL}articles/`, { headers: authHeader });
      const articlesRaw = articlesRes.data;
      const articles = await Promise.all(
        articlesRaw.map(async (article) => {
          try {
            const commentRes = await axios.get(`${API_URL}comments/`, {
              params: { content_type: "articles.article", object_id: article.id },
              headers: authHeader,
            });
            return {
              ...transformArticle(article),
              commentCount: commentRes.data.length,
            };
          } catch {
            return transformArticle(article);
          }
        })
      );

      // Events
      const eventsRes = await axios.get(`${API_URL}events/`, { headers: authHeader });
      const eventsRaw = eventsRes.data;
      const events = await Promise.all(
        eventsRaw.map(async (event) => {
          try {
            const commentRes = await axios.get(`${API_URL}comments/`, {
              params: { content_type: "events.event", object_id: event.id },
              headers: authHeader,
            });
            return {
              ...transformEvent(event),
              commentCount: commentRes.data.length,
            };
          } catch {
            return transformEvent(event);
          }
        })
      );

      // Combine
      let allPosts = [...forumPosts, ...articles, ...events].sort((a, b) => {
        if (!a.created_at) return 1;
        if (!b.created_at) return -1;
        return new Date(b.created_at) - new Date(a.created_at);
      });

      // Likes
      if (token && user?.id) {
        const updatedPosts = await Promise.all(
          allPosts.map(async (card) => {
            try {
              const likeRes = await axios.get(`${API_URL}likes/`, {
                params: {
                  content_type: getLikeContentType(card.type),
                  object_id: card.id,
                },
                headers: authHeader,
              });
              const likes = likeRes.data;
              return {
                ...card,
                likeCount: likes.length,
                liked: likes.some(
                  (like) => Number(like.user.id) === Number(user.id)
                ),
              };
            } catch (error) {
              console.error("Error fetching likes for", card.uniqueId, error);
              return { ...card, liked: false };
            }
          })
        );
        allPosts = updatedPosts;
      }

      setCards(allPosts);
    } catch (error) {
      console.error("Error fetching posts:", error);
    }
  }, []);

  useEffect(() => {
    const fetchUserThenPosts = async () => {
      const token = localStorage.getItem("token");
      if (!token) return;
      try {
        const res = await axios.get(`${API_URL}accounts/user/`, {
          headers: { Authorization: `Bearer ${token}` },
        });
        const user = res.data;
        setCurrentUser(user);
        await fetchAllPosts(user);
      } catch (err) {
        console.error("Error fetching current user:", err);
      }
    };
    fetchUserThenPosts();
  }, [fetchAllPosts]);
State Management and Modal Integration
State management in ForYouCard involves storing fetched posts, tracking modal visibility for creating posts, filtering, and expanded views, and maintaining local filter options and sort order.
The component includes various modals for different functionalities. The CreatePostModal handles the creation of new forum posts, the FilterForYouModal allows users to filter and sort content, and the ExpandedPostModal provides a detailed view of a selected post. The component also supports user interactions such as liking posts and opening the comments popup. The following is a simplified version of ForYouCard which shows how states are managed and utilised and how modals are integrated:
import React, { useState, useEffect, useCallback } from "react";
import axios from "axios";
// ...other imports

const ForYouCard = () => {
  const [cards, setCards] = useState([]);
  const [isCreatePostModalOpen, setIsCreatePostModalOpen] = useState(false);
  const [isFilterModalOpen, setIsFilterModalOpen] = useState(false);
  const [selectedPostId, setSelectedPostId] = useState(null);
  const [expandedPost, setExpandedPost] = useState(null);
  const [filterOptions, setFilterOptions] = useState({
    forum: true,
    article: true,
    event: true,
    likedOnly: false,
  });
  const [sortOrder, setSortOrder] = useState("newest");

  // Fetching posts and current user on component mount.
  useEffect(() => { /* ... fetch current user ... */ }, []);

  const fetchAllPosts = useCallback(async (user) => {
    // Fetch forum posts, articles, and events then transform and merge them.
    // Sort posts by created_at date.
    setCards(allPosts);
  }, []);

  useEffect(() => { fetchAllPosts(); }, [fetchAllPosts]);

  return (
    <div className="p-6 font-sans">
      <div className="flex justify-between items-center mb-8">
        <h2 className="text-3xl font-bold text-gray-900">For You</h2>
        <div className="flex gap-2">
          <button onClick={() => setIsFilterModalOpen(true)} className="...">
            {/* Filter Icon & Label */}
          </button>
          <button onClick={() => setIsCreatePostModalOpen(true)} className="...">
            {/* Create Post Button */}
          </button>
        </div>
      </div>
      {/* Render post cards */}
      <div className="grid grid-cols-1 sm:grid-cols-2 lg:grid-cols-3 gap-6">
        {sortedCards.map((card) => (
          <div key={card.uniqueId} onClick={() => setExpandedPost(card)} className="group ...">
            {/* Render image, title, content snippet, and meta details */}
          </div>
        ))}
      </div>
      {/* Include modals for creating posts, filtering, comments, and expanded post views */}
      <CreatePostModal
        isOpen={isCreatePostModalOpen}
        onClose={() => setIsCreatePostModalOpen(false)}
        onSubmit={handleCreatePost}
      />
      {selectedPostId && (
        <CommentsPopup
          postId={selectedPostId}
          // ...other props
        />
      )}
      <FilterForYouModal
        isOpen={isFilterModalOpen}
        onClose={() => setIsFilterModalOpen(false)}
        onApply={(newFilters, newSortOrder) => {
          setFilterOptions(newFilters);
          setSortOrder(newSortOrder);
        }}
        initialFilters={filterOptions}
        initialSortOrder={sortOrder}
      />
      {expandedPost && (
        <ExpandedPostModal
          post={expandedPost}
          onClose={() => setExpandedPost(null)}
          onOpenComments={handleOpenComments}
        />
      )}
    </div>
  );
};

export default ForYouCard;
Data Transformation
To standardise data across different content types, helper functions are used to transform raw API responses into a consistent format. The function transformForumPost ensures that forum posts follow the same structure as articles and events. Similar functions exist for other content types.
const transformForumPost = (post) => ({
  id: post.id,
  uniqueId: `forum-${post.id}`,
  type: "forum",
  title: post.title || post.name,
  content: post.content,
  image: post.media,
  author: post.author,
  created_at: post.created_at,
  commentCount: post.commentCount || 0,
  likeCount: post.likeCount !== undefined ? post.likeCount : 0,
  liked: post.liked !== undefined ? post.liked : false,
  tags: post.tags,
});
Since all posts are transformed into a common structure, the frontend does not need to differentiate between content types when rendering or handling interactions.
Expanded Posts and Filtering
The ExpandedPostModal provides a detailed view of a post when clicked. It includes options to navigate to dedicated article or event pages and to open the comments section.
import React from "react";
import { FaTimes, FaComment } from "react-icons/fa";
import { useNavigate } from "react-router-dom";

const ExpandedPostModal = ({ post, onClose, onOpenComments }) => {
  const navigate = useNavigate();
  if (!post) return null;

  const formatDate = (dateString) => {
    if (!dateString) return "";
    const date = new Date(dateString);
    const day = String(date.getDate()).padStart(2, "0");
    const month = String(date.getMonth() + 1).padStart(2, "0");
    const year = date.getFullYear();
    return `${day}/${month}/${year}`;
  };

  const formatTime = (timeString) => {
    if (!timeString) return "";
    return timeString.slice(0, 5);
  };

  const handleRedirect = (item) => {
    if (item.type === "report") {
      navigate("/reporting", { state: { selectedIssue: item } });
    } else if (item.type === "event") {
      navigate(`/events/${item.id}`);
    } else {
      navigate(`/articles/${item.id}`);
    }
  };

  return (
    <div className="fixed inset-0 z-50 flex items-center justify-center bg-black bg-opacity-50">
      <div className="bg-white rounded-lg shadow-lg max-w-2xl w-full relative overflow-y-auto max-h-screen">
        <button
          onClick={onClose}
          className="absolute top-4 right-4 text-gray-600 hover:text-gray-800"
        >
          <FaTimes size={24} />
        </button>
        {post.image && (
          <img
            src={post.image}
            alt="Media content"
            className="w-full h-64 object-cover rounded-t-lg"
          />
        )}
        <div className="p-6">
          <h2 className="text-2xl font-bold mb-2">{post.title}</h2>
          <p className="text-gray-500 text-sm mb-4">{formatDate(post.created_at)}</p>
          {post.author && (
            <div className="flex items-center mb-4">
              <div className="w-10 h-10 bg-gray-300 rounded-full flex items-center justify-center text-lg font-bold text-white mr-3">
                {post.author[0]}
              </div>
              <p className="font-semibold text-lg text-gray-800">{post.author}</p>
            </div>
          )}
          <p className="text-gray-700 mb-4">{post.content}</p>
          {post.type === "event" ? (
            <>
              <div className="mb-4">
                {post.location && (
                  <p className="text-gray-700 mb-2">
                    <span className="font-bold">Location:</span> {post.location}
                  </p>
                )}
                {post.time && (
                  <p className="text-gray-700">
                    <span className="font-bold">Time:</span> {formatTime(post.time)}
                  </p>
                )}
              </div>
              {post.tags && (
                <p className="text-gray-500 italic mb-4">Tags: {post.tags}</p>
              )}
            </>
          ) : (
            post.tags && (
              <p className="text-gray-500 italic mb-4">Tags: {post.tags}</p>
            )
          )}

          {/* Footer buttons - View Details left, Comments right */}
          <div className="flex justify-between items-center mt-6">
            {post.type !== "forum" ? (
              <button
                onClick={() => {
                  handleRedirect(post);
                  console.log("Source id is", post.id);
                  console.log("Source is", post.type);
                }}
                className="text-blue-500 hover:text-blue-600"
              >
                View details
              </button>
            ) : <div />}

            <button
              onClick={(e) => {
                e.stopPropagation();
                onOpenComments(post.id, post.type, e);
              }}
              className="flex items-center gap-1 text-blue-500 hover:text-blue-600"
            >
              <FaComment className="text-xl" />
              <span>Comments ({post.commentCount || 0})</span>
            </button>
          </div>
        </div>
      </div>
    </div>
  );
};

export default ExpandedPostModal;
Filtering options and inputs are handled by FilterForYouModal, which provides checkboxes for post types and a dropdown menu for sorting.
import React, { useState } from "react";
import { FaFilter } from "react-icons/fa";

const FilterForYouModal = ({
  isOpen,
  onClose,
  onApply,
  initialFilters,
  initialSortOrder,
}) => {
  const [filters, setFilters] = useState(
    initialFilters || { forum: true, article: true, event: true, likedOnly: false }
  );
  const [sortOrder, setSortOrder] = useState(initialSortOrder || "newest");

  const handleCheckboxChange = (e) => {
    const { name, checked } = e.target;
    setFilters((prev) => ({ ...prev, [name]: checked }));
  };

  const handleSortChange = (e) => {
    setSortOrder(e.target.value);
  };

  const handleApply = () => {
    onApply(filters, sortOrder);
    onClose();
  };

  if (!isOpen) return null;

  return (
    <div className="fixed inset-0 bg-black bg-opacity-50 flex items-center justify-center z-50">
      <div className="bg-white p-6 rounded-lg w-full max-w-md">
        <h2 className="text-xl font-bold mb-4 flex items-center gap-2">
          <FaFilter /> Filter Posts
        </h2>

        <div className="mb-4">
          <p className="font-medium mb-2">Select Post Types:</p>
          <div className="flex items-center space-x-4 flex-wrap">
            <label className="flex items-center">
              <input
                type="checkbox"
                name="forum"
                checked={filters.forum}
                onChange={handleCheckboxChange}
                className="mr-1"
              />
              Forum
            </label>
            <label className="flex items-center">
              <input
                type="checkbox"
                name="article"
                checked={filters.article}
                onChange={handleCheckboxChange}
                className="mr-1"
              />
              Article
            </label>
            <label className="flex items-center">
              <input
                type="checkbox"
                name="event"
                checked={filters.event}
                onChange={handleCheckboxChange}
                className="mr-1"
              />
              Event
            </label>
          </div>
        </div>

        <div className="mb-4">
          <label className="flex items-center">
            <input
              type="checkbox"
              name="likedOnly"
              checked={filters.likedOnly}
              onChange={handleCheckboxChange}
              className="mr-2"
            />
            Show only liked posts
          </label>
        </div>

        <div className="mb-4">
          <p className="font-medium mb-2">Sort By:</p>
          <select
            value={sortOrder}
            onChange={handleSortChange}
            className="w-full p-2 border rounded"
          >
            <option value="newest">Newest First</option>
            <option value="oldest">Oldest First</option>
            <option value="most_liked">Most Liked</option>
            <option value="most_commented">Most Commented</option>
          </select>
        </div>

        <div className="flex justify-end">
          <button
            type="button"
            onClick={onClose}
            className="mr-2 px-4 py-2 bg-gray-500 text-white rounded hover:bg-gray-600"
          >
            Cancel
          </button>
          <button
            type="button"
            onClick={handleApply}
            className="px-4 py-2 bg-blue-500 text-white rounded hover:bg-blue-600"
          >
            Apply
          </button>
        </div>
      </div>
    </div>
  );
};

export default FilterForYouModal;
The filteredCards and sortedCards functions in are responsible for applying filtering and sorting respectively.
// Apply filtering and sorting.
const filteredCards = cards.filter((card) => {
  // Filter by post type (forum/article/event)
  if (!filterOptions[card.type]) return false;

  // Filter by liked posts only if enabled
  if (filterOptions.likedOnly && !card.liked) return false;

  return true;
});

const sortedCards = [...filteredCards].sort((a, b) => {
  if (sortOrder === "newest") {
    return new Date(b.created_at) - new Date(a.created_at);
  } else if (sortOrder === "oldest") {
    return new Date(a.created_at) - new Date(b.created_at);
  } else if (sortOrder === "most_liked") {
    return (b.likeCount || 0) - (a.likeCount || 0);
  } else if (sortOrder === "most_commented") {
    return (b.commentCount || 0) - (a.commentCount || 0);
  }
  return 0;
});
Forums
The Forums functionality provides users with a dedicated interface to create and manage forum posts, which is all accessible within the For You section of the Home page. Users can author posts by entering a title, content, tags, and optionally uploading media. The overall design ensures that posts are associated with authenticated users and that they are stored and retrieved consistently.
Frontend Implementation
On the frontend side, the core component for creating a forum post is the CreatePostModal React component. This modal is rendered when the user clicks the "Create Post" button in the For You section. It utilises React hooks, such as useState, to manage local state for the title, content, tags, and media file. When the user submits the form, the component collects the input data and calls the onSubmit function provided by its parent, after which it closes itself. The following code snippet shows the complete implementation of the CreatePostModal:
import React, { useState } from "react";

const CreatePostModal = ({ isOpen, onClose, onSubmit }) => {
  const [title, setTitle] = useState("");
  const [content, setContent] = useState("");
  const [tags, setTags] = useState("");
  const [media, setMedia] = useState(null);

  const handleSubmit = async (e) => {
    e.preventDefault();
    const postData = { title, content, tags, media };
    onSubmit(postData); // Call the onSubmit function passed from the parent
    onClose(); // Close the modal
  };

  if (!isOpen) return null;

  return (
    <div className="fixed inset-0 bg-black bg-opacity-50 flex items-center justify-center">
      <div className="bg-white p-6 rounded-lg w-full max-w-md">
        <h2 className="text-xl font-bold mb-4">Create a Forum Post</h2>
        <form onSubmit={handleSubmit}>
          <div className="mb-4">
            <label className="block text-sm font-medium mb-1">Title</label>
            <input
              type="text"
              value={title}
              onChange={(e) => setTitle(e.target.value)}
              className="w-full p-2 border rounded"
              required
            />
          </div>
          <div className="mb-4">
            <label className="block text-sm font-medium mb-1">Content</label>
            <textarea
              value={content}
              onChange={(e) => setContent(e.target.value)}
              className="w-full p-2 border rounded"
              required
            />
          </div>
          <div className="mb-4">
            <label className="block text-sm font-medium mb-1">Tags</label>
            <input
              type="text"
              value={tags}
              onChange={(e) => setTags(e.target.value)}
              className="w-full p-2 border rounded"
              placeholder="e.g., Volunteering, Events"
            />
          </div>
          <div className="mb-4">
            <label className="block text-sm font-medium mb-1">Media</label>
            <input
              type="file"
              onChange={(e) => setMedia(e.target.files[0])}
              className="w-full p-2 border rounded"
            />
          </div>
          <div className="flex justify-end">
            <button
              type="button"
              onClick={onClose}
              className="mr-2 px-4 py-2 bg-gray-500 text-white rounded hover:bg-gray-600"
            >
              Cancel
            </button>
            <button
              type="submit"
              className="px-4 py-2 bg-blue-500 text-white rounded hover:bg-blue-600"
            >
              Submit
            </button>
          </div>
        </form>
      </div>
    </div>
  );
};

export default CreatePostModal;
Backend Implementation
The backend implementation begins with the data model. The ForumPost model is defined with fields for title, content, author, timestamps (for creation and updates), tags, and an optional media file. This model ensures that each forum post is associated with a user (via a foreign key) and that all the necessary details are stored persistently. The following Django model represents the forum posts:
from django.db import models
from django.contrib.auth import get_user_model

User = get_user_model()

class ForumPost(models.Model):
    """
    Forum Post Model
    """
    title = models.CharField(max_length=200)
    content = models.TextField()
    author = models.ForeignKey(User, on_delete=models.CASCADE, related_name='forum_posts')
    created_at = models.DateTimeField(auto_now_add=True)
    updated_at = models.DateTimeField(auto_now=True)
    tags = models.CharField(max_length=100, blank=True, null=True)
    media = models.ImageField(upload_to='forum_media/', blank=True, null=True)

    def __str__(self):
        return self.title
To expose the model through a RESTful API, a serializer is defined using Django REST Framework. The ForumPostSerializer serialises the model data and ensures that the author field displays the username of the post creator. The serializer also handles the creation of new posts by setting the author to the authenticated user. Here is the serializer code:
from django.contrib.auth import get_user_model
from rest_framework import serializers
from .models import ForumPost

User = get_user_model()

class ForumPostSerializer(serializers.ModelSerializer):
    """
    Serializer for ForumPost
    """
    # Display the username of the author
    author = serializers.ReadOnlyField(source='author.username')

    class Meta:
        model = ForumPost
        fields = ['id', 'title', 'content', 'author', 'created_at', 'updated_at', 'tags', 'media']

    def create(self, validated_data):
        """
        Create and return a new ForumPost instance, associating it with the authenticated user.
        """
        user = self.context['request'].user  # Get the authenticated user
        validated_data['author'] = user  # Set the author to the authenticated user
        return ForumPost.objects.create(**validated_data)
Finally, the API endpoints for forum posts are provided by a viewset. The ForumPostViewSet utilises Django REST Framework's ModelViewSet to offer CRUD operations. It enforces that only authenticated users can create or modify posts by specifying the IsAuthenticated permission. Moreover, the viewset automatically sets the author field when a new post is created. The viewset is implemented as follows:
from rest_framework import viewsets
from rest_framework.permissions import IsAuthenticated
from .models import ForumPost
from .serializers import ForumPostSerializer

class ForumPostViewSet(viewsets.ModelViewSet):
    """
    Forum Post View Set
    """
    queryset = ForumPost.objects.all()
    serializer_class = ForumPostSerializer
    permission_classes = [IsAuthenticated]  # Only authenticated users can create/modify posts

    def perform_create(self, serializer):
        """
        Automatically set the author to the authenticated user when creating a post.
        """
        serializer.save(author=self.request.user)
Comments
The Comments feature allows users to leave feedback and participate in discussions across different types of content, including forum posts, articles, and events. It supports nested replies, comment editing, and deletion, with permissions enforced both on the frontend and backend.
Backend Implementation
The core of the backend is a generic Comment model, which supports attaching comments to any model using Django’s content types framework. This design enables flexibility by allowing comments to be reused across different apps.
from django.db import models
from django.contrib.auth import get_user_model
from django.contrib.contenttypes.fields import GenericForeignKey
from django.contrib.contenttypes.models import ContentType

User = get_user_model()

class Comment(models.Model):
    content = models.TextField()
    author = models.ForeignKey(User, on_delete=models.CASCADE, related_name='comments')
    content_type = models.ForeignKey(ContentType, on_delete=models.CASCADE)
    object_id = models.PositiveIntegerField()
    content_object = GenericForeignKey('content_type', 'object_id')
    parent_comment = models.ForeignKey(
        'self', on_delete=models.CASCADE, null=True, blank=True, related_name='replies'
    )
    created_at = models.DateTimeField(auto_now_add=True)
    updated_at = models.DateTimeField(auto_now=True)
To expose the model via a REST API, the CommentSerializer handles both serialization and comment creation logic. It maps the string-based content_type (e.g. "forums.forumpost") to the correct ContentType object and automatically sets the authenticated user as the author.
class CommentSerializer(serializers.ModelSerializer):
    author = serializers.ReadOnlyField(source='author.username')
    replies = serializers.SerializerMethodField()
    content_type = serializers.CharField(write_only=True)
    object_id = serializers.IntegerField(write_only=True)

    class Meta:
        model = Comment
        fields = [
            'id', 'content', 'author', 'content_type', 'object_id',
            'parent_comment', 'created_at', 'updated_at', 'replies'
        ]
        read_only_fields = ['author', 'created_at', 'updated_at']

    def get_replies(self, obj):
        replies = obj.replies.all()
        return CommentSerializer(replies, many=True).data

    def create(self, validated_data):
        user = self.context['request'].user
        request_data = self.context['request'].data
        validated_data['author'] = user

        app_label, model = validated_data.pop('content_type').split('.')
        ct = ContentType.objects.get(app_label=app_label, model=model)
        validated_data['content_type'] = ct

        if request_data.get('reply_to'):
            validated_data['parent_comment_id'] = request_data.get('reply_to')

        return Comment.objects.create(**validated_data)
The CommentViewSet enforces permissions using Django REST Framework. Users can only update or delete comments they authored. Filtering by content_type and object_id is supported via query parameters.
class CommentViewSet(viewsets.ModelViewSet):
    queryset = Comment.objects.all()
    serializer_class = CommentSerializer
    permission_classes = [IsAuthenticated]

    def get_queryset(self):
        if self.kwargs.get("pk"):
            return Comment.objects.all()
        content_type_str = self.request.query_params.get('content_type')
        object_id = self.request.query_params.get('object_id')
        if content_type_str and object_id:
            try:
                app_label, model = content_type_str.split('.')
                ct = ContentType.objects.get(app_label=app_label, model=model)
                return Comment.objects.filter(content_type=ct, object_id=object_id)
            except (ValueError, ContentType.DoesNotExist):
                return Comment.objects.none()
        return Comment.objects.none()

    def create(self, request, *args, **kwargs):
        data = request.data.copy()
        if not data.get('object_id') or not data.get('content_type'):
            return Response(
                {"error": "Both 'object_id' and 'content_type' are required"},
                status=status.HTTP_400_BAD_REQUEST
            )
        serializer = self.get_serializer(data=data)
        serializer.is_valid(raise_exception=True)
        serializer.save()
        return Response(serializer.data, status=status.HTTP_201_CREATED)

    def update(self, request, *args, **kwargs):
        comment = self.get_object()
        if comment.author != request.user:
            raise PermissionDenied("You can only edit your own comment.")
        return super().update(request, *args, **kwargs)

    def destroy(self, request, *args, **kwargs):
        comment = self.get_object()
        if comment.author != request.user:
            raise PermissionDenied("You can only delete your own comment.")
        return super().destroy(request, *args, **kwargs)
Frontend Implementation
On the frontend, the CommentsPopup component handles rendering, posting, editing, replying to, and deleting comments. It uses React state to manage new comment input, edit mode, and which replies are visible.
const handleSubmitComment = async (e) => {
  e.preventDefault();
  const token = localStorage.getItem("token");
  const payload = {
    content: newComment,
    content_type: contentType,
    object_id: postId,
    reply_to: replyTo,
  };
  await axios.post(`${API_URL}comments/`, payload, {
    headers: { Authorization: `Bearer ${token}` },
  });
  setNewComment("");
  setReplyTo(null);
  fetchComments();
  if (onCommentAdded) onCommentAdded();
};
Users can only edit or delete their own comments, which is determined by comparing the current logged-in user to the comment's author.
const isAuthor = currentUser === comment.author;

{isAuthor && (
  <>
    <button onClick={() => setEditingCommentId(comment.id)}>Edit</button>
    <button onClick={() => handleDeleteComment(comment.id)}>Delete</button>
  </>
)}
The component supports nested replies by recursively flattening and rendering any child replies under a top-level comment. The flattenReplies function handles this recursion:
const flattenReplies = (replies) => {
  let result = [];
  replies.forEach((reply) => {
    result.push(reply);
    if (reply.replies && reply.replies.length > 0) {
      result = result.concat(flattenReplies(reply.replies));
    }
  });
  return result;
};
This ensures all nested replies are collected and displayed in a flat but indented structure under their parent comment. The list of comments updates in real time after any create, edit, or delete action using local state and callback props like onCommentAdded and onCommentDeleted.
Likes
The Likes feature enables users to express approval or interest in various types of content in the For You section, including forum posts, articles, and events. The backend uses Django’s content types framework to associate likes with different models, while the frontend manages state updates and provides interactive toggling of like status in real-time.
Backend Implementation
The Like model uses a generic relation to allow users to like any content type, ensuring reusability across the application.
from django.db import models
from django.contrib.auth import get_user_model
from django.contrib.contenttypes.fields import GenericForeignKey
from django.contrib.contenttypes.models import ContentType

User = get_user_model()

class Like(models.Model):
    user = models.ForeignKey(User, on_delete=models.CASCADE, related_name='likes')
    content_type = models.ForeignKey(ContentType, on_delete=models.CASCADE)
    object_id = models.PositiveIntegerField()
    content_object = GenericForeignKey('content_type', 'object_id')
    created_at = models.DateTimeField(auto_now_add=True)

    class Meta:
        unique_together = ('user', 'content_type', 'object_id')  # Prevent duplicate likes
The LikeSerializer returns the user's id and username, and ensures that the user making the request is set as the like owner during creation.
class LikeSerializer(serializers.ModelSerializer):
    user = serializers.SerializerMethodField()

    class Meta:
        model = Like
        fields = ['id', 'user', 'content_type', 'object_id', 'created_at']
        read_only_fields = ['user', 'created_at']

    def get_user(self, obj):
        return {
            'id': obj.user.id,
            'username': obj.user.username
        }

    def create(self, validated_data):
        user = self.context['request'].user
        return Like.objects.create(user=user, **validated_data)
The LikeViewSet provides full CRUD support using Django REST Framework’s ModelViewSet. It filters likes by content type and object ID, and includes a custom unlike endpoint to allow deletion by parameters rather than ID.
class LikeViewSet(viewsets.ModelViewSet):
    queryset = Like.objects.all()
    serializer_class = LikeSerializer
    permission_classes = [IsAuthenticated]

    def get_queryset(self):
        content_type_param = self.request.query_params.get('content_type')
        object_id = self.request.query_params.get('object_id')
        if content_type_param and object_id:
            try:
                app_label, model = content_type_param.split('.')
                ct = ContentType.objects.get(app_label=app_label, model=model)
                return Like.objects.filter(content_type=ct, object_id=object_id)
            except (ValueError, ContentType.DoesNotExist):
                return Like.objects.none()
        return Like.objects.none()

    def create(self, request, *args, **kwargs):
        data = request.data.copy()
        if not data.get('content_type') or not data.get('object_id'):
            return Response({"error": "Both 'content_type' and 'object_id' are required"}, status=400)
        app_label, model = data['content_type'].split('.')
        ct = ContentType.objects.get(app_label=app_label, model=model)
        data['content_type'] = ct.id
        serializer = self.get_serializer(data=data, context={'request': request})
        serializer.is_valid(raise_exception=True)
        serializer.save()
        return Response(serializer.data, status=201)

    @action(detail=False, methods=["delete"], url_path="unlike")
    def unlike(self, request):
        user = request.user
        content_type_param = request.query_params.get("content_type")
        object_id = request.query_params.get("object_id")
        if not content_type_param or not object_id:
            return Response({"error": "Both 'content_type' and 'object_id' are required"}, status=400)
        try:
            app_label, model = content_type_param.split(".")
            ct = ContentType.objects.get(app_label=app_label, model=model)
            like = Like.objects.get(user=user, content_type=ct, object_id=object_id)
            like.delete()
            return Response(status=204)
        except (ValueError, ContentType.DoesNotExist, Like.DoesNotExist):
            return Response({"error": "Like not found"}, status=404)
Frontend Implementation
On the frontend, likes are handled within the ForYouCard component. The app fetches likes when loading posts, calculates the number of likes per post, and sets a boolean liked state to indicate whether the current user has liked each item.
const getLikeContentType = (type) => {
  if (type === "forum") return "forums.forumpost";
  if (type === "article") return "articles.article";
  if (type === "event") return "events.event";
  return "forums.forumpost";
};

useEffect(() => {
  const fetchUserThenPosts = async () => {
    const res = await axios.get(`${API_URL}accounts/user/`, { headers: authHeader });
    const user = res.data;
    setCurrentUser(user);

    const updatedPosts = await Promise.all(allPosts.map(async (card) => {
      const likeRes = await axios.get(`${API_URL}likes/`, {
        params: {
          content_type: getLikeContentType(card.type),
          object_id: card.id,
        },
        headers: authHeader,
      });
      const likes = likeRes.data;
      return {
        ...card,
        likeCount: likes.length,
        liked: likes.some((like) => like.user.id === user.id),
      };
    }));
    setCards(updatedPosts);
  };

  fetchUserThenPosts();
}, []);
Likes are toggled with the handleToggleLike function. If the post is not yet liked, a POST request is made. If the post is already liked, a DELETE request is sent to the custom unlike endpoint. The component updates the local state immediately for a responsive UI.
const handleToggleLike = async (postId, postType, e) => {
  e.stopPropagation();
  const token = localStorage.getItem("token");
  const contentType = getLikeContentType(postType);
  const uniqueId = `${postType}-${postId}`;
  const card = cards.find((c) => c.uniqueId === uniqueId);
  if (!card) return;

  if (!card.liked) {
    await axios.post(`${API_URL}likes/`, { content_type: contentType, object_id: postId }, {
      headers: { Authorization: `Bearer ${token}` },
    });
    setCards((prev) =>
      prev.map((c) =>
        c.uniqueId === uniqueId ? { ...c, liked: true, likeCount: c.likeCount + 1 } : c
      )
    );
  } else {
    await axios.delete(`${API_URL}likes/unlike/`, {
      params: { content_type: contentType, object_id: postId },
      headers: { Authorization: `Bearer ${token}` },
    });
    setCards((prev) =>
      prev.map((c) =>
        c.uniqueId === uniqueId ? { ...c, liked: false, likeCount: Math.max(c.likeCount - 1, 0) } : c
      )
    );
  }
};
The frontend also supports filtering posts by likes and sorting by most liked using the likedOnly filter and sortOrder options:
const filteredCards = cards.filter((card) => {
  if (!filterOptions[card.type]) return false;
  if (filterOptions.likedOnly && !card.liked) return false;
  return true;
});

const sortedCards = [...filteredCards].sort((a, b) => {
  if (sortOrder === "most_liked") return (b.likeCount || 0) - (a.likeCount || 0);
  return 0;
});
This setup ensures the like count and status stay in sync between client and server, with efficient updates and filtering built-in.
Reporting
The reporting page is where users can report, comment and upvote issues in the area.
Frontend
The frontend for reporting has inspiration taken from FixMyStreet, Google Maps and Bing Maps.


The frontend logic described below is very similar to the logic in the Manage section for reporting, except that it is contained within a smaller box.
ReportPage.jsx
ReportsPage.jsx contains the other components:
Expand Code
...
 <div className="h-full flex mt-4">
    ...
    <SidebarReport>
    ...
    </SideBarReport>
...
    <MapComponent>
    ...
    </MapComponent>
...
It also manages state for the page.
Expand Code
  const location = useLocation();
  const [selectedMarker, setSelectedMarker] = useState(
    location.state?.selectedIssue || null
  );
  const [newMarker, setNewMarker] = useState(null);
  const [reports, setReports] = useState([]);
  const [isSidebarOpen, setIsSidebarOpen] = useState(
    !!location.state?.selectedIssue
  );
  const [viewingAISummary, setViewingAISummary] = useState(false);
  const [modelReply, setModelReply] = useState("");
  const [lastSummaryID, setLastSummaryID] = useState(null);
  const [title, setTitle] = useState("");
  const [description, setDescription] = useState("");
...
As shown above, key data such as the selected marker, whether the sidebar is open, and what the model's reply is are stored in this component.
It then passes this state to and from its child components as necessary.
Expand Code
            <SidebarReport
              selectedMarker={selectedMarker}
              newMarker={newMarker}
              fetchReports={fetchReports}
              onSidebarClose={handleSidebarClose}
              viewingAISummary={viewingAISummary}
              setViewingAISummary={setViewingAISummary}
              modelReply={modelReply}
              setModelReply={setModelReply}
              lastSummaryID={lastSummaryID}
              setLastSummaryID={setLastSummaryID}
              title={title}
              setTitle={setTitle}
              description={description}
              setDescription={setDescription}
            ></SidebarReport>
...
        <MapComponent
            onMarkerSelected={handleMarkerSelected}
            onNewMarkerSelected={handleNewMarkerSelected}
            reports={reports}
            newMarker={newMarker}
            activeFilters={getActiveFilters()}
            selectedMarker={selectedMarker}
            mapRef={mapRef}
            viewingAISummary={viewingAISummary}
            isSidebarOpen={isSidebarOpen}
        ></MapComponent>
...
Additionally, ReportsPage.jsx is mainly responsible for the responsive design of the page. For example, here, SideBarReport.jsx is resized depending on if the screen size is wide or mobile.
Expand Code
 ...
    <div
    className={`bg-[#f9f9f9] shadow-2xl py-5 rounded-xl h-full ${
    isSidebarOpen ? "w-full" : "w-2/6"
    } relative sm:w-2/6`}
    ref={sidebarRef}
          >
        ...
        <SidebarReport>
        ...
        </SideBarReport>
SideBarReport.jsx
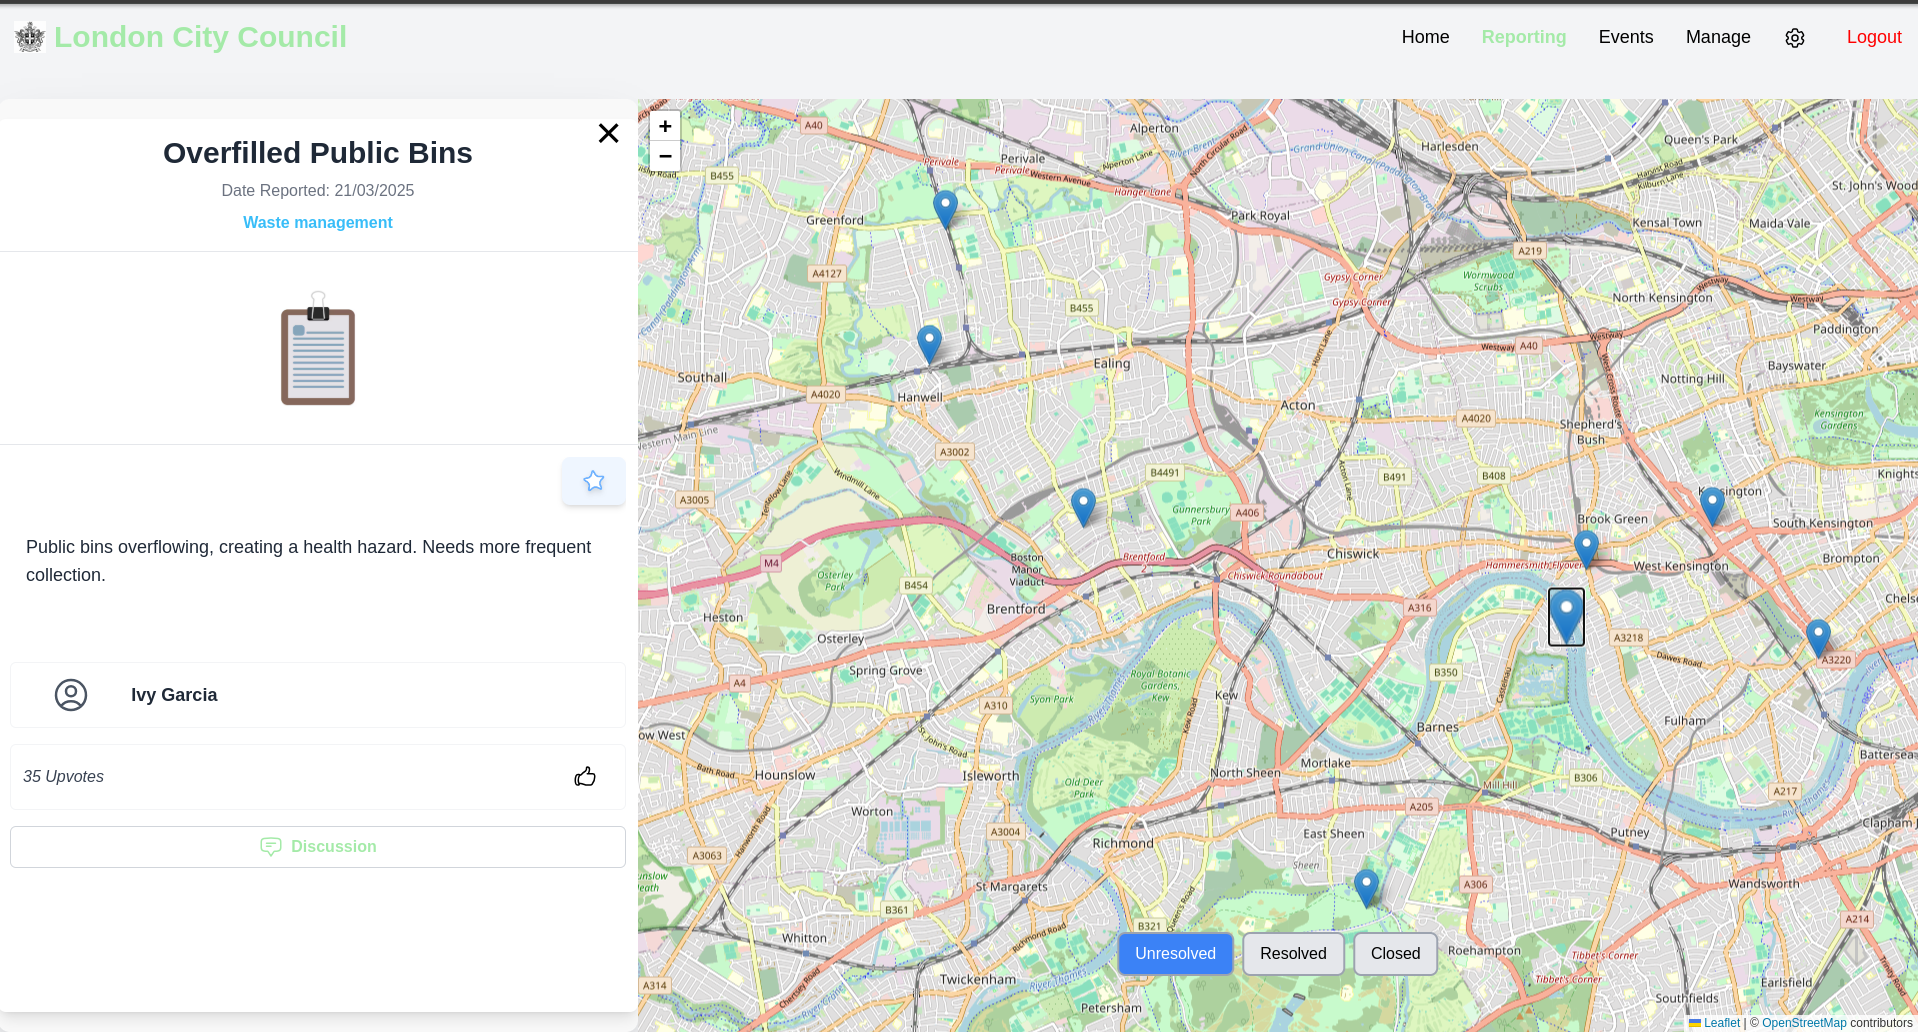
The side bar has three possible displays.
Selected a Report

Selected a Report and viewing a Discussion

New Report

Depending on the current state (passed in by ReportsPage.jsx), the SideBarReport.jsx displays different frontends.
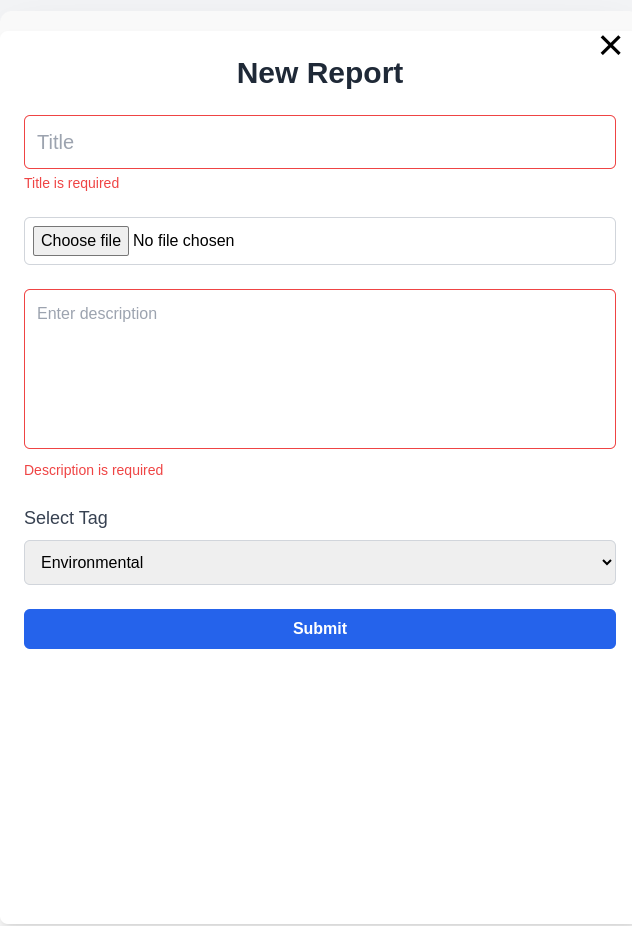
New Report
If newMarker is not null, a frontend form is shown to input data for a new report.
Here is a snippet.
Expand Code
...
<form onSubmit={handleSubmitNewForm} className="space-y-6">
            {/* Title Input */}
            <div>
              <input
                type="text"
                id="title"
                value={title}
                onChange={(e) => setTitle(e.target.value)}
                placeholder="Title"
                className={`w-full p-3 text-xl border ${isTitleEmpty ? "border-red-500" : "border-gray-300"
                  } rounded-md focus:outline-none focus:ring-2 focus:ring-blue-300`}
              />
              {isTitleEmpty && (
                <p className="text-red-500 text-sm mt-1">Title is required</p>
              )}
            </div>
...
Notice that we do have frontend validation for sections that are required, providing user feedback to not leave those fields blank.
The function handleSubmitNewForm executes a POST request to the backend to submit the new report.
Expand Code
...
const handleSubmitNewForm = async (e) => {
...
    const token = localStorage.getItem("token");
    const formData = new FormData();
    formData.append("title", title);
    if (image) {
      formData.append("main_image", image);
    }
    formData.append("description", description);
    formData.append("author", author);
    formData.append("longitude", newMarker.latlng.lng.toFixed(5));
    formData.append("latitude", newMarker.latlng.lat.toFixed(5));
    formData.append("tags", selectedTag); // Include the selected tag

    try {
      const response = await axios.post(API_URL + "reports/", formData, {
        headers: {
          "Content-Type": "multipart/form-data", // To send files and form data
          Authorization: `Bearer ${token}`,
        },
      });
      if (response.status === 201) {
        fetchReports();
        onSidebarClose();
      }
...
Selected Marker
If we are viewing a report instead, SideBarReport.jsx will show the selectedMarker information such as title, date, tag etc.
Expand Code
...
      return (
        <div className="w-full h-full flex flex-col bg-white shadow-lg rounded-lg overflow-hidden">
          {/* Header */}
          <div className="p-4 border-b border-gray-200">
            <div className="text-center">
              <p className="font-semibold text-3xl mb-2 line-clamp-2 text-gray-800">
                {selectedMarker.title}
              </p>
            </div>
            <div className="text-center">
              <p className="text-gray-500 text-base mb-2">
                Date Reported:{" "}
                {new Date(selectedMarker.published_date).toLocaleDateString()}
              </p>
            </div>
            {selectedMarker.status !== "open" ? (
              <div className="flex justify-center items-center mt-2">
                <p className="text-purple-600 font-bold mx-2">
                  {selectedMarker.status.charAt(0).toUpperCase() +
                    selectedMarker.status.slice(1).replace("_", " ")}
                </p>
                <span className="text-gray-300">|</span>
                <p className="text-sky-400 font-bold mx-2">
                  {selectedMarker.tags.charAt(0).toUpperCase() +
                    selectedMarker.tags.slice(1).replace("_", " ")}
                </p>
              </div>
            ) : (
              <div className="flex justify-center items-center mt-2">
                <p className="text-sky-400 font-bold">
                  {selectedMarker.tags.charAt(0).toUpperCase() +
                    selectedMarker.tags.slice(1).replace("_", " ")}
                </p>
              </div>
            )}
          </div>
          {/* Image */}
...
The upvote functionality is a POST request sent to upvote a report. Immediately after we refresh the reports to show feedback to the user that their upvote worked.
Expand Code
...
  const handleUpvote = async () => {
    try {
      const token = localStorage.getItem("token");
      const response = await axios.post(
        API_URL + "reports/" + selectedMarker.id + "/upvote/",
        {},
        {
          headers: {
            Authorization: `Bearer ${token}`,
          },
        }
      );
      if (response.status === 200) {
        fetchReports();
      }
    } catch (err) {
      console.log(err.message);
    }
  };
...
Selected Marker viewing discussion
If we are viewing a discussion, the SelectedMarker variable has discussion data that is displayed including message, date and author. There are a few key implementations to note:
-
handleSubmitNewDiscussionMessagefunctionThis function handles submitting the data that was inputted. It sends it to the correct report ID, and appends the message, along with the author.
-
The report message is tied to your account
This is determined using
AuthContext, see the relevant section for more information.Expand Code
frontend/src/components/reporting/SidebarReport.jsx...
import { useAuth } from "../../context/AuthContext";
...
const { auth } = useAuth();
...
const author = auth.user.username;
...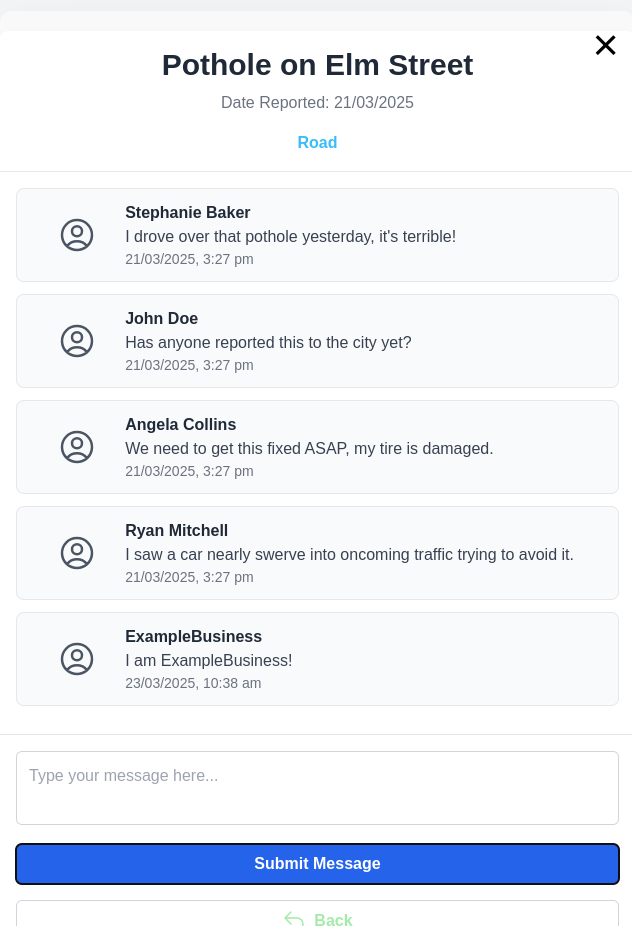
-
Cannot submit a message for a closed report
Depending on
SelectedMarker.status(open or not resolved/closed), there may be a message showing that the report cannot be commented on because it is not open.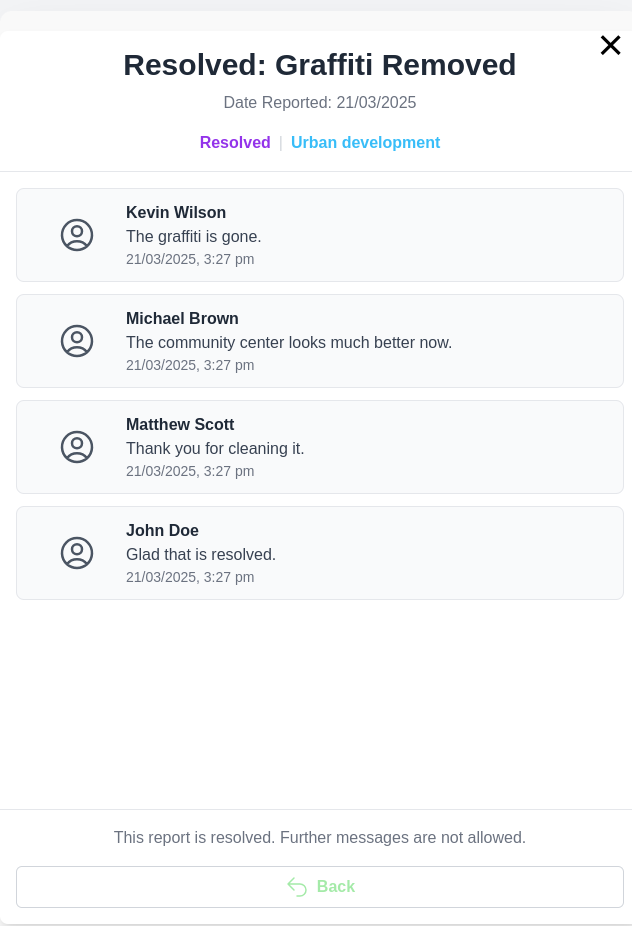
MapComponent.jsx
The map component handles displaying the existing reports on a map. It also captures the functionality for clicking on the map to create a new report. It also filters markers depending on the state of the toggled filters from the ReportsPage.jsx
Setting map boundaries
Map boundaries are loaded in from CompanyContext.jsx and used to set the center and boundaries of the MapComponent.jsx.
Expand Code
...
import { CompanyContext } from "../../context/CompanyContext";
...
    const { sw_lat, sw_lon, ne_lat, ne_lon } = useContext(CompanyContext);
...
    const bounds = [
        [sw_lat, sw_lon],
        [ne_lat, ne_lon],
    ];
...
     <MapContainer
        center={[
          (parseFloat(sw_lat) + parseFloat(ne_lat)) / 2, // Midpoint latitude
          (parseFloat(sw_lon) + parseFloat(ne_lon)) / 2, // Midpoint longitude
        ]}
        ...
        maxBounds={bounds}
        maxBoundsViscosity={1.0}
        ...
      >
...
    </MapContainer>
...
New Marker
When the user clicks anywhere on the map, the NewReport component captures the click event and places a draggable marker at that location.
The new marker is also draggable, the handleDragEnd function updates its position and calls the onNewMarkerSelected function (passed in from ReportsPage.jsx to propagate the changes.
Expand Code
  function NewReport() {
    const map = useMapEvents({
      click(e) {
        map.closePopup();
        setPosition(e.latlng);
        map.flyTo(e.latlng, map.getZoom());
        onNewMarkerSelected(e);
      },
      locationfound(e) {
        setPosition(e.latlng);
        map.flyTo(e.latlng, map.getZoom());
      },
    });


    const handleDragEnd = (e) => {
      const newLatLng = e.target.getLatLng();
      setPosition(newLatLng);
      onNewMarkerSelected({ latlng: newLatLng });
      };

    return newMarker === null ? null : (
      <Marker
        position={position || newMarker.latlng}
        draggable={true}
        icon={SelectedIcon}
        eventHandlers={{
          dragend: handleDragEnd, // Listen for dragend event
        }}
      ></Marker>
    );
  }
Selected Marker
When a marker on the map is selected, the map component calls the parent component (ReportsPage.jsx) handleMarkerSelected function, which propagates changes to the sidebar component automatically.
Expand Code
  const handleMarkerSelected = (item) => {
    setSelectedMarker(item);
    setNewMarker(null);
    setIsSidebarOpen(true);
  };
Filter Markers
The ReportsPage.jsx contains pills to toggle filters.
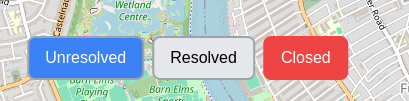
That data (activeFilters) is passed into MapComponent.jsx to filter markers based on the toggles.
Expand Code
...
  const filteredReports = reports.filter((item) =>
    activeFilters.includes(item.status)
  );
...
{filteredReports.map((item) => (
          <Marker.../>
...
Backend
The backend includes a reports Django app and a reportsdiscussion app
Reports
The Report model represents a report in the system, which includes fields such as title, status, and so on. The model also stores geographical data with latitude and longitude fields to locate the report's position and is used by the MapComponent to display markers.
Expand Code
"""
models.py
"""
from django.db import models

class Report(models.Model):
    """
    Report Model
    """
    STATUS_CHOICES = [
        ('open', 'Open'),
        ('closed', 'Closed'),
        ('resolved', 'Resolved'),
    ]
    TAGS_CHOICES = [
        ('environmental', 'Environmental'),
        ('road', 'Road'),
        ('pollution', 'Pollution'),
        ('wildlife_conservation', 'Wildlife Conservation'),
        ('climate_change', 'Climate Change'),
        ('waste_management', 'Waste Management'),
        ('health_safety', 'Health & Safety'),
        ('urban_development', 'Urban Development'),
    ]

    title = models.CharField(max_length=200)
    status = models.CharField(max_length=10, choices=STATUS_CHOICES, default='open')
    tags = models.CharField(max_length=30, choices=TAGS_CHOICES, default='environmental')
    main_image = models.ImageField(upload_to='report_images/', blank=True, null=True)
    author = models.CharField(max_length=100)
    published_date = models.DateField(auto_now_add=True)
    description = models.TextField()
    upvotes = models.IntegerField(default=0)
    latitude = models.DecimalField(max_digits=9, decimal_places=6, blank=True)
    longitude = models.DecimalField(max_digits=9, decimal_places=6, blank=True)

    def __str__(self):
        return self.title
Reports Discussions
The ReportDiscussion model uses a foreign key relationship with the Report model. There are other fields such as author and message.
Expand Code
"""
Model
"""
from django.db import models
from reports.models import Report

class ReportDiscussion(models.Model):
    """
    Report Discussion
    """
    report = models.ForeignKey(Report, on_delete=models.CASCADE, related_name='discussions')
    author = models.CharField(max_length=100)
    message = models.TextField()
    created_at = models.DateTimeField(auto_now_add=True)

    def __str__(self):
        return f"Discussion on {self.report.title} by {self.author}"
Upvotes
When a user sends a POST request to the /reports/id/upvote/ endpoint, the report's upvote count is incremented by 1.
Expand Code
    @action(detail=True, methods=['post'])
    def upvote(self, request, pk=None): # pylint: disable=W0613
        """
        Handle upvotes endpoint
        """
        report = self.get_object()
        report.upvotes += 1
        report.save()
        return Response({'upvotes': report.upvotes}, status=status.HTTP_200_OK)
AI
The reports page features an AI summarisation and recommendation feature. Whichever report the user is looking at, an LLM can generate a response relevant to the report.
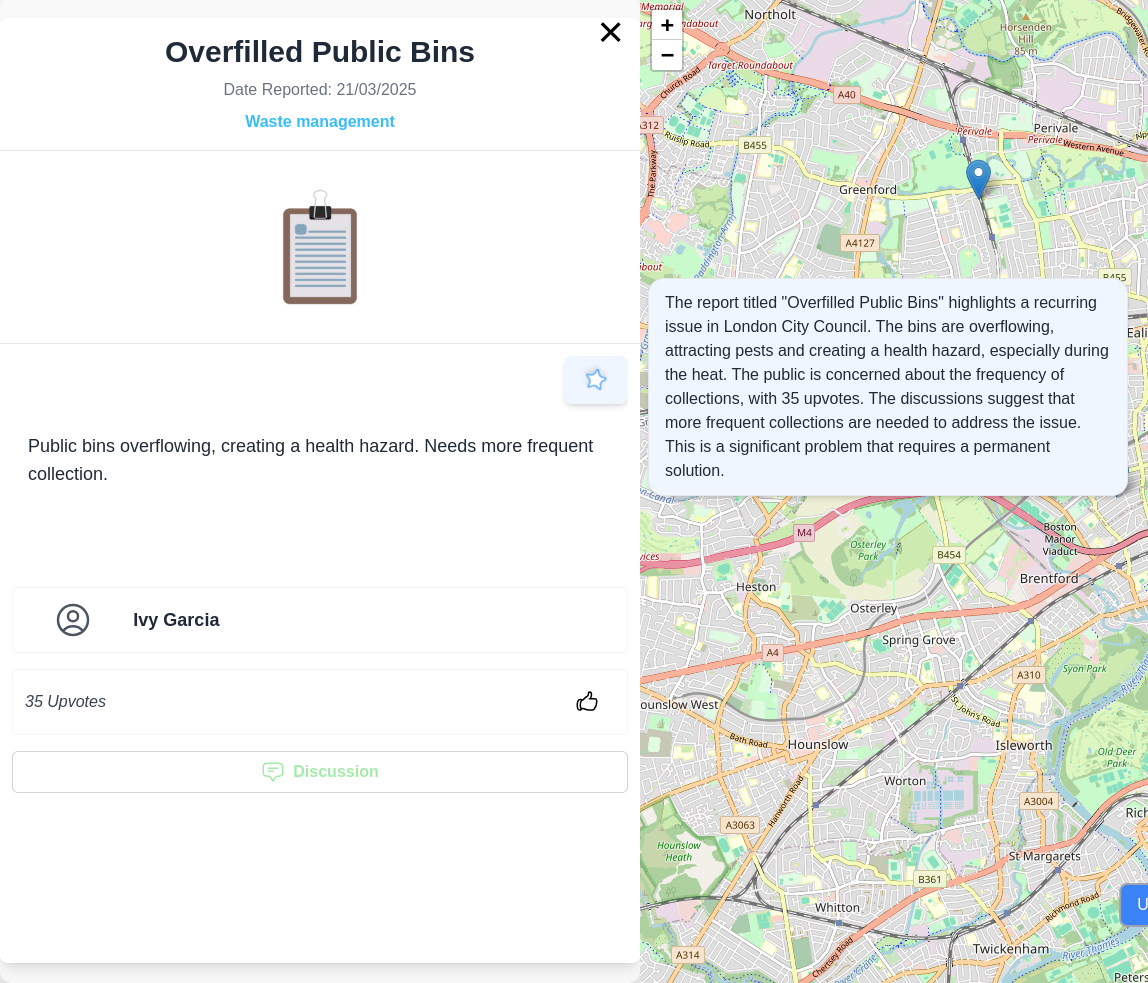
Input
User presses the AI button and we extract relevant report details:
Expand Code
  const extractReportDetails = () => {
    if (!selectedMarker) return null;

    // Extract only relevant fields
    const relevantDetails = {
      title: selectedMarker.title,
      status: selectedMarker.status,
      tags: selectedMarker.tags,
      author: selectedMarker.author,
      published_date: selectedMarker.published_date,
      description: selectedMarker.description,
      upvotes: selectedMarker.upvotes,
      latitude: selectedMarker.latitude,
      longitude: selectedMarker.longitude,
      discussions: selectedMarker.discussions.map((discussion) => ({
        // author: discussion.author,
        message: discussion.message,
        created_at: discussion.created_at,
      })),
    };

    return relevantDetails;
  };
Process
The model is fed the extracted report data as a userQuery. It is prompted to provide a summary and recommendation based on the report information. It uses the AI Engine provided by AIContext.jsx.
Expand Code
  const getReportSummary = async () => {
    // Extract relevant data from selectedMarker
    const userQuery = JSON.stringify(extractReportDetails(), null, 2);
    const systemPrompt = `You are an AI assistant chatbot for ${name}, a company.

              Provide a summary of the report.
              Provide a summary of the discussion message.
              Provide your recommendations.
              Maximum 100 words.

              Today's date: ${new Date().toISOString().split("T")[0]}
              `;

    await getReply(userQuery, systemPrompt, setModelReply, setIsStreaming);
  };
Output
The expandable AI summary section in ReportsPage.jsx provides the model response as it is being output.
Expand Code
<div className="absolute lg:top-1/3 lg:w-1/4 top-1/3 lg:translate-x-[135%] lg:translate-y-[0%] translate-y-[80%] lg:bottom-auto bottom-0">
          {/* Expandable AI Summary Section */}
          {viewingAISummary && selectedMarker && (
            <div className="mt-4 p-4 max-h-[40rem] overflow-auto px-4 py-3 bg-blue-50 rounded-2xl shadow-md border border-gray-200">
              <p
                className={`text-gray-700 ${
                  !modelReply ? "animate-pulse bg-gray-200 rounded" : ""
                }`}
              >
                <ReactMarkdown className="text-gray-800">
                  {modelReply || ""}
                </ReactMarkdown>
              </p>
            </div>
          )}
        </div>
Events
We wanted to create a feature that would allow users to view events happening in the city. We decided to create two types of events: Scheduled Events and Points of Interest. Scheduled Events are events that are scheduled to happen at a specific date and time, such as a festival. Points of Interest are locations that are of interest, such as landmarks, museums, and parks.
Backend
We first began creating events with the following fields:
Expand Code
class Event(models.Model):
    """
    Event Model class
    """
    title=models.CharField(max_length=100)
    date=models.DateField()
    time=models.TimeField()
    description = models.TextField()

    def __str__(self):
        return self.title
This then needed restructuring as we planned on having two different types of events: Scheduled Events and Points of Interest. We could have created two separate models for these two types of events, but we decided to use a single model with a field to differentiate between the two. This is the final model we ended up with:
Expand Code
class Event(models.Model):
    """
    Event Model class
    """

    EVENT_TYPES = [
        ('scheduled', 'Scheduled Event'),
        ('point_of_interest', 'Point of Interest'),
    ]

    POI_TYPES = [
        ('landmarks', 'Landmarks'),
        ('museums', 'Museums'),
        ('parks', 'Parks'),
        ('other', 'Other'),
    ]

    title = models.CharField(max_length=100)
    event_type = models.CharField(max_length=20, choices=EVENT_TYPES, default='scheduled')
    description = models.TextField()
    main_image = models.ImageField(upload_to='event_images/', blank=True, null=True)
    location = models.CharField(max_length=255)
    longitude = models.FloatField(null=True, blank=True)
    latitude = models.FloatField(null=True, blank=True)

    # Fields for Scheduled Events only
    date = models.DateField(null=True, blank=True)
    time = models.TimeField(null=True, blank=True)
    is_featured = models.BooleanField(default=False)


    # Fields for Points of Interest only
    opening_times = models.CharField(max_length=255, blank=True, null=True)
    poi_type = models.CharField(max_length=20, choices=POI_TYPES, blank=True, null=True)

    def __str__(self):
        return self.title
By using this model, we can easily differentiate between the two types of events and add specific fields for each type. For example, we added a poi_type field for Points of Interest to categorize them into different types such as Landmarks, Museums, Parks, etc which are not applicable to Scheduled Events.
The following fields are for Scheduled Events:
- Title
- Event Type
- Description
- Image (optional)
- Location
- Longitude (optional)
- Latitude (optional)
- Is Featured (optional)
- Date
- Time
The following fields are for Points of Interest:
- Title
- Event Type
- Description
- Image (optional)
- Location
- Longitude (optional)
- Latitude (optional)
- Is Featured (optional)
- Opening Times (optional)
- POI Type
At first we made validation checks in serializers.py to validate fields that are required and are optional. However, we ran into issues such as a field such as date being required for Scheduled Events but not for Points of Interest. This made it difficult to validate the fields in the backend as we would have to check the event type and then validate the fields accordingly. This would make the code more complex and harder to maintain in the future. We decided to move the validation checks to the frontend to make it easier to display error messages to the user.
Frontend
The first iteration of the events page was based on the Prototype Design we designed. The only difference being the addition of a section for Featured Events, which we envisioned would be events that the content manager wants to highlight.
We created three separate components to allow for modularity. The FeaturedEvents.jsx component displays the featured events, the Calendar.jsx component displays the calendar, and the PointOfInterest.jsx component displays the points of interest.
const EventsPage = () => {
  return (
    <div>
      <Header />
      <div className="pt-20"></div>
      <FeaturedEvents />
      <Calendar />
      <PointOfInterest />
    </div>
  );
};
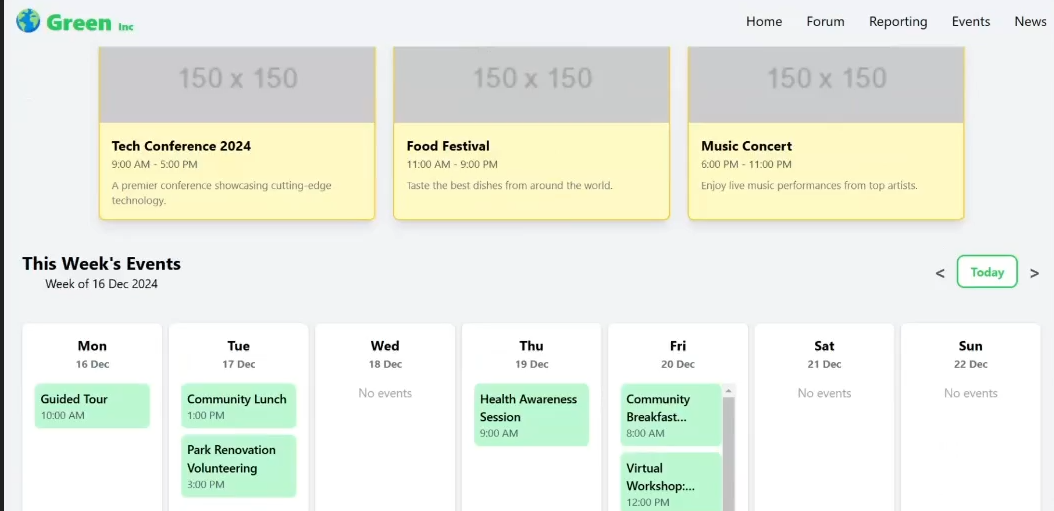
I was then able to connect the frontend to the backend and display the events on the events page. I used the useEffect hook to fetch the events from the backend when the component mounts. I then stored the events in the state and displayed them on the page. I also added a loading spinner to indicate that the events are being fetched.

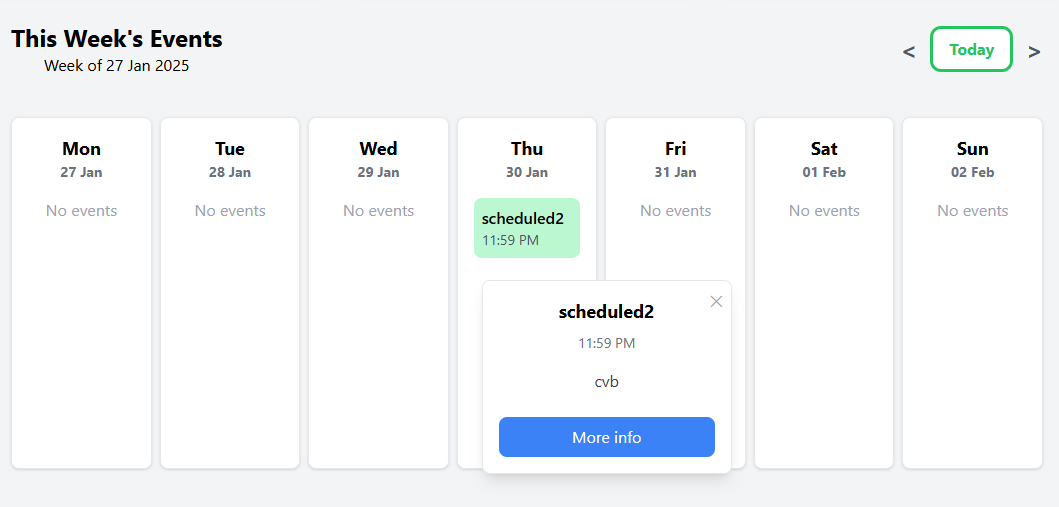
Calendar
The calendar component displays the scheduled events in a weekly calendar format. I used the dayjs library to get the current date and the dates for the current week.
Expand Code
  const today = dayjs(); // Get today's date
  const [highlightToday, setHighlightToday] = useState(false);
  const startOfWeek = currentWeek.startOf("week").add(1, "day");
  const daysOfWeek = Array.from({ length: 7 }, (_, index) =>
    startOfWeek.add(index, "day")
  );

  const handleNextWeek = () => {
    setCurrentWeek((prevWeek) => prevWeek.add(7, "day"));
  };

  const handlePrevWeek = () => {
    setCurrentWeek((prevWeek) => prevWeek.subtract(7, "day"));
  };
I then displayed the events for each day of the week. Events are sorted by time and displayed as a list within each day.
Expand Code
  {daysOfWeek.map((day) => {
    const dayKey = day.format("YYYY-MM-DD");
    const isToday = today.isSame(day, "day");
    const dayEvents = events[dayKey] || [];

    // Sort dayEvents by time
    dayEvents.sort((a, b) => {
      const timeA = dayjs(a.time, ["HH:mm:ss", "HH:mm"]);
      const timeB = dayjs(b.time, ["HH:mm:ss", "HH:mm"]);
      return timeA.isBefore(timeB) ? -1 : timeA.isAfter(timeB) ? 1 : 0;
    });
The calendar component also has buttons to navigate to the next and previous weeks. We also created a "Today" button that would take the user back to the current week, highlighting the current day.
Expand Code
const handleNextWeek = () => {
setCurrentWeek((prevWeek) => prevWeek.add(7, "day"));
};
const handlePrevWeek = () => {
setCurrentWeek((prevWeek) => prevWeek.subtract(7, "day"));
};
...
return (
<button
className="text-gray-600 text-2xl hover:text-gray-800 focus:outline-none font-bold scale-125 hover:scale-150"
onClick={handlePrevWeek}
>
<
</button>
<button
className="px-4 py-2 rounded-lg font-bold text-black hover:scale-110 transition active:duration-100 hover:duration-500 duration-500"
style={{
color: main_color,
outline: "solid " + main_color,
backgroundColor: "white",
}}
onMouseEnter={(e) => {
e.currentTarget.style.color = "white";
e.currentTarget.style.outline = "none";
e.currentTarget.style.backgroundColor = lightenColor(
main_color,
20
); // Lighter background on hover
}}
onMouseLeave={(e) => {
e.currentTarget.style.color = main_color;
e.currentTarget.style.outline = "solid " + main_color;
e.currentTarget.style.backgroundColor = "white";
}}
onMouseDown={(e) => {
e.currentTarget.style.color = "white";
e.currentTarget.style.backgroundColor = lightenColor(
main_color,
60
);
}}
onMouseUp={(e) => {
e.currentTarget.style.backgroundColor = lightenColor(
main_color,
20
);
}}
onClick={handleToday}
>
Today
</button>
<button
className="text-gray-600 text-2xl hover:text-gray-800 focus:outline-none font-bold scale-125 hover:scale-150"
onClick={handleNextWeek}
>
>
</button>
... )};
When a user clicks on an event on the calendar, a modal will pop up showing the details of the event. The modal will show the title, description, time, and a button to view more details.
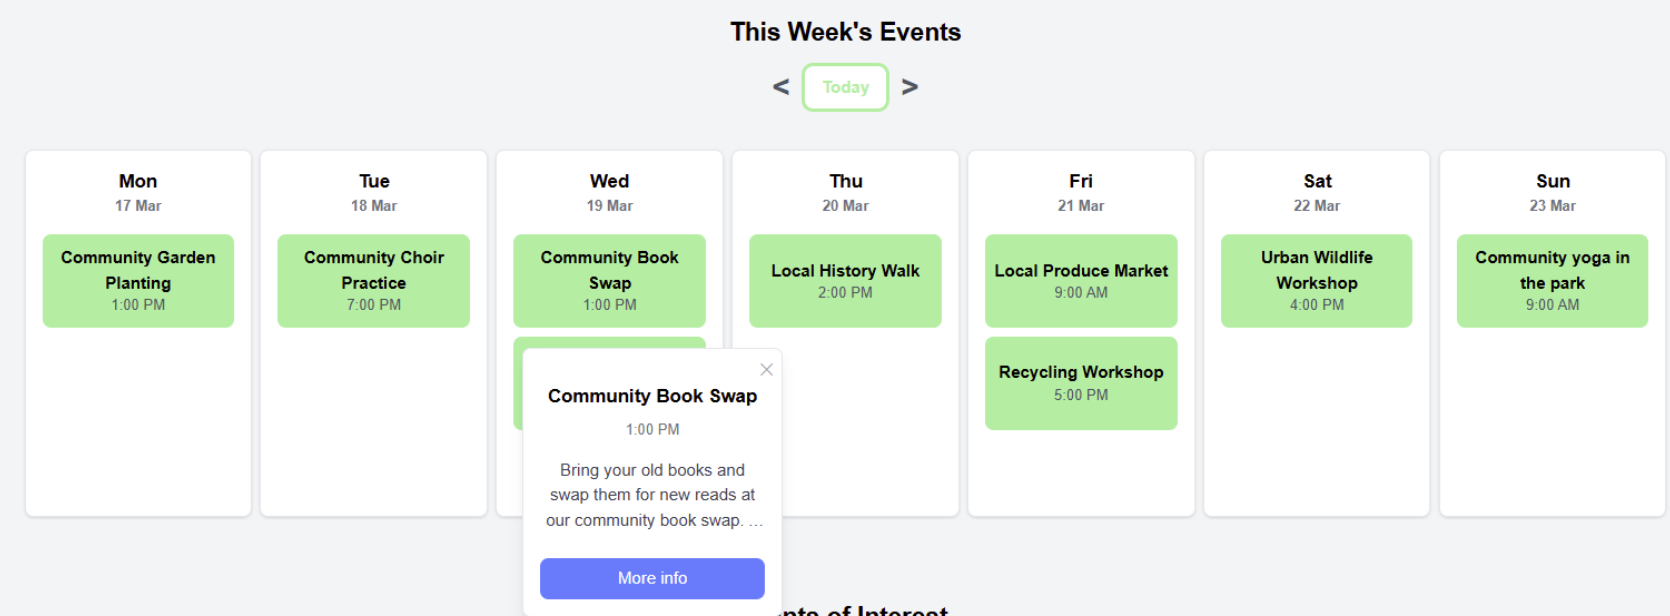
When an event is clicked, the position of the event is stored in the state and the modal is displayed at that position. This is done by getting the position of the event and adding the scroll position to it.
Expand Code
  const openEventDetails = (eventData, e) => {
    const eventRect = e.target.getBoundingClientRect();
    const topPosition = eventRect.top + window.scrollY + 50;
    const leftPosition = eventRect.left + window.scrollX;

    setSelectedEvent(eventData);
    setSelectedEventPosition({
      top: topPosition,
      left: leftPosition,
    });
  };
Final Design
The final design of the events page is shown below. There were many iterations of this page, due to constant feedback from user testing. We were able to settle on this final design as it was the most user-friendly and visually appealing.
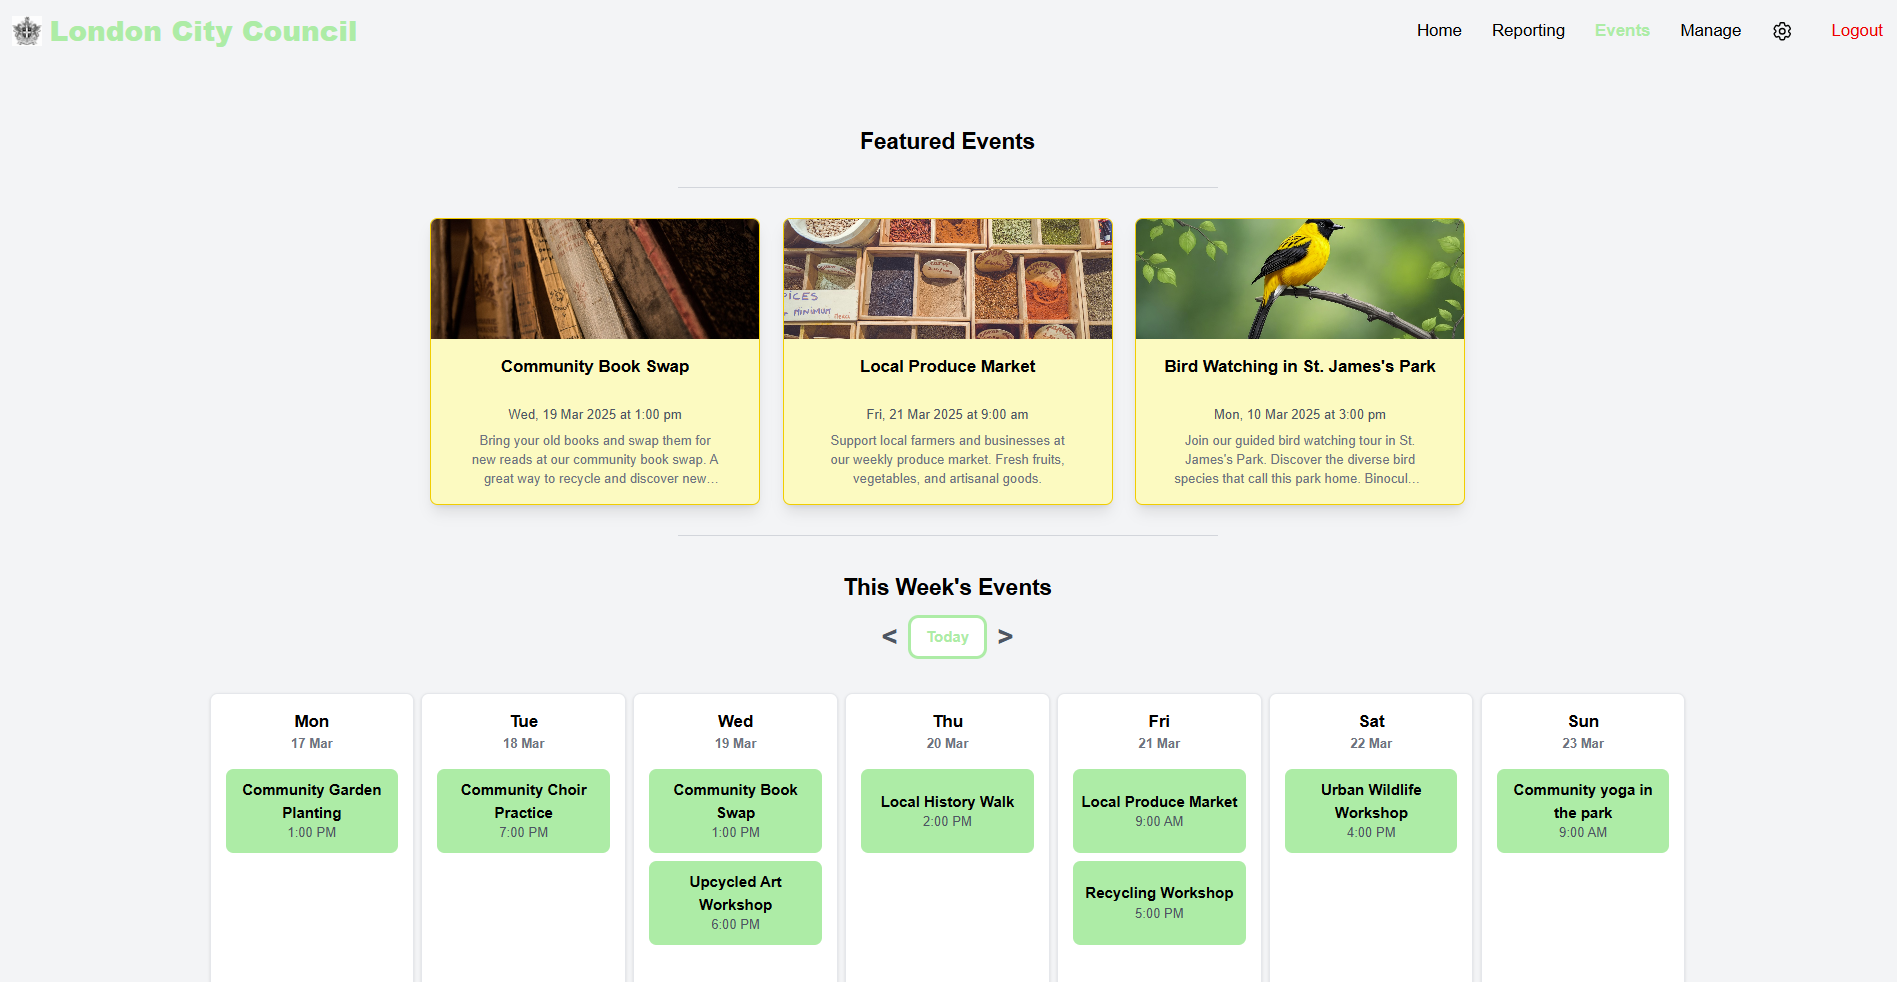
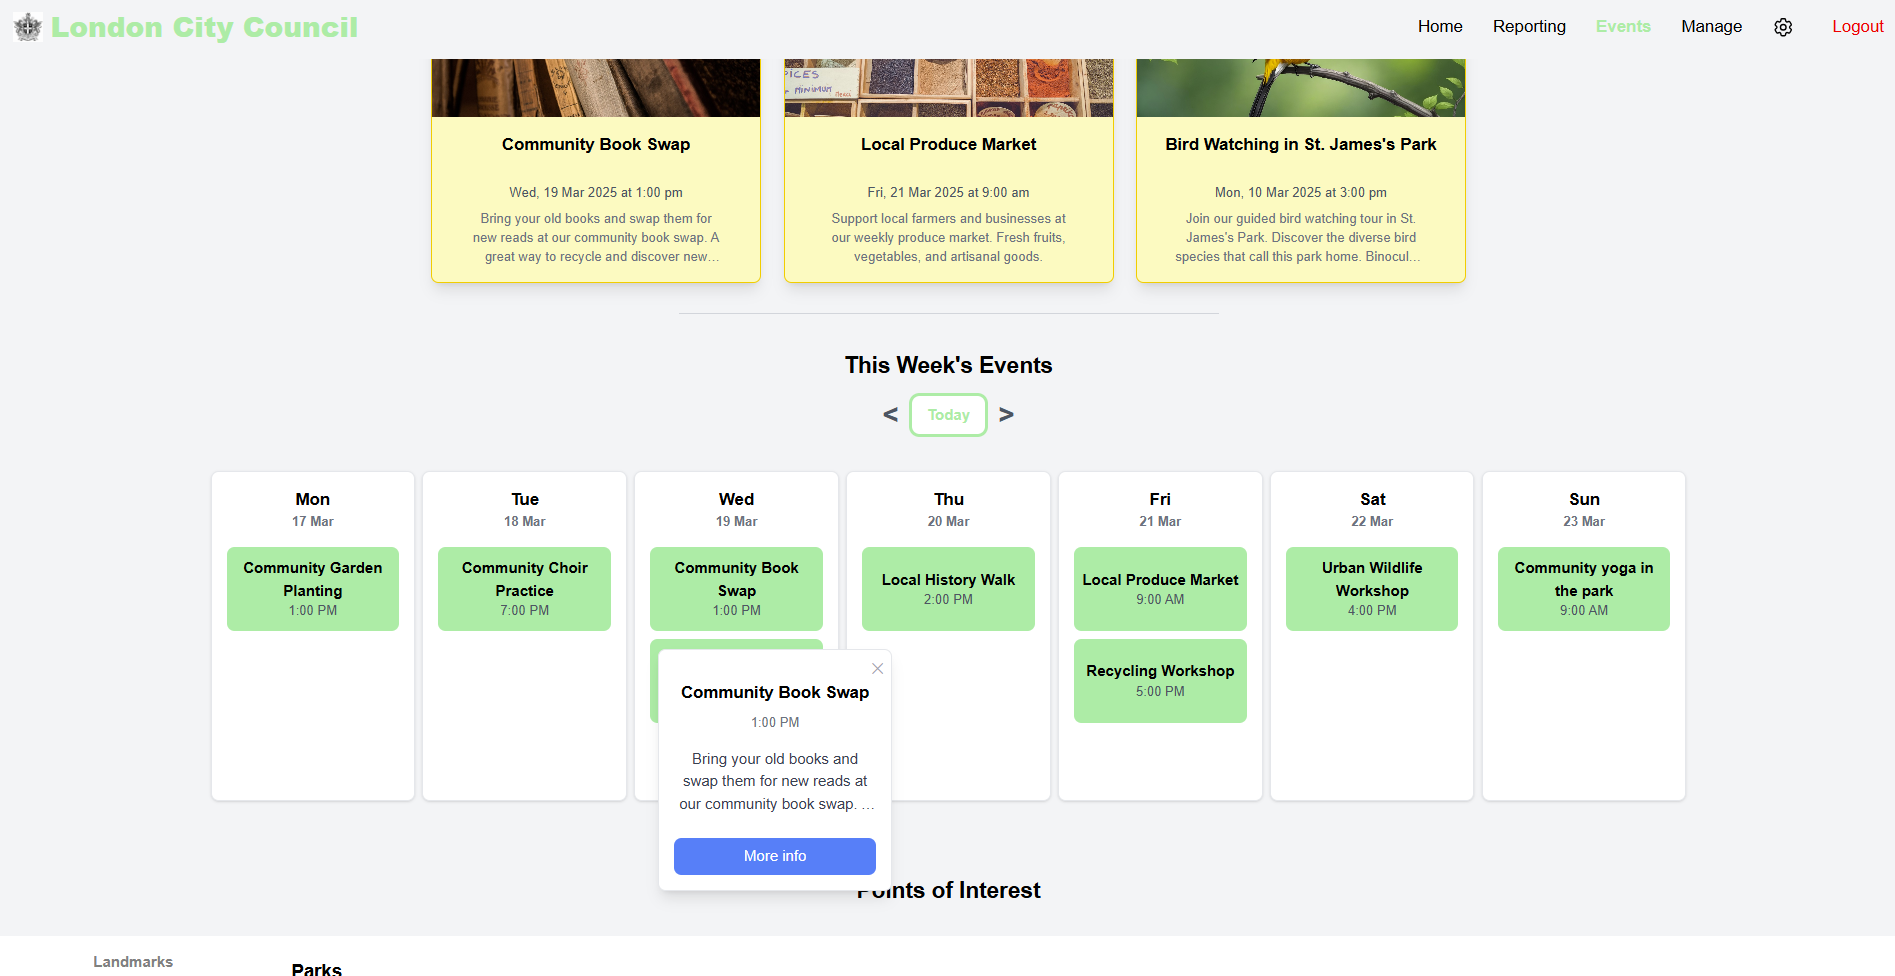
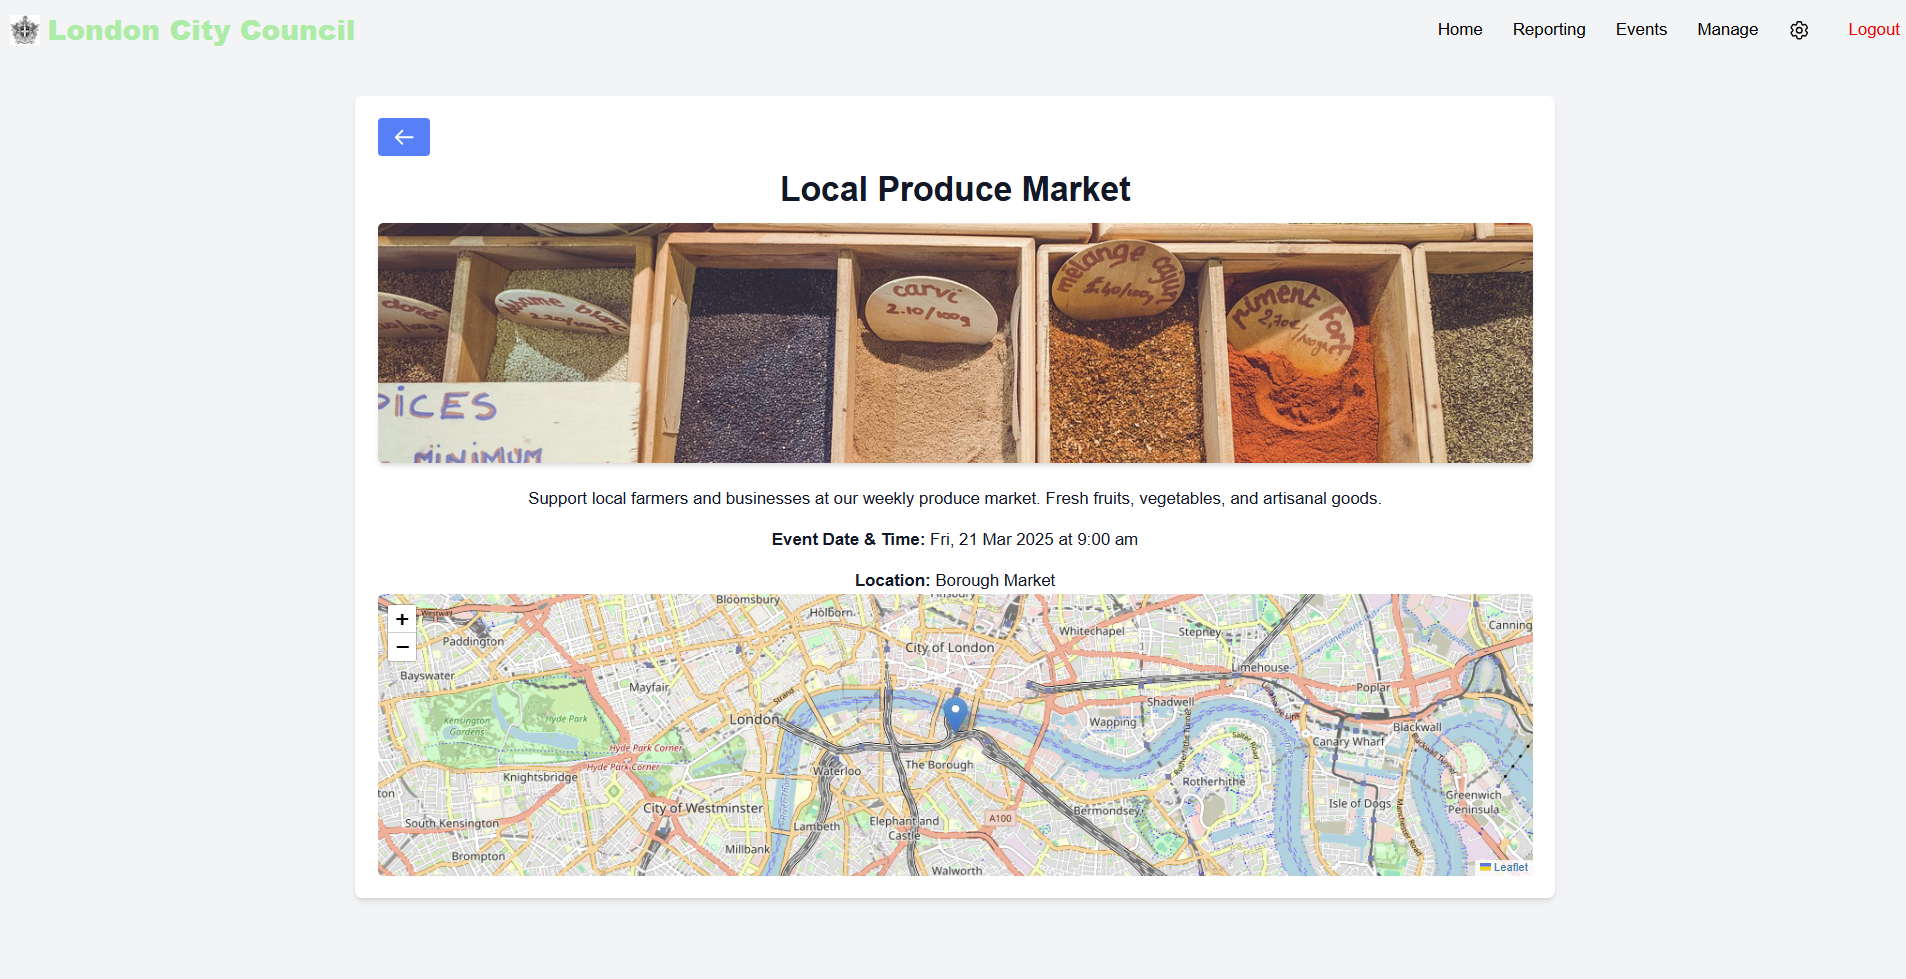
We also designed the page to be responsive so that it would look good on all screen sizes:

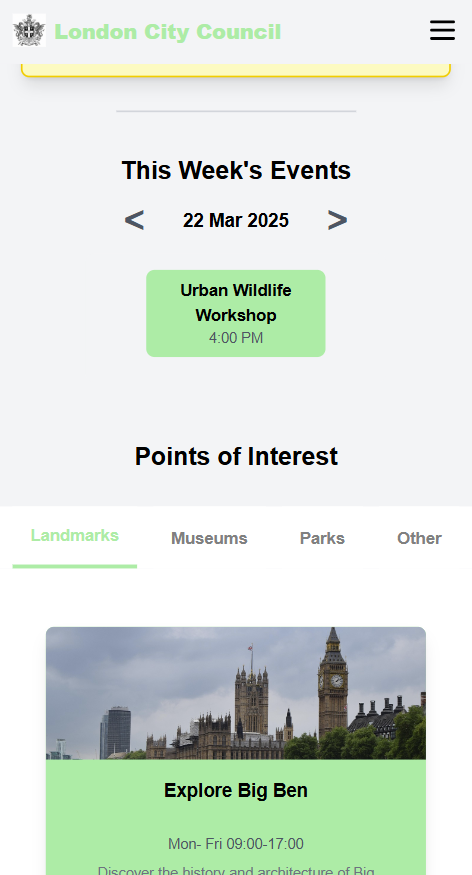
Content Management
When the content manager wants to create a new event, this is done on the DetailedEventPage.jsx. The default is new event is set to a scheduled event, and they can choose to create a point of interest instead though a dropdown menu.
The selection causes the form to change to show the fields that are relevant to the selected event type. For example, if the content manager selects a scheduled event, the form will show fields for the date and time of the event. If they select a point of interest, the form will show fields for the opening times and type of point of interest.
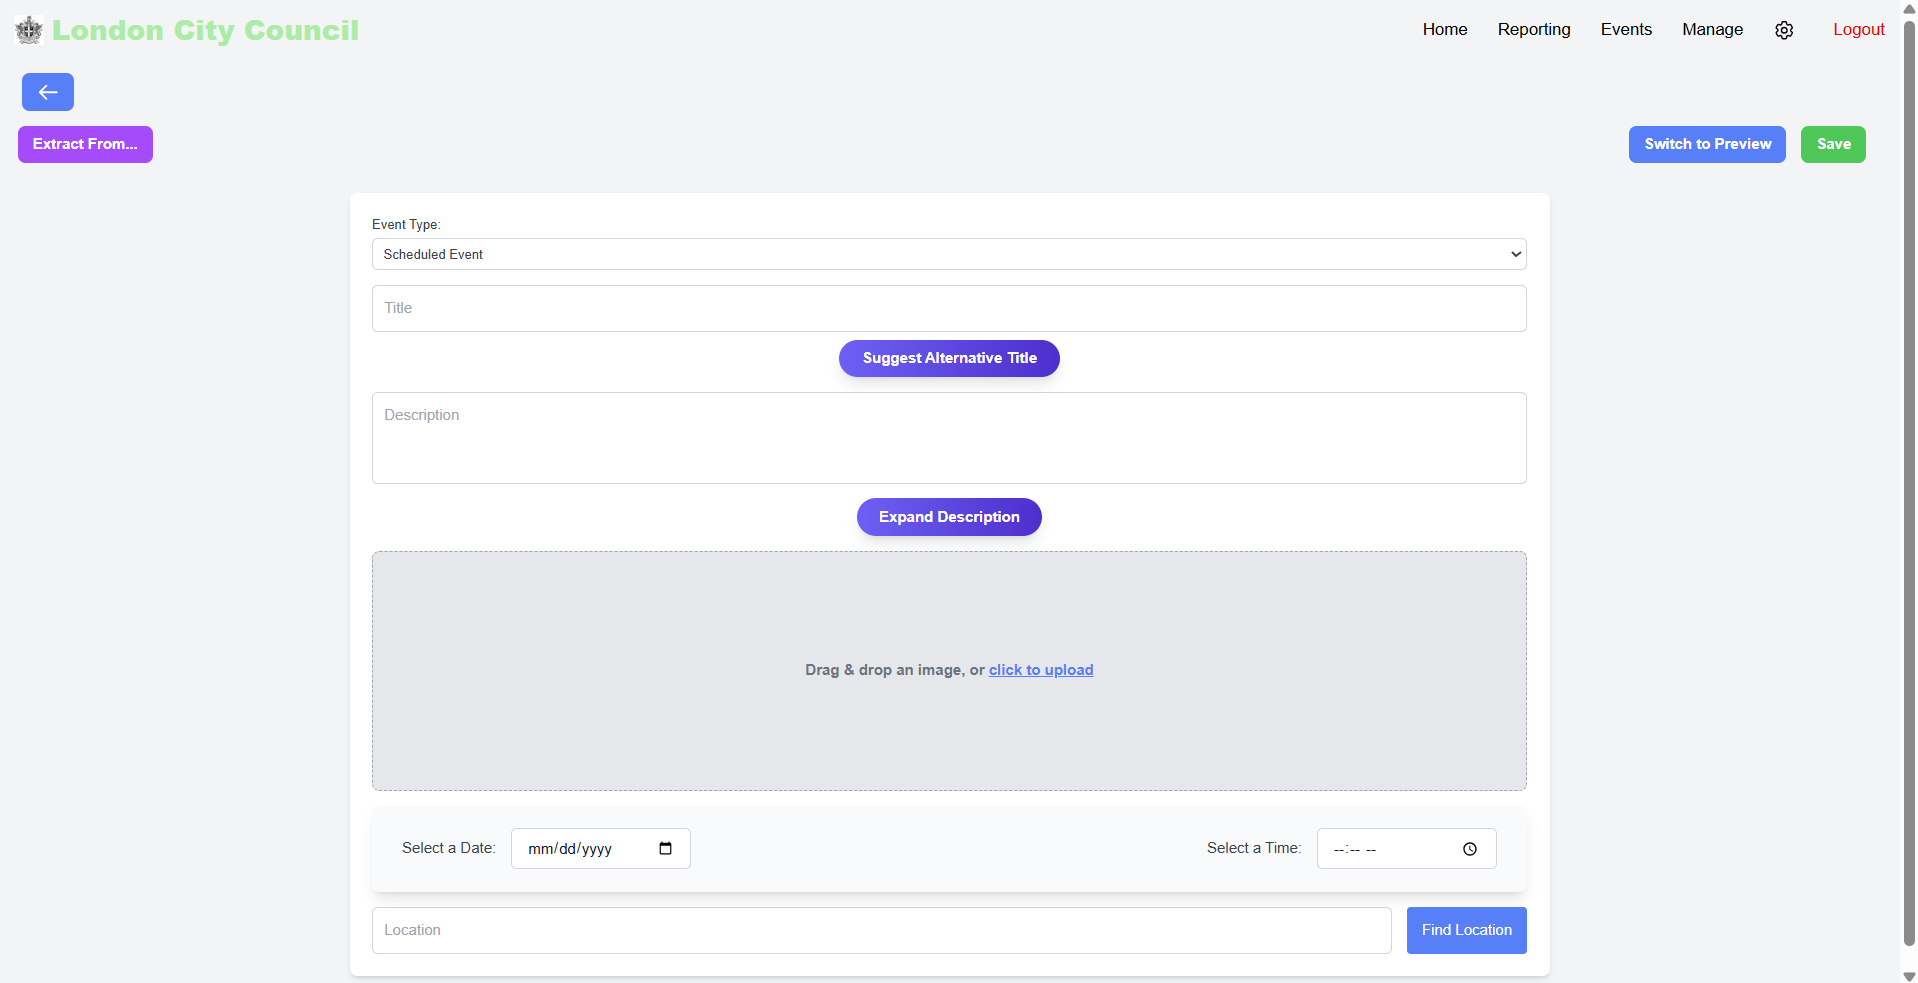
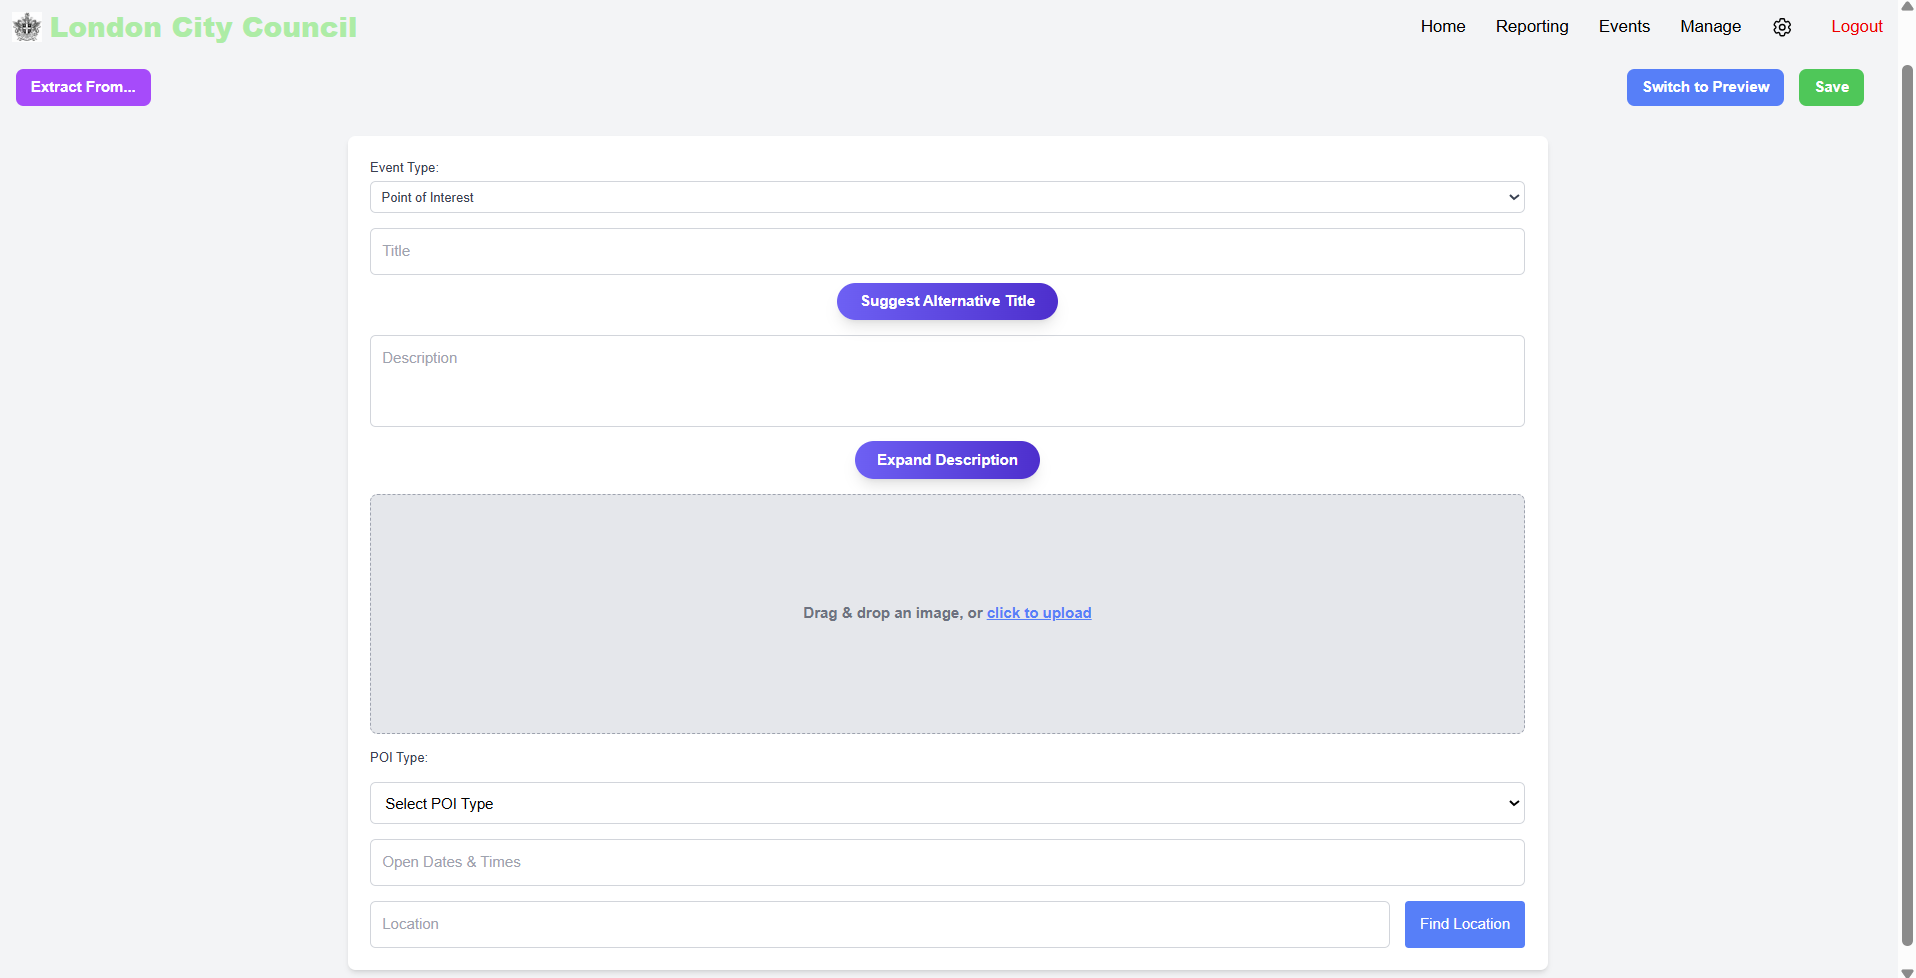
If they want to switch between the two types of events, even though they have already filled in some fields, they can do so by selecting the event type from the dropdown menu. The form will set the fields that are not relevant to the selected event type to null. This allows the content manager to easily switch between the two types of events without having to re-enter all the fields.
Expand Code
{eventId === NEW_EVENT_ID && (
    <label className="block text-sm font-medium text-gray-700">
    Event Type:
    <select
        value={eventType}
        onChange={(e) => {
        const newType = e.target.value;
        setEventType(newType);

        // Reset relevant fields when switching event types
        if (newType === "scheduled") {
            setDate("");
            setTime("");
            setPoiType("");
            setOpeningTimes("");
        } else if (newType === "point_of_interest") {
            setDate("");
            setTime("");
        }
        }}
        className="mt-1 w-full p-2 border border-gray-300 rounded-md focus:ring-indigo-500 focus:border-indigo-500"
    >
        <option value="scheduled">Scheduled Event</option>
        <option value="point_of_interest">Point of Interest</option>
    </select>
    </label>
)}
We added the ability to edit events which is done through the same DetailedEventPage.jsx. When the content manager clicks on an event, they are taken to that page where they can edit the event. The form is pre-filled with the event details and the content manager can make changes and save the event. They can also preview the event before saving it.
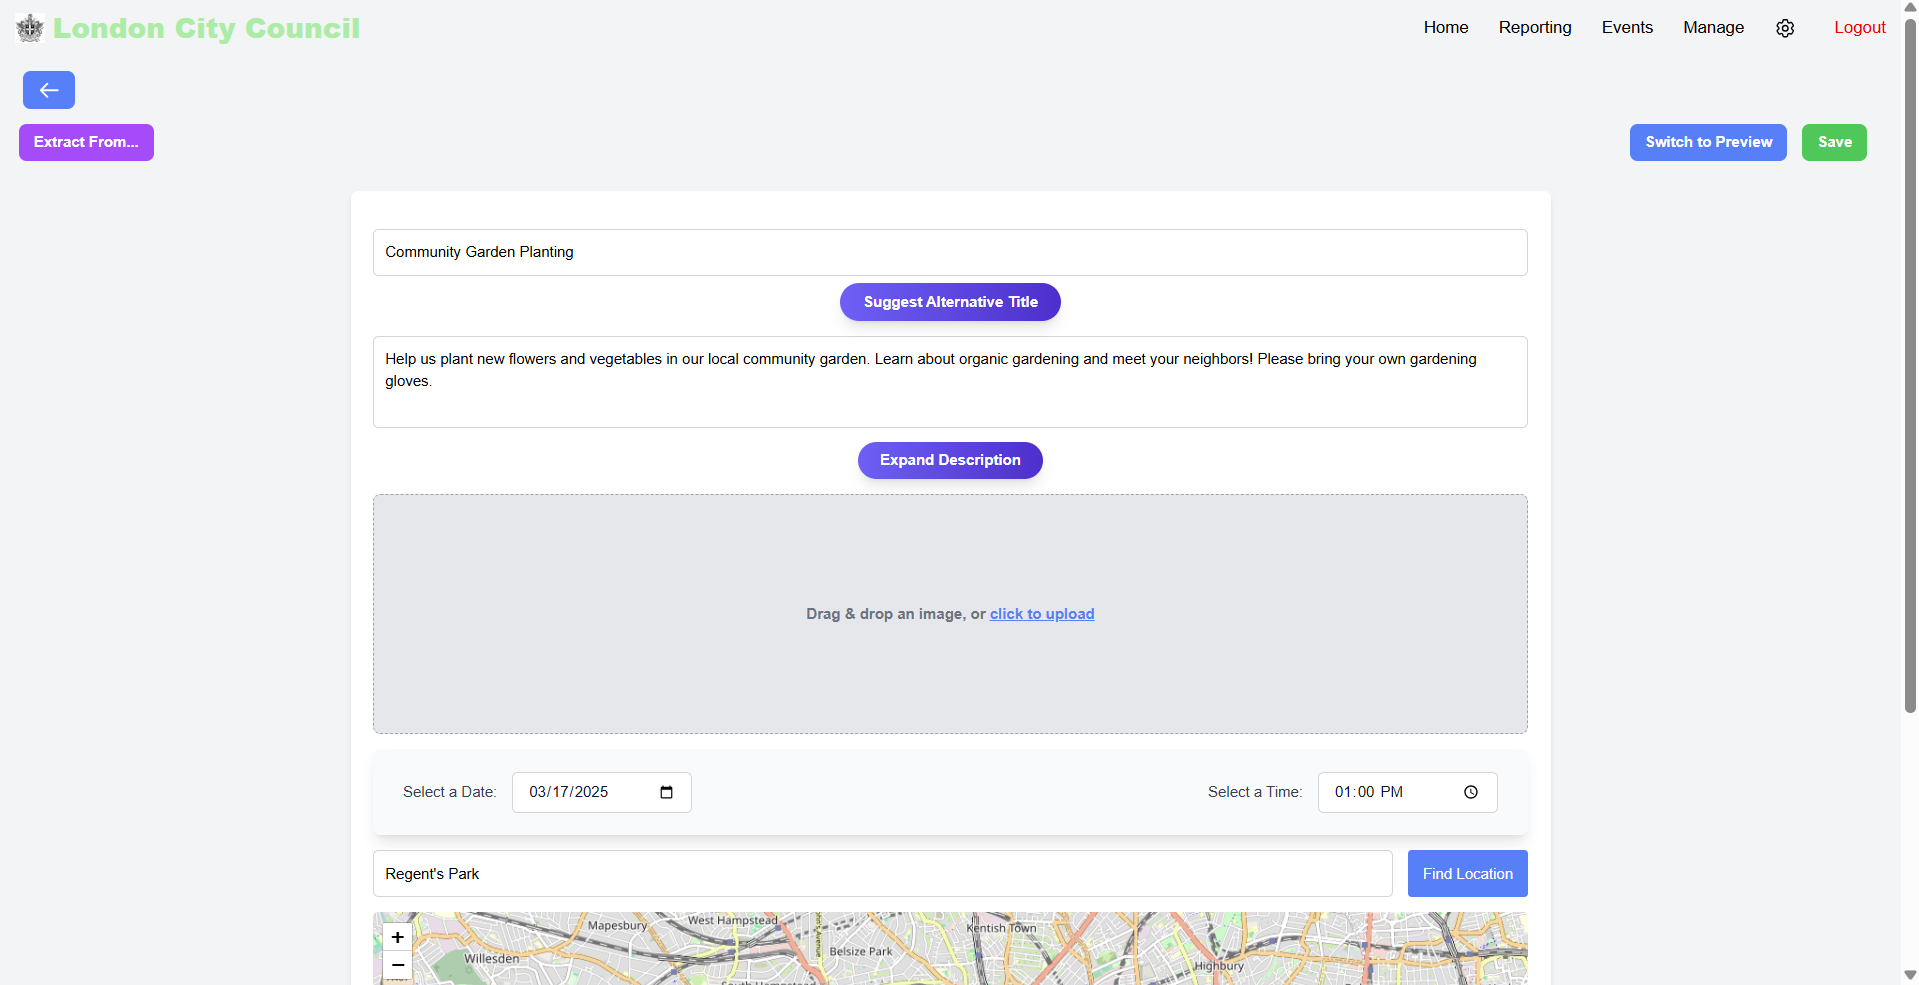

We also added a feature that allows content managers to type in the location of the event, and suggestions will be shown. This is done using Nominatim's search API. The content manager can then select the location from the suggestions and the longitude and latitude fields will be automatically filled in.
Expand Code
const fetchSuggestions = async (query) => {
if (!query) return;

try {
    const controller = new AbortController();
    const timeoutId = setTimeout(() => {
    controller.abort();
    alert("Location not found");
    }, 3000);

    const response = await fetch(
    `https://nominatim.openstreetmap.org/search?format=json&q=${query}`,
    { signal: controller.signal }
    );

    clearTimeout(timeoutId);

    if (!response.ok) {
    throw new Error(`HTTP error! Status: ${response.status}`);
    }}
}
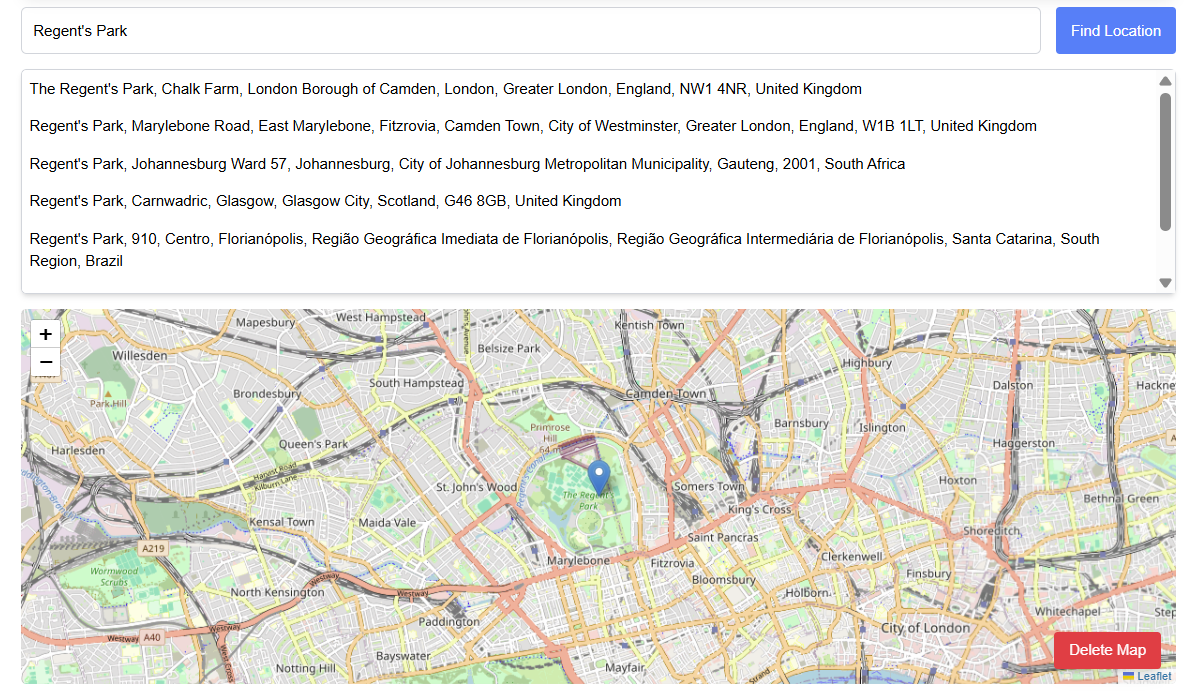
There are validation checks such as date and time fields only accepting valid dates and times. We also added validation checks to the frontend to ensure that the required fields are filled in before the event is saved. If the content manager tries to save an event without filling in the required fields, an error message will be displayed, and the fields that are missing will be highlighted in red.
An example of this is shown below:
Expand Code
<input
    type="text"
    value={location}
    onChange={(e) => {
    setLocation(e.target.value);
    }}
    placeholder="Location"
    className={`flex-1 p-3 border ${
    isFieldRequired("location")
        ? "border-red-500"
        : "border-gray-300"
    } rounded-md focus:ring-indigo-500 focus:border-indigo-500`}
/>
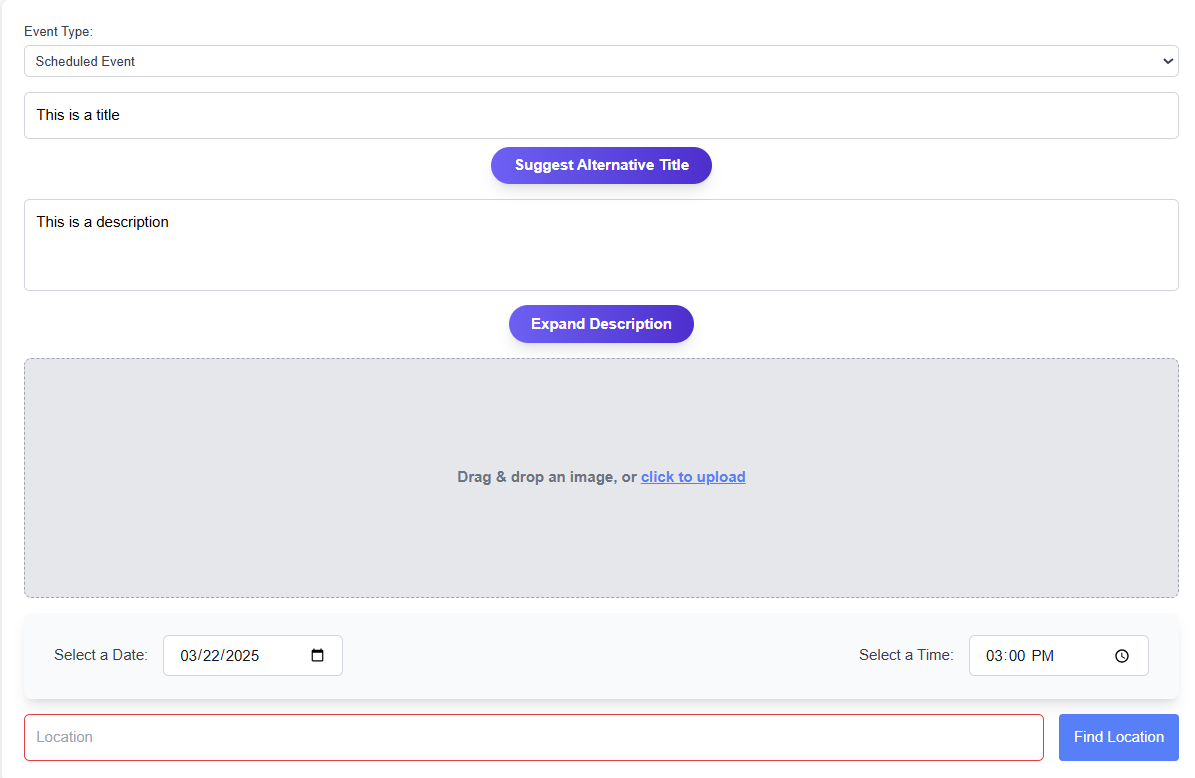
Content Management Page
The CMS allows users to select a category (e.g., Articles, Events, Reporting) to manage. The selected category displays data for that category and allows for CRUD operations on the data
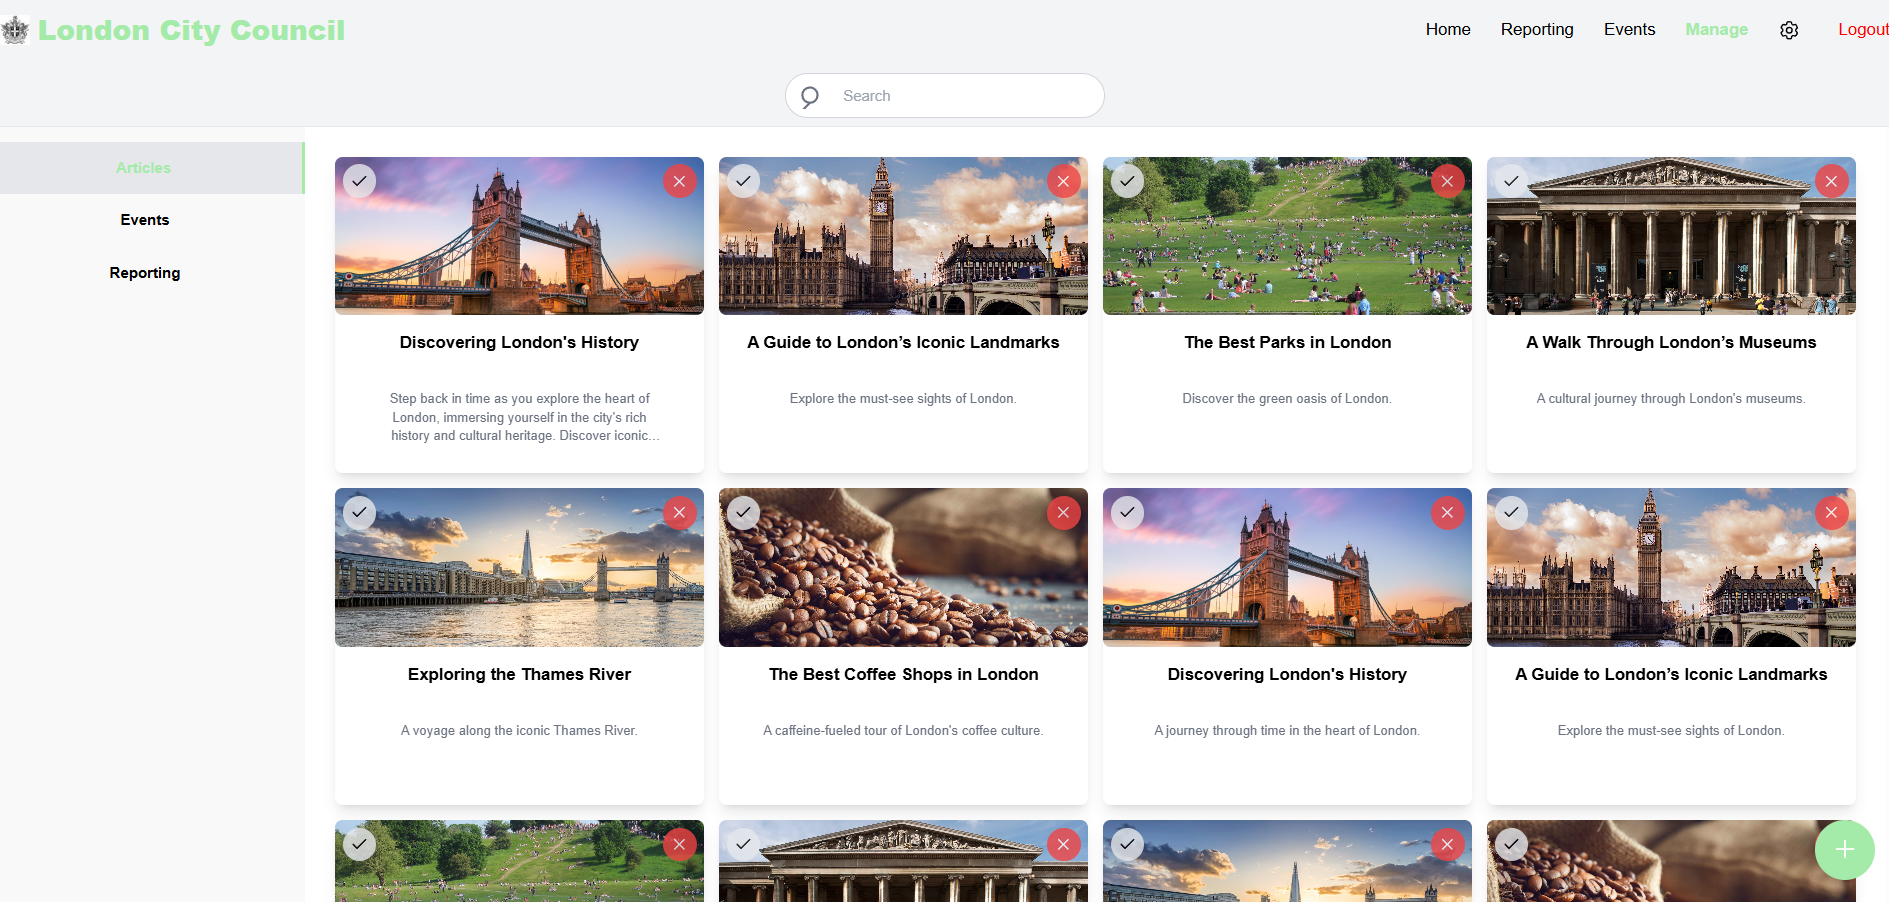
Frontend Styling
The frontend of the content management page is mainly designed in the ContentManagementPage.jsx component, however does contain features like the Header.jsx, SelectTopBar.jsx, and DefaultTopBar.jsx, which provide features such as a Header, Cards Selection, and navigation to content creation tools. The frontend for the CMS also consists of a sidebar which can be toggled between the three categories articles, events and reports
Below is a snippet of the styling of the CMS page in TailwindCSS
...

<div className="h-[calc(100vh-146px)] w-full">
  <Header />
  <div className="pt-20"></div>
  <div className="w-full h-full flex flex-col md:flex-row overflow-hidden relative">
    {/* Sidebar */}
    <div className="hidden md:block w-1/6 bg-[#f9f9f9] flex flex-col text-black shadow-lg">
      <ul className="space-y-2 py-4 flex flex-col h-full">
        {categories.map((category) => (
          <li
            key={category}
            onClick={() => handleCategoryClick(category)}
            className={`p-4 text-center font-semibold cursor-pointer transition-colors ${
              selectedCategory === category
                ? "bg-gray-200 border-r-4"
                : "text-gray-600 hover:bg-gray-200"
            }`}
          >
            {category}
          </li>
        ))}
      </ul>
    </div>
    {/* Main Content */}
    <div className="w-full md:w-5/6 h-full bg-white overflow-auto">
      {/* Content goes here */}
    </div>
  </div>
</div>

...
Frontend state management
The following examples are state variables which are defined in the CMS
const [selectedCategory, setSelectedCategory] = useState("Articles");
const [articles, setArticles] = useState([]);
const [events, setEvents] = useState([]);
...
selectedCategory Tracks the current selected category
articles stores the list of articles fetched from the backend
events stores the list of events fetched from the backend
The selectedCategory state is updated when a user selects a category
const handleCategoryClick = (category) => {
  setSelectedCategory(category);
  setSelectedCards([]); // Clear selected cards when switching categories
};
Fetching Data
The articles and events states are updated by fetching data from the backend
Frontend Code
The refreshData function fetches data for the selected category via axios
const refreshData = async () => {
  if (selectedCategory === "Articles") {
    axios
      .get(API_URL + "articles/", {
        headers: { Authorization: `Bearer ${token}` },
      })
      .then((response) => {
        setArticles(Array.isArray(response.data) ? response.data : []);
      })
      .catch((error) => {
        console.error("Error fetching articles:", error.response?.data);
        setArticles([]);
      });
  }
  if (selectedCategory === "Events") {
    axios
      .get(API_URL + "events/", {
        headers: { Authorization: `Bearer ${token}` },
      })
      .then((response) => {
        setEvents(response.data);
        updateStarredCards(response.data);
      })
      .catch((error) => {
        console.error("Error fetching events:", error.response?.data);
        setEvents([]);
      });
  }
};
Backend Code
The backend uses Django REST Framework , known as DRF to define viewsets for fetching data. Below is an example for fetching articles
from rest_framework import viewsets
from .models import Article
from .serializers import ArticleSerializer

class ArticleViewSet(viewsets.ModelViewSet):
    """
    Viewset for managing articles.
    """
    queryset = Article.objects.all()
    serializer_class = ArticleSerializer
The ArticleViewSet handles CRUD operations for the Article model
The queryset retrieves all articles and the ArticleSerializer and converts the data to JSON for the frontend
State Updates in the UI - Displaying the data
The selectedCategory state, which depends on the option the user has clicked, determines which category's data is displayed
<div className="block md:hidden w-full bg-[#f9f9f9] flex overflow-x-auto py-2 px-4 shadow-lg">
  {categories.map((category) => (
    <div
      key={category}
      onClick={() => handleCategoryClick(category)}
      className={`flex-shrink-0 px-4 py-2 mx-1 rounded cursor-pointer transition-colors ${
        selectedCategory === category ? "bg-gray-200 border-b-4" : "text-gray-600 hover:bg-gray-200"
      }`}
    >
      {category}
    </div>
  ))}
</div>
Detailed Articles Page
The content management page also contains dedicated pages to creating articles and events. For this example we will talk about the implementation of the Detailed Articles Page. This page is a subpage of the CMS which allows businesses to create articles which are then visible to normal users
The Articles Page can be accessed via either clicking on a existing article or when pressing the button to create a new one
Shown below is a snippet of code that is triggered when the create button is clicked whilst the articles category is selected on the Content Management Page
 const handleManualClicked = () => {
    if (selectedCategory === "Reporting") {
      navigate(`/reporting/`);
    } else {
      navigate(
        `/contentmanagementsystem/details/${selectedCategory.toLowerCase()}/${sampleData[selectedCategory].length - 1
        }`
      );
    }
  };
When an existing article is clicked, the following code is triggered, which uses the id of the article to navigate to the corresponding article page
  const handleCardClick = (index) => {
  navigate(
    `/contentmanagementsystem/details/${selectedCategory.toLowerCase()}/${index}`
  );
};
Frontend Styling
The current frontend implementation of the DetailedArticlesPage.jsx is as shown below.

The frontend for the DetailedArticlesPage.jsx is primarily designed using other components such as Editor.jsx , MainEditor.jsx, MainImage.jsx, TitleEditor.jsx.
Frontend State Management
The following state variables are defined in the DetailedArticlesPage.jsx.
const [title, setTitle] = useState("");
const [mainContent, setMainContent] = useState("");
const [author, setAuthor] = useState("");
const [description, setDescription] = useState("");
const [uploadedFiles, setUploadedFiles] = useState([]);
const [isEditing, setIsEditing] = useState(true);
const [errorMessage, setErrorMessage] = useState("");
const [isLoadingTitle, setIsLoadingTitle] = useState(false);
const [isLoadingMainContent, setIsLoadingMainContent] = useState(false);
const [isLoadingDescription, setIsLoadingDescription] = useState(false);
These variables are self-explanatory in the fact that they keep track of the content that is entered into the fields and manage UI states like edit/preview section.
When the DefaultArticlePage.jsx is triggered when clicking on a existing article, the page fetches its details from the backend using Axios and fills in the fields automatically.
useEffect(() => {
  if (articleId !== NEW_ARTICLE_ID) {
    setIsEditing(false);
    const token = localStorage.getItem("token");
    axios
      .get(API_URL + `articles/${articleId}/`, {
        headers: { Authorization: `Bearer ${token}` },
      })
      .then((response) => {
        const article = response.data;
        setTitle(article.title || "");
        setMainContent(article.content || "");
        setAuthor(article.author || "");
        setDescription(article.description || "");
        if (article.main_image) {
          setUploadedFiles([article.main_image]);
        }
      })
      .catch((error) => {
        console.error("Error fetching article:", error);
        setErrorMessage("Failed to fetch article data. Please try again.");
      });
  }
}, [articleId]);
The useEffect hook fetches the article data when the page loads and the response is used to populate the state variables.
When a new article is clicked the fields are blank by default.
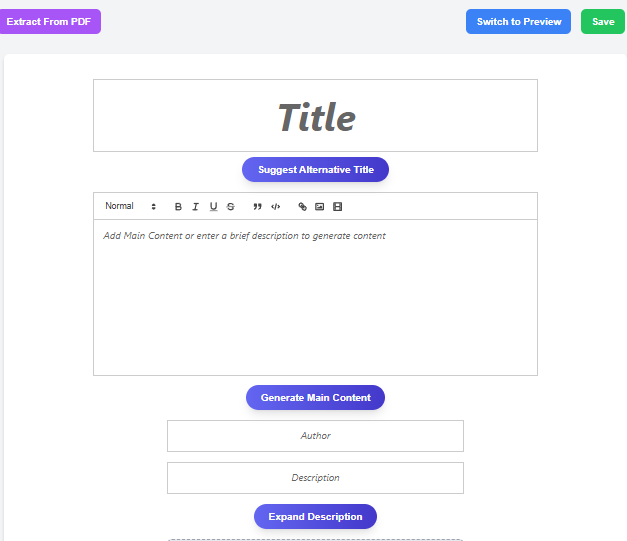
After edits are made and the user is ready to save, or switch to preview mode, changes are saved by sending a POST or PUT request to the backend using Axios.
const handleSave = async () => {
  const token = localStorage.getItem("token");
  const formData = new FormData();
  formData.append("title", title);
  formData.append("content", mainContent);
  formData.append("author", author);
  formData.append("description", description);
  if (uploadedFiles.length > 0 && typeof uploadedFiles[0] !== "string") {
    formData.append("main_image", uploadedFiles[0]);
  }
  try {
    if (articleId !== NEW_ARTICLE_ID) {
      await axios.put(API_URL + `articles/${articleId}/`, formData, {
        headers: {
          "Content-Type": "multipart/form-data",
          Authorization: `Bearer ${token}`,
        },
      });
      alert("Article updated successfully!");
    } else {
      await axios.post(API_URL + "articles/", formData, {
        headers: {
          "Content-Type": "multipart/form-data",
          Authorization: `Bearer ${token}`,
        },
      });
      alert("Article saved successfully!");
    }
  } catch (error) {
    console.error("Error saving or updating article:", error);
    setErrorMessage("Error saving or updating article. Please try again.");
  }
};
The handleSave sends the article data to the backend, using POST for new articles, and PUT for existing articles
Backend Implementation
The Article model defines the structure of an article in the database.
from django.db import models

class Article(models.Model):
    title = models.CharField(max_length=255)
    author = models.CharField(max_length=255, blank=True, null=True)
    description = models.TextField(blank=True, null=True)
    main_content = models.TextField(blank=True, null=True)
    main_image = models.ImageField(upload_to='articles/', blank=True, null=True)
    created_at = models.DateTimeField(auto_now_add=True)
    updated_at = models.DateTimeField(auto_now=True)

    def __str__(self):
        return self.title
As described before the ArticleSerializer converts the Article into JSON format for API responses and the ArticleViewSet handles API requests for articles.
CMS Generative AI Tools
The DetailedArticlesPage.jsx and DetailedEventsPage.jsx both feature generative AI tool such as Generate Alternative Title, Generate Main Content, as well as a Expand Description feature. The second two work by entering a prompt, and the LLM then generates content based it.
This is how the buttons look like as of our final build.
Frontend Implementation
The frontend implementation is defined entirely in their respective pages DetailedArticlesPage.jsx and DetailedEventsPage.jsx.
Here is a snippet of the styling for the Alternative Title button
<div className="mt-2 flex justify-center">
  <button
    onClick={handleSuggestAlternativeTitle}
    className="bg-gradient-to-r from-indigo-500 to-indigo-700 text-white font-bold py-2 px-6 rounded-full shadow-lg transform hover:scale-105 transition-all duration-300 flex items-center"
  >
    {isLoadingTitle && (
      <svg
        className="animate-spin h-5 w-5 mr-2 text-white"
        xmlns="http://www.w3.org/2000/svg"
        fill="none"
        viewBox="0 0 24 24"
      >
        <circle
          className="opacity-25"
          cx="12"
          cy="12"
          r="10"
          stroke="currentColor"
          strokeWidth="4"
        ></circle>
        <path
          className="opacity-75"
          fill="currentColor"
          d="M4 12a8 8 0 018-8V0C5.373 0 0 5.373 0 12h4z"
        ></path>
      </svg>
    )}
    {isLoadingTitle ? "Loading..." : "Suggest Alternative Title"}
  </button>
</div>
The Generate Main Content, as well as the Expand Description feature follow the same design.
AI Integration
The AI engine is accessed through the AIContext which is used in the DetailedArticlesPage.jsx and DetailedEventsPage.jsx components. The context provides the engine object which acts as an interface to interact with the AI model, by allowing to send prompts and receive responses from the AI model.
import { AIContext } from "../../context/AIContext";

// Access the AI engine from the context
const { engine } = useContext(AIContext);
In AIContext.jsx the model is initialised via the CreateWebWorkerMLCengine` function from the `@mlc-ai/web-llm library. This function creates the web worker that allows the AI model to run in the browser.
Here is a snippet of initialisation of the engine in AIContext.jsx
const initModel = async () => {
  try {
    const createdEngine = await CreateWebWorkerMLCEngine(
      new Worker(new URL(".././workers/worker.jsx", import.meta.url), {
        type: "module",
      }),
      modelToUse,
      { initProgressCallback }
    );
    setEngine(createdEngine);
  } catch (error) {
    console.error("Error while loading model:", error);
  }
};
Back to DetailedArticlesPage.jsx
When the Alternative Title button is clicked the following code is triggered, where the system prompt instructs the AI to generate a title. The current entered title is passed as a user query. The AI then generates a response, which is set as the new title
// Function to suggest an alternative, more appealing title
  const handleSuggestAlternativeTitle = async () => {
    if (!title) {
      alert("Please enter a title first.");
      return;
    }
    if (!engine) {
      alert("AI model is still loading. Please wait.");
      return;
    }
    setIsLoadingTitle(true);
    try {
      await engine.resetChat();
      const messages = [
        {
          role: "system",
          content:
            "Suggest an alternative title that is more appealing for the following title: , dont add any commentary , just generate one title maximum",
        },
        {
          role: "user",
          content: title,
        },
      ];
      let alternativeTitle = "";
      const stream = await engine.chat.completions.create({
        messages,
        temperature: 0.7,
        stream: true,
      });
      for await (const chunk of stream) {
        alternativeTitle += chunk.choices[0]?.delta.content || "";
      }
      setTitle(alternativeTitle);
      if (quillRefTitle.current) {
        quillRefTitle.current.setContents([{ insert: alternativeTitle }]);
      }
    } catch (error) {
      console.error("Error suggesting alternative title:", error);
    }
    setIsLoadingTitle(false);
  };
PDF Extraction
This section details how I implemented the Extract PDF functionality for the Community Impacts Web Portal, focusing on both the backend and frontend aspects. The goal was to enable users to upload PDF (and ICS) files, automatically extract key fields (such as title, date, time, description, location, etc.), and populate these fields in the application.
Backend Implementation
The backend is built using Django along with the Django REST framework to handle API requests. I created several functions to handle file uploads and data extraction:
-
File Upload and Extraction Endpoints
I implemented separate endpoints for PDF and ICS file uploads. When a user uploads a file, the endpoint saves it temporarily using Django’sFileSystemStorage. Depending on the file type and the selected mode (event or article), the corresponding extraction function is invoked.@csrf_exempt
def upload_pdf_and_extract_data(request, pdf_type):
"""
Handle PDF file upload and extract data based on the type (event or article).
"""
if request.method == 'POST' and request.FILES.get('pdf_file'):
try:
pdf_file = request.FILES['pdf_file']
fs = FileSystemStorage()
filename = fs.save(pdf_file.name, pdf_file)
pdf_path = fs.path(filename)
if pdf_type == 'event':
extracted_data = extract_event_data(pdf_path)
elif pdf_type == 'article':
extracted_data = extract_article_data(pdf_path)
else:
return JsonResponse({'error': 'Invalid pdf_type'}, status=400)
if os.path.exists(pdf_path):
os.remove(pdf_path)
return JsonResponse(extracted_data)
except (IOError, ValueError) as e:
return JsonResponse({'error': f"Error processing file: {str(e)}"}, status=500)
return JsonResponse({'error': 'Invalid request'}, status=400)For PDFs, the code utilises the PyMuPDF library (imported as
fitz) to open the document, extract text and images, and then run a series of regular expressions and spaCy-based NLP functions to extract data. The extraction functions are designed in a two-pass manner: first, they attempt to extract fields using structured extraction functions, which are implemented using regexes. Unstructured extraction functions, which are implemented using a combination of regexes and nlp, are then called for all fields in the second pass. By utilising this two-pass system, we enable our function to be able to extract data from all types of PDFs, and ensure that all fields have been extracted.For example, this is how the extract event details function has been implemented.
def extract_event_data(pdf_path, output_image_dir="media/extracted_images"):
"""
Extract event details and images from any type of PDF.
"""
data = {
    'title': '',
    'date_of_event': '',
    'time_of_event': '',
    'description': '',
    'location': '',
    'images': []
}

try:
    with fitz.open(pdf_path) as doc:
        full_text = ""
        for page in doc:
            full_text += page.get_text() + "\n"

            for img in page.get_images(full=True):
                base_image = doc.extract_image(img[0])
                image_name = f"event_image_page{page.number + 1}_{img[0]}.{base_image['ext']}"
                os.makedirs(output_image_dir, exist_ok=True)

                with open(os.path.join(output_image_dir, image_name), "wb") as f:
                    f.write(base_image["image"])

                data['images'].append(image_name)

    sentences = [sent.strip() for sent in full_text.split("\n") if sent.strip()]

    structured_fields = {
        'title': extract_structured_event_title(full_text),
        'date_of_event': extract_structured_date(full_text),
        'time_of_event': extract_structured_time(full_text),
        'description': extract_structured_event_description(full_text),
        'location': extract_structured_location(full_text)
    }

    for field, extractor in {
        'title': lambda: extract_unstructured_title(sentences),
        'date_of_event': lambda: extract_unstructured_date(full_text),
        'time_of_event': lambda: extract_unstructured_time(full_text),
        'description': lambda: extract_unstructured_description(full_text),
        'location': lambda: extract_unstructured_location(full_text, sentences)
    }.items():
        data[field] = structured_fields[field] or extractor()

except fitz.FileDataError as e:
    print(f"Error extracting event data: {e}")
    data = {key: '' for key in data}
    data['images'] = []

return data -
Extraction Functions: Structured vs Unstructured
The extraction functions can be split into two categories; Structured extraction functions and Unstructured extraction functions.-
Structured Functions
Structured extraction functions are used to extract information given by clear explicit headings (e.g. "Time:", "Location:" etc). All structured extraction functions use regexes to achieve this. For example, the following function shows how the time field is extracted from structured text:def extract_structured_time(text):
"""
Extract the time from structured text.
"""
match = re.search(r'Time:\s*([\d:]+(?:\s*[APap][Mm])?)', text)
return normalise_time(match.group(1).strip()) if match else ""This function uses a regex pattern that looks for the keyword "Time:" followed by digits and an optional AM/PM indicator. The captured time string is then passed to a helper function which is responsible for formatting the time to MM:HH format.
-
Unstructured Functions
Unstructured extraction functions are used to extract information from plain text, without the aid of any explicit headings. These functions utilise both regex matching and spaCy's NLP. For example, the following function shows how an author is extracted from unstructured text:def extract_unstructured_author(text):
"""
Extract the author from unstructured text.
"""
author_patterns = [
r'\b[Bb]y\s+([A-Z][a-z]+(?:\s+[A-Z][a-z]+)*)',
r'\b[Bb]yline:\s*([A-Z][a-z]+(?:\s+[A-Z][a-z]+)*)',
r'\b[Bb]y:\s*([A-Z][a-z]+(?:\s+[A-Z][a-z]+)*)',
r'\b[Aa]rticle\s+by\s+([A-Z][a-z]+(?:\s+[A-Z][a-z]+)*)',
r'\b[Rr]eported\s+by\s+([A-Z][a-z]+(?:\s+[A-Z][a-z]+)*)',
r'\b[Cc]ontributed\s+by\s+([A-Z][a-z]+(?:\s+[A-Z][a-z]+)*)',
r'\b[Ee]ditor:\s*([A-Z][a-z]+(?:\s+[A-Z][a-z]+)*)',
r'\b[Pp]ublished\s+by\s+([A-Z][a-z]+(?:\s+[A-Z][a-z]+)*)',
r'\b[Rr]eport\s+by\s+([A-Z][a-z]+(?:\s+[A-Z][a-z]+)*)',
r'\b[Ss]tory\s+by\s+([A-Z][a-z]+(?:\s+[A-Z][a-z]+)*)'
]
for pattern in author_patterns:
match = re.search(pattern, text)
if match:
return match.group(1).strip()
doc_nlp = nlp(text)
text_length = len(text)
for ent in doc_nlp.ents:
if ent.label_ == "PERSON":
pos = text.find(ent.text)
if pos < 300 or (text_length > 300 and pos > text_length - 300):
return ent.text.strip()
return ""This function first tries several regex patterns that look for common phrases such as “By”, “Byline:”, “Article by”, etc. If none of the regex patterns yield a result, it falls back to spaCy’s entity recognition. The NLP component processes the entire text and searches for entities labeled as “PERSON”. This dual approach helps in accurately extracting the author even when the text is not structured.
-
Frontend Implementation
The frontend is developed using React, and it is responsible for providing a user-friendly interface for file uploads, data extraction, and subsequent editing of the extracted content. Here’s how the main components work:
-
File Input and Triggering Extraction:
To allow users to select PDF and ICS files without cluttering the UI, I implemented hidden file input elements. These inputs are controlled using React’suseRefhook. When a user clicks the "Extract From PDF" button, for example, the corresponding hidden file input is triggered. The selected file is then stored in the component’s state usinguseState.// State for PDF and ICS extraction
const [pdfFile, setPdfFile] = useState(null);
const [icsFile, setIcsFile] = useState(null);
const [extractedData, setExtractedData] = useState(null);
const [isUploading, setIsUploading] = useState(false);
const [isDataExtracted, setIsDataExtracted] = useState(false);
// Refs for hidden file inputs
const hiddenFileInputPDF = useRef(null);
const hiddenFileInputICS = useRef(null);
// Function to trigger the hidden PDF file input
const handleExtractFromPDFClick = () => {
hiddenFileInputPDF.current.click();
setIsDataExtracted(false);
}; -
Uploading Files to the Backend:
Once a file is selected, an onChange handler captures the file and updates the state. Then, a separate function creates a FormData object to package the file and sends it to the backend via a fetch API call. The backend response, which contains the extracted data, is used to update the component’s state.// Handler to capture file selection
const handlePDFUpload = (event) => {
const file = event.target.files[0];
if (file && file.type === "application/pdf") {
setPdfFile(file);
}
};
// Function to upload the PDF file to the backend
const handleUploadPDF = async () => {
if (!pdfFile) {
return;
}
setIsUploading(true);
const formData = new FormData();
formData.append("pdf_file", pdfFile);
try {
const response = await fetch(API_URL + "api/upload/event/", {
method: "POST",
body: formData,
});
if (!response.ok) {
return;
}
const data = await response.json();
setExtractedData(data);
populateFields(data);
setIsDataExtracted(true);
} catch (error) {
console.error("Error uploading PDF:", error);
} finally {
setIsUploading(false);
}
}; -
Populating Extracted Data into the Form:
After the backend processes the uploaded file and returns the extracted data, the frontend updates the form fields accordingly. This is achieved by updating the relevant state variables. For instance, the populateFields function sets the event type, title, description, location, and converts the date format appropriately before updating the state. In addition, a useEffect hook ensures that if the component is in editing mode and new extracted data is available, the form fields are automatically updated:const populateFields = (data) => {
setEventType("scheduled");
setTitle(data.title || "");
setDescription(data.description || "");
setLocation(data.location || "");
if (data.date_of_event) {
// Convert date from dd/mm/yyyy to yyyy-mm-dd format for the date picker
const [day, month, year] = data.date_of_event.split("/");
const formattedDate = `${year}-${month}-${day}`;
setDate(formattedDate);
}
if (data.time_of_event) {
setTime(data.time_of_event);
}
if (data.images && data.images.length > 0) {
setUploadedFiles(data.images);
}
};
useEffect(() => {
if (isEditing && extractedData) {
populateFields(extractedData);
}
}, [isEditing, extractedData]);
Authentication
We have implemented an authentication mechanism to our application using the Django user authentication framework [1] and JSON Web Token (JWT) authentication.
Backend
The accounts app in the backend folder is responsible for user authentication.
Most endpoints such as submitting reports, fetching articles etc. have added access tokens for many endpoints for enhanced security. This means users logging in are enforced.
A note about passwords: "By default, Django uses the PBKDF2 algorithm with a SHA256 hash, a password stretching mechanism recommended by NIST. This should be sufficient for most users: it’s quite secure, requiring massive amounts of computing time to break" [1].
Registration
The SignUpView class provides a POST endpoint at /signup/. Given a set of valid user details (verified by the UserSerializer class), it creates a user and returns the details. The response is a 400 error if the data was not a valid user.
class SignUpView(APIView):
    """
    View to handle user sign-up.
    Allows users to create an account by providing username, email, and password.
    """
    permission_classes = [AllowAny]

    def post(self, request):
        """
        Handle POST requests for user sign-up.
        Validates the incoming data and creates a new user if the data is valid.
        """
        serializer = UserSerializer(data=request.data)
        if serializer.is_valid():
            user = serializer.save()
            return Response({
                "username": user.username,
                "email": user.email,
                "is_superuser": user.is_superuser
            }, status=201)
        return Response(serializer.errors, status=400)
Login
The LoginView class is responsible for handling user login.
Given a request, the LoginView post function creates a UserLoginSerializer to validate the username and password.
    def validate(self, attrs):
        """
        Validate the user's credentials and generate JWT tokens if valid.
        """
        user = User.objects.filter(username=attrs['username']).first()
        if user and user.check_password(attrs['password']):
            refresh = RefreshToken.for_user(user)
            return {
                'refresh': str(refresh),
                'access': str(refresh.access_token),
            }
        raise serializers.ValidationError("Invalid credentials")
If the credentials are valid, a JWT refresh and access token are generated.
Given the returned data, the LoginView returns the data in the correct format, or raises a 400 error.
    def post(self, request):
        """
        Handle POST requests for user login.
        Validates the user's credentials and returns authentication tokens if valid.
        """
        serializer = UserLoginSerializer(data=request.data)
        if serializer.is_valid():
            user = User.objects.get(username=request.data['username'])
            return Response({
                "refresh": serializer.validated_data['refresh'],
                "access": serializer.validated_data['access'],
                "user": {
                    "username": user.username,
                    "email": user.email,
                    "is_superuser": user.is_superuser
                }
            }, status=200)
        return Response(serializer.errors, status=400)
Business Account
Our site differentiates between business and normal user accounts. This is because business accounts should have elevated privileges. We use the super_user framework for Django to achieve this.
A post_save signal is connected to the User model so that a new User being added to the database means that this signal is fired.
If the new user is the first in the database, then it is made a superuser and staff.
The function make_first_user_superuser checks if the newly created user is the first user in the database (User.objects.count() == 1).
If it's the first user, the function sets the user as a superuser (is_superuser = True) and staff (is_staff = True), then saves the user again.
This ensures that the first user in the system has full administrative privileges.
@receiver(post_save, sender=User)
def make_first_user_superuser(sender, instance, created, **kwargs):  # pylint: disable=W0613

    if created and User.objects.count() == 1:
        instance.is_superuser = True
        instance.is_staff = True
        instance.save()
        print("First user is now a superuser.")
Frontend
The frontend utilises the backend endpoints to register and authenticate users. Here is how we've implemented this.
Sign-Up
The sign-up page (SignUp.jsx) is where a new account can be created.
A key feature is that we have robust password requirements, the password is not allowed to be sent if it does not meet the minimum requirements.
// Validate password and return multiple errors at once
  const validatePassword = (password) => {
    const errors = [];

    if (password.length < 8) {
      errors.push("Password must be at least 8 characters long.");
    }
    if (!/[A-Z]/.test(password)) {
      errors.push("Password must contain at least one uppercase letter.");
    }
    if (!/[a-z]/.test(password)) {
      errors.push("Password must contain at least one lowercase letter.");
    }
    if (!/\d/.test(password)) {
      errors.push("Password must contain at least one number.");
    }
    if (!/[!@#$%^&*(),.?":{}|<>]/.test(password)) {
      errors.push("Password must contain at least one special character.");
    }

    return errors;
  };
Upon pressing submit, the backend receives a request at /api/auth/signup.
Log in
The login page is for logging into an already made account. It allows users to toggle the visibility of their password, displays an error message if login fails, and provides a link to create a new account if not done so already.
The useAuth context is used to check if the user is authenticated when login is successful, and automatically checks whenever the page is navigated to, so that unnecessary logins are removed.
AuthContext + Protected Routes
Our AuthContext.jsx handles authentication for the frontend. The login function stores a JWT token in local storage to use across the app.
To enforce authentication for the whole app, we implemented ProtectedRoutes.jsx to protect parts of the site, requiring a login before you can access them. Only with a valid JWT token is the user allowed to the main application.
Expand Code
    // Login function - stores token and fetches user data
    const login = async (token) => {
        localStorage.setItem('token', token);
        try {
            const response = await axios.get(`${API_URL}api/auth/user/`, {
                headers: { Authorization: `Bearer ${token}` }
            });
            console.log("User Data After Login:", response.data);
            setAuth({
                isAuthenticated: true,
                token,
                user: response.data,  //
            });
        } catch (error) {
            console.error("Failed to fetch user data", error);
        }
    };
    // Logout function - clears token and user info
    const logout = () => {
        localStorage.removeItem('token');
        setAuth({ isAuthenticated: false, token: null, user: null });
    };
import React from "react";
import { Navigate, Outlet } from "react-router-dom";
import { useAuth } from "../../context/AuthContext";

const ProtectedRoute = () => {
    const { auth } = useAuth(); // Get authentication status from context

    // If not authenticated, redirect to login page
    if (!auth.isAuthenticated) {
        return <Navigate to="/login" replace />;
    }

    // If authenticated, render the child routes
    return <Outlet />;
};

export default ProtectedRoute;
  return (
    <div style={{ fontFamily: font }}>
      <AuthProvider>
        <CompanyProvider>
          <AIProvider>
            <Router>
              <div className="bg-gray-100 text-black min-h-screen">
                <Routes>
                  {/* Public Routes */}
                  <Route path="/signup" element={<SignUp />} />
                  <Route path="/login" element={<Login />} />

                  {/* Protected Routes */}
                  <Route element={<ProtectedRoute />}>
                    <Route path="/" element={<HomePage />} />
                    <Route path="/events" element={<EventsPage />} />
                    <Route
                      path="/contentmanagementsystem"
                      element={<ContentManagementSystem />}
                    />
                    <Route
                      path="/articles/:articleId"
                      element={<DetailedArticlePageView />}
                    />
                    <Route
                      path="/contentmanagementsystem/details/articles/:articleId"
                      element={<DetailedArticlePage />}
                    />
                    <Route
                      path="/events/:eventId"
                      element={<DetailedEventPageView />}
                    />
                    <Route
                      path="/contentmanagementsystem/details/events/:eventId"
                      element={<DetailedEventPage />}
                    />
                    <Route path="/reporting" element={<ReportsPage />} />
                    <Route
                      path="/miscellaneous"
                      element={<MiscellaneousSection />}
                    />
                  </Route>
                </Routes>
              </div>
            </Router>
          </AIProvider>
        </CompanyProvider>
      </AuthProvider>
    </div>
  );
};
Business account differentiation
Business account differentiation is implemented in the Header.jsx component. By using the AuthContext, we can check if a user is a business account, and dynamically show the manage and miscellaneous sections if they are.
...
 {auth.user?.is_superuser && (
            <div className="flex">
              <Link
                to="/contentmanagementsystem"
                style={{
                  color: isActive("/contentmanagementsystem") ? main_color : "black",
                  fontWeight: isActive("/contentmanagementsystem") ? "bold" : "normal",
                  transition: "color 0.3s, transform 0.3s",
                }}
                className="ml-8 text-lg hover:scale-110 duration-500"
                onMouseEnter={(e) => (e.target.style.color = main_color)}
                onMouseLeave={(e) => {
                  if (!isActive("/contentmanagementsystem"))
                    e.target.style.color = "black";
                }}
              >
                Manage
              </Link>
...
Database Connection
Overview
Our backend and frontend are linked through HTTP requests. To prevent hard-coding the URL in our frontend, we've used JavaScript environment variables [2].
const API_URL = import.meta.env.VITE_API_URL;
The environment variable (.env) should be created in the frontend folder, as specified in the read me.
VITE_API_URL=http://127.0.0.1:8000/
Finally, any component that needs to interact with the backend can do so using axios and the API_URL.
 ...
 axios
      .get(API_URL + `events/scheduled/`)
      .then((response) => {
        const event = response.data;
        setEvents(event);
        setLoading(false);
      })
      .catch((error) => {
        console.error("Error fetching event:", error);
        setLoading(false);
      });
...
References
[1] Django Software Foundation, "Authentication in Django," Django Documentation, 2025. [Online]. Available: https://docs.djangoproject.com/en/5.1/topics/auth/. [Accessed March 2025].
[2] Import Meta, "Introduction to Import Meta Environment," Import Meta Documentation, 2025. [Online]. Available: https://import-meta-env.org/guide/getting-started/introduction.html. [Accessed March 2025].
[3] WebLLM, "Getting Started with WebLLM," WebLLM Documentation, 2025. [Online]. Available: https://webllm.mlc.ai/docs/user/get_started.html. [Accessed March 2025].
[4] WebLLM, "WebLLM Overview," WebLLM Documentation, 2025. [Online]. Available: https://webllm.mlc.ai/. [Accessed March 2025].
[5] Mozilla, "Using Web Workers," MDN Web Docs, 2025. [Online]. Available: https://developer.mozilla.org/en-US/docs/Web/API/Web_Workers_API/Using_web_workers. [Accessed March 2025].