Getting Started
1. Setting up the Engduino:
To be able to use the Engduino (and any Arduino board in general), we are going to need to install the following programs:
- Arduino IDE at least version 1.0.6
- Python version 2.7.9 (or any 2.7 version)
- node.js
- TouchDevelop local (to do that run a command prompt from the folder where you intend to keep your programs and type: “ npm install -g http://aka.ms/touchdevelop.tgz “ to install TouchDevelop local and then when you want to run it just type “ touchdevelop”)
Note: Always run TouchDevelop from the folder where you want to keep your programs
2. Creating a blank Engduino script:
Touchdevelop has pre-defined scripts for Engduino programs, meaning that you only have to write the normal TouchDevelop code and the platform will automatically compile it as C++ to be able to run on the Engduino.
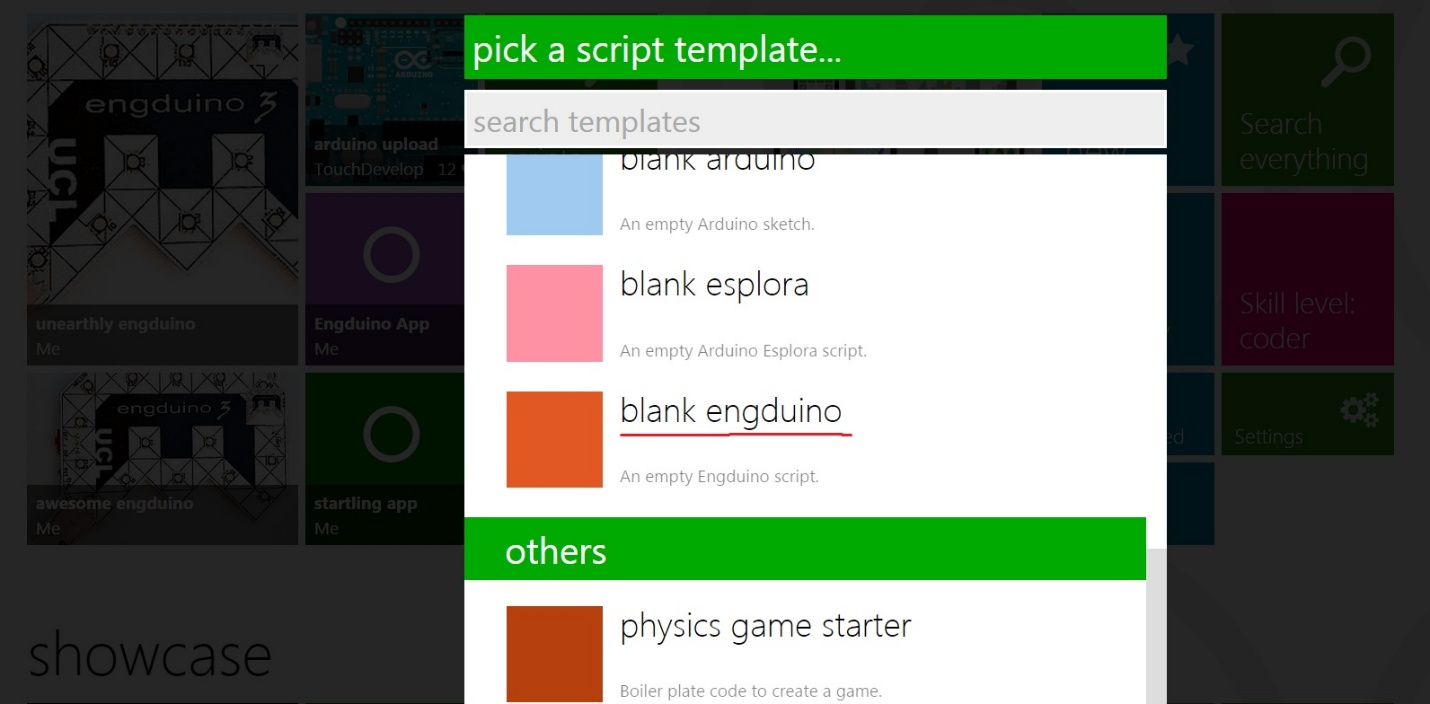
To start creating an Engduino program click on Create Script and then Blank Engduino.
Now we will see that our script has 4 basic functions: main, loop, setup and variables.
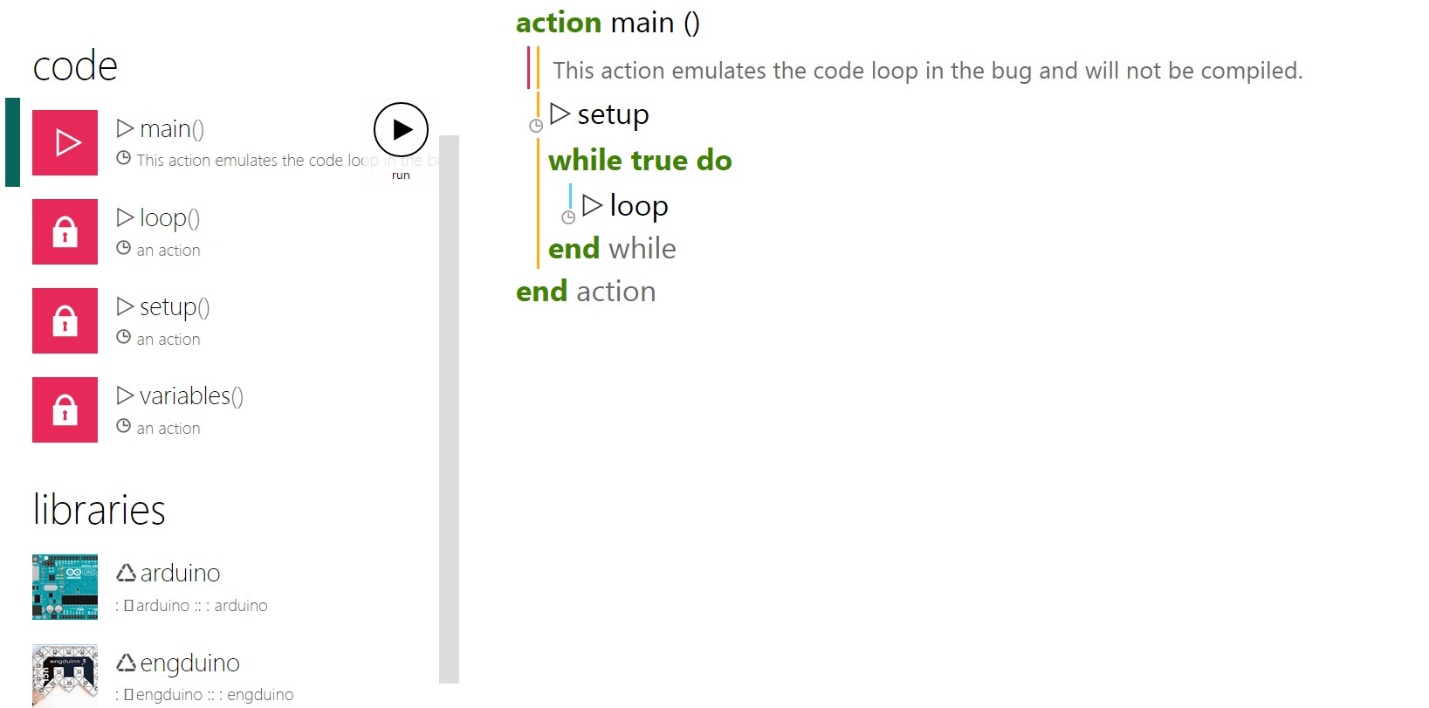
The main function contains the entire program (including the other functions). Here, after setup, we can add code which will only be run once (for example if we want the Engduino to only blink once).
The loop function is where the “action” takes place. Everything we write there will be run continuously as long as the Engduino is turned on.
The setup function automatically implements the Engduino library which contains all the functions we are going to use so we don’t have to change anything there.
In the variables section we can define global variables to be used across the entire program but for our exercises we aren’t going to need them to again we don’t have to change that section.
3. Writing the Engduino program:
As I mentioned earlier, we are going to write our code inside the loop function. By default, it already contains a demo program which blinks the LEDs. Since we want to write our own programs, we are going to delete those lines.
Throughout these experiments we are going to concentrate on taking measurements from sensors, so now we are going to learn how to use those sensors.
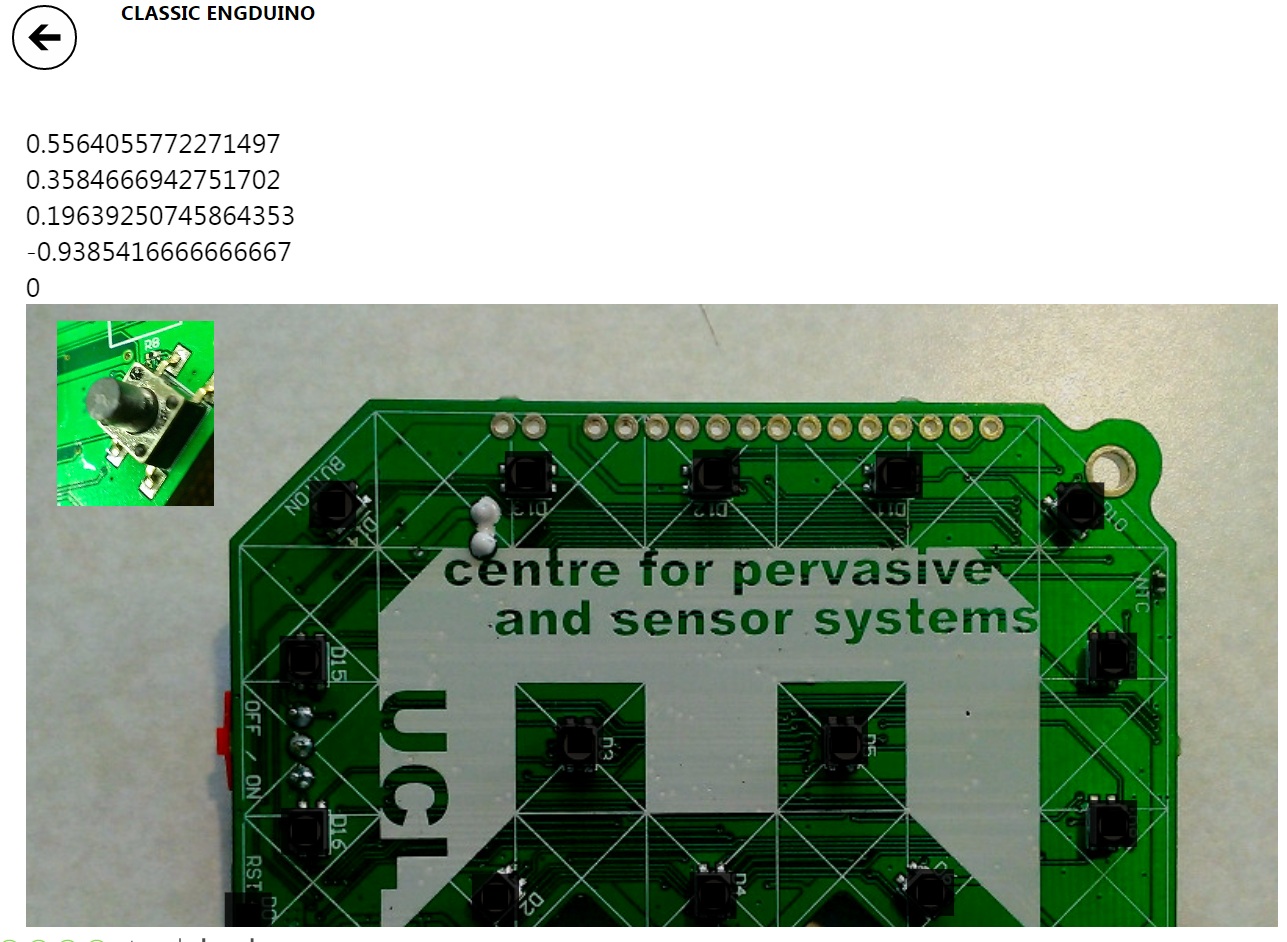
TouchDevelop can use 2 of the Engduino’s sensors: the accelerometer and the temperature sensor. The accelerometer can measure the acceleration in all 3 directions: x, y and z and the value is measured relative to the gravitational acceleration g. The temperature sensor can read the board’s temperature in degrees Kelvin.
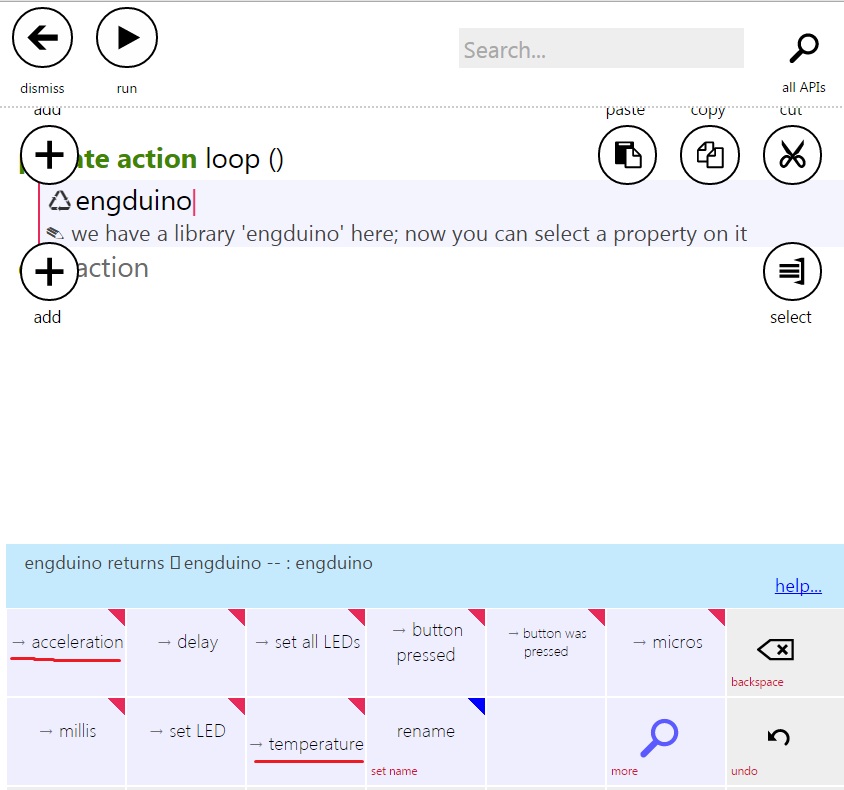
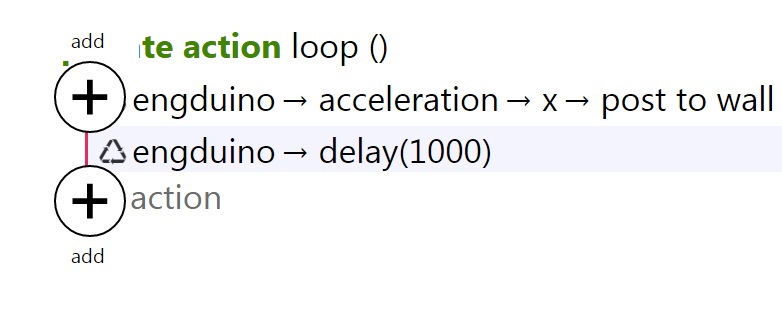
To get readings from those sensors, inside the loop function we click on “Engduino” and then either on temperature to directly get the value or on acceleration and then on the direction we want to get the readings from.
Either way, now we have 2 options: either click on “store in var” to store the value in a variable in case we want to use it throughout the program or click on “post to wall” to display the value directly. Since this is contained within a loop, the values will be measured and displayed continuously in real-time. But because of that, the values will be displayed too fast for us to follow them so we might want to set a delay between the sensor readings. To do that, on a new line right after we took the readings we click on Engduino, then on delay and we set the number to 1000 (delay is in milliseconds so that means 1 second).
For this example I clicked on Engduino, then on acceleration, selected the horizontal direction x and posted the value to the wall with a delay between readings of 1 second.
4. Testing the program:
To test our program we go back to the script’s main page where we will see 2 buttons: “arduino upload” and “serial monitor”. Arduino upload allows you to upload your code to any Arduino board connected to your computer (including the Engduino) and the Serial Monitor works like a normal console and it allows you to see what you decide to display on the wall.
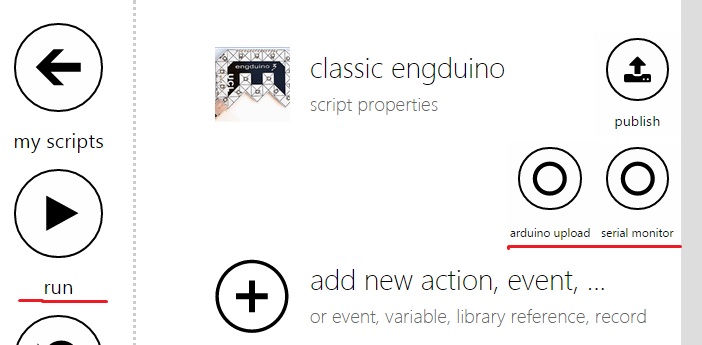
But for now it is enough to click on “run” to see a model of the Engduino and the values displayed by our measurements.