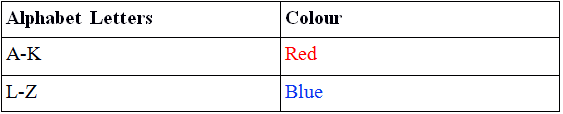
TouchDevelop allows us to change the colour of specific LEDs to red or blue. In this tutorial, we're going to be using these 2 colours to transmit a message using Morse code. Here are the letters that correspond to each colour:
Each letter will need a unique pattern to transmit a message using Morse code. There are 16 LEDs available on the Engduino so we are going to be lighting up different patterns of LEDs to transmit letters and messages using Morse code. Here are the patterns that correspond to each letter:
Morse Code Patterns
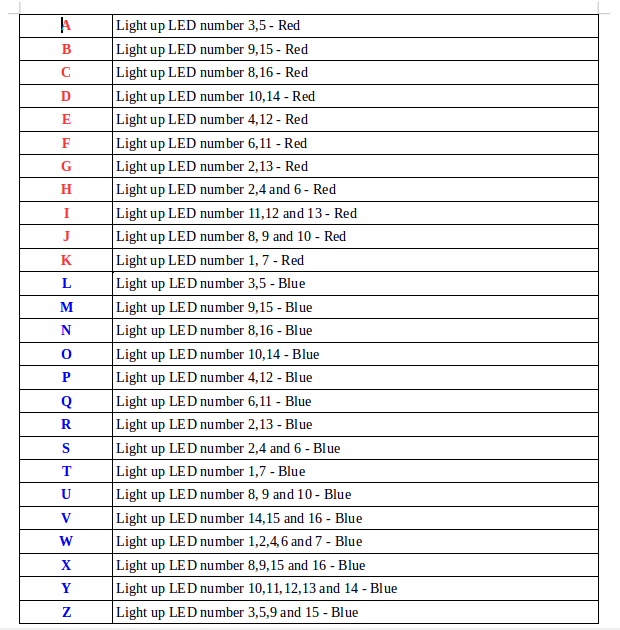
I designed the Morse code table so that letters that occur more frequently in a word require less LEDs to light up. For example the letter 'A' only requires 2 LEDs to transmit the letter whereas the letter 'Z', which occurs much less than the letter 'A' in a word, requires 4 LEDs to transmit the letter.
In this tutorial, we are going to transmit the letter 'A' by flashing the 3rd and 5th LED red.
The very first thing we have to do before actually doing any coding is to select the correct template. Select the 'black engduino' template and name it something appropriate such as “Engduino Morse Code”:
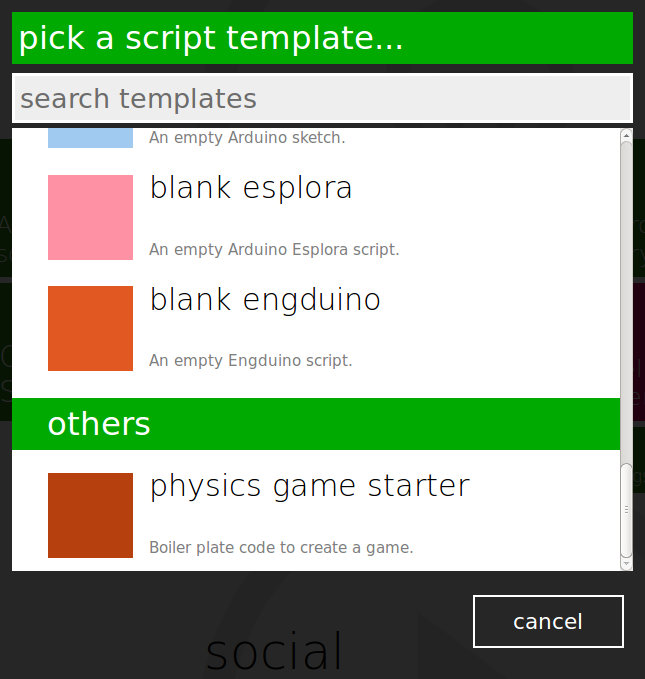
After selecting the 'blank engduino' template, you should get a blank screen that has the main body.
Steps
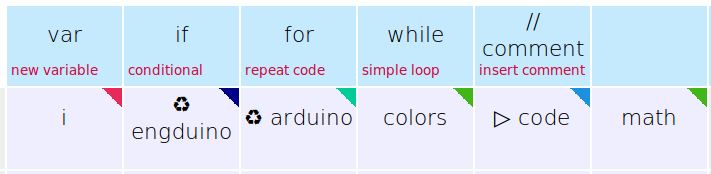
1. In the main body, add a new line under setup and you should get a menu like the one above. Create a for loop by clicking the 'for' button from the menu
2. Set the maximum value of your for loop to 3 to make each LED flash 3 times (the loop will be executed 3 times)
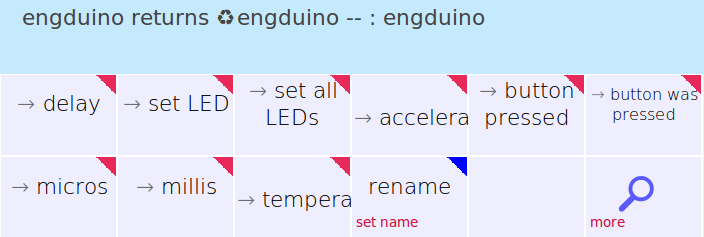
3. In the for loop you have made, add a new line and click on the 'engduino' button. Then click on '→ set LED'. TouchDevelop will automatically select a random LED and a colour once you click on this button. However, for letter 'A', we want to light up the 3rd and the 5th LED specifically. For us to do this, click on the number and change it to 3 and change the colour from random to red.
4. Repeat the same process for the 5th LED light – add a new line, click on the 'engduino' button then select '→ set LED' and change the LED number to 5 and the colour from random to red
5. After completing the steps above, add a new line in your for loop and click on the 'engduino' button then select '→ delay'. This is the amount of time a single LED will be lit for in milliseconds. Set the value of delay to 500.
6. To make the LEDs flash, we have to switch them on and off. So add a new line in your for loop and click on the 'engduino' button then select '→ set all LEDs' and set the colour to black. This will switch off all the LEDs.
7. Lastly, we want to switch off all the LEDs for a certain amount of time so add a new line in your for loop, click on the 'engduino' button then select '→ delay' and set the value of delay to 200.
Example walkthrough
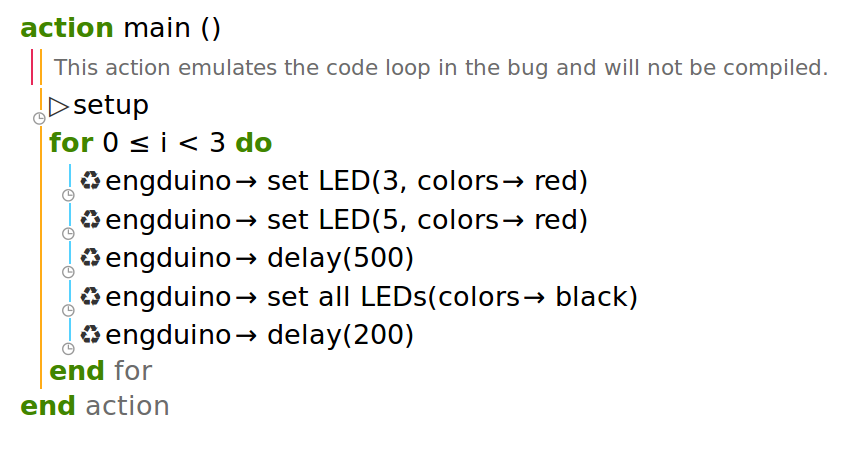
The example code for letter 'A' looks like this:
After you type in the code above, do the following:
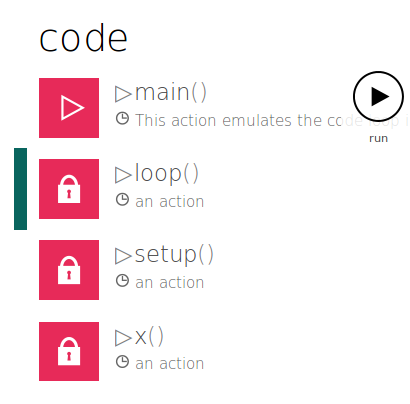
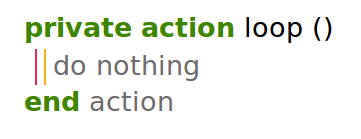
Click on 'loop' from the side menu. You should see something like this:
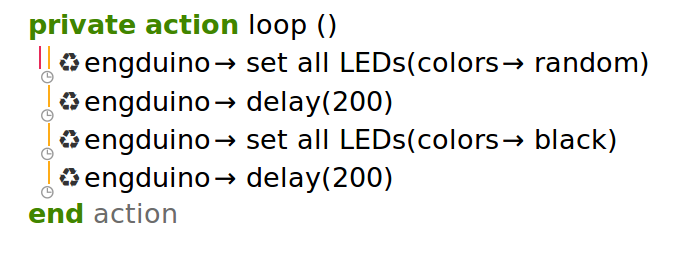
Delete all the code written automatically by Touchdevelop. In the end, your private action loop should look like this:
After you do all the steps above, compile and run the code and you should see something like this:
Task
Now that we have learned how to transmit a letter using Morse code, try displaying the message “UCL” on your engduino. (Hint: You are going to need as many for loops as the number of letters in the word “UCL” - so 3 for loops)
If you are struggling, have a look at the following link:
http://tdev.ly/ukblc