Implementation
This is how we handled the large process of managing all of the MotionInput teams and ensuring they were able to deliver.

As can be seen from our final templates, there is a standard quality maintained among every MFC, with the alignment and placement of names, sections and information buttons for simple readability. By separating the options into sections it is easier to focus on the sections that are relevant to you as a user.
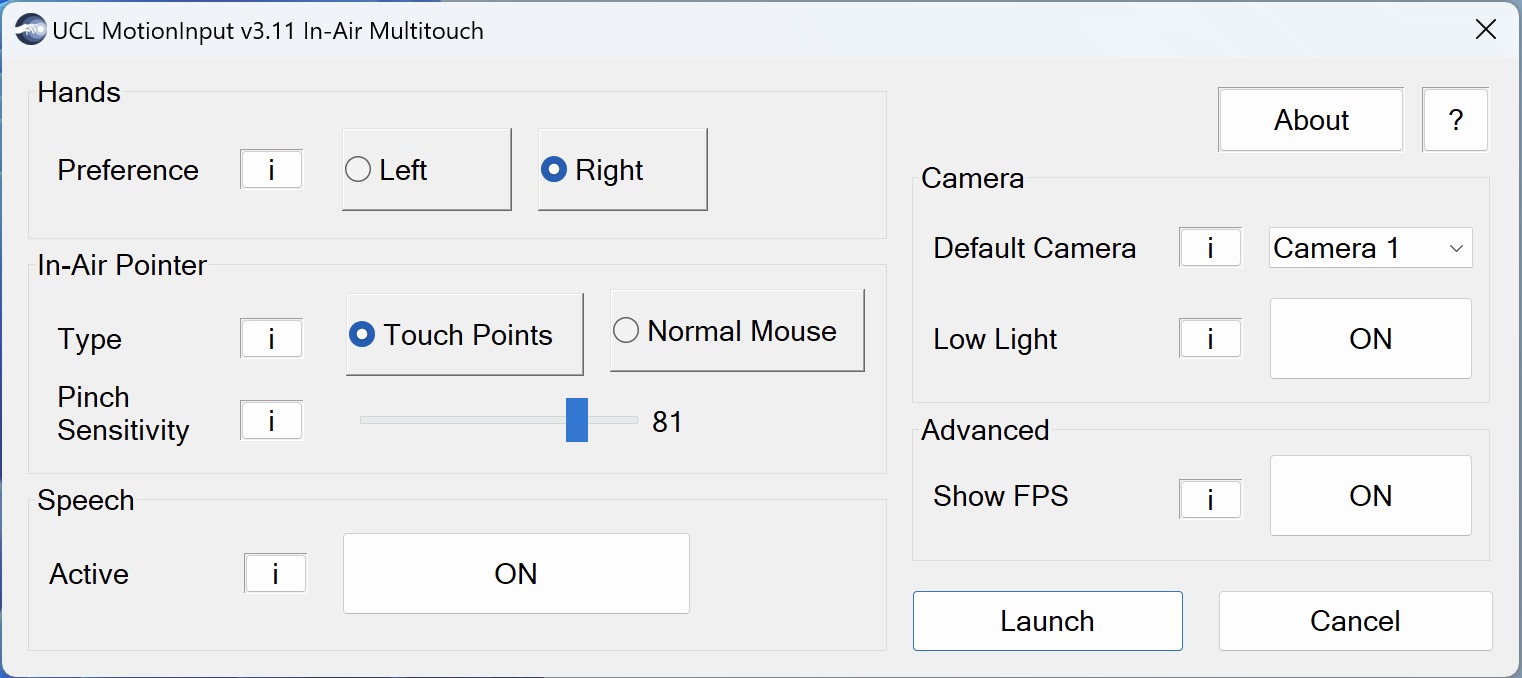
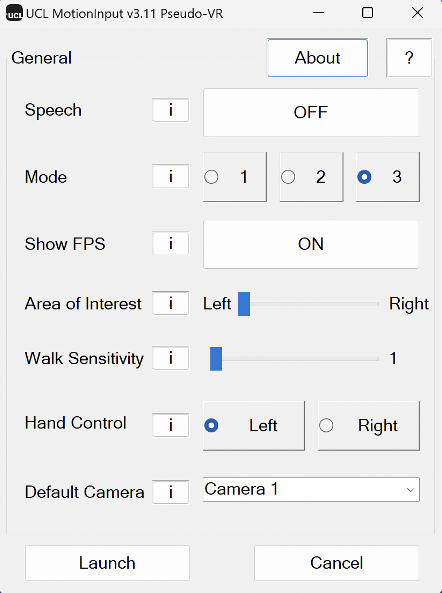
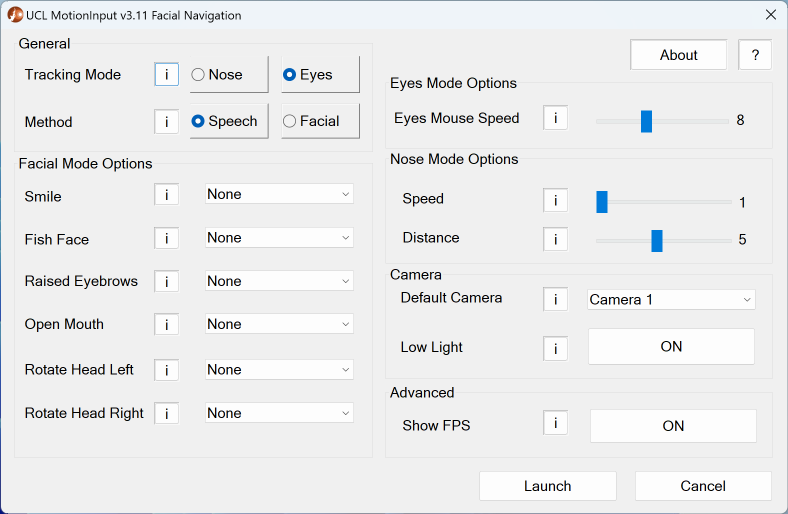
The process of using the frontend GUIs to interact with MotionInput must be as streamlined as possible hence all these iterations however that was not our only area of focus. Ensuring that the teams of MotionInput v3.2 are able to adapt the backend of the MFCs to their needs is important so guiding them through the steps with one to one tutorials was a necessary step.
To further explain the backend functionality, the MFC is designed to allow each button and slider to manipulate information that can be stored and sent to a config file. By manipulating this JSON file you can change the settings and functionality of MotionInput. This means all the settings of MotionInput have to pass through and be stored in JSON files, this can be limiting in the sense that the values are only updated at launch time. Figuring out how to best work around these restrictions was a large part of our job.
The process runs as follows,
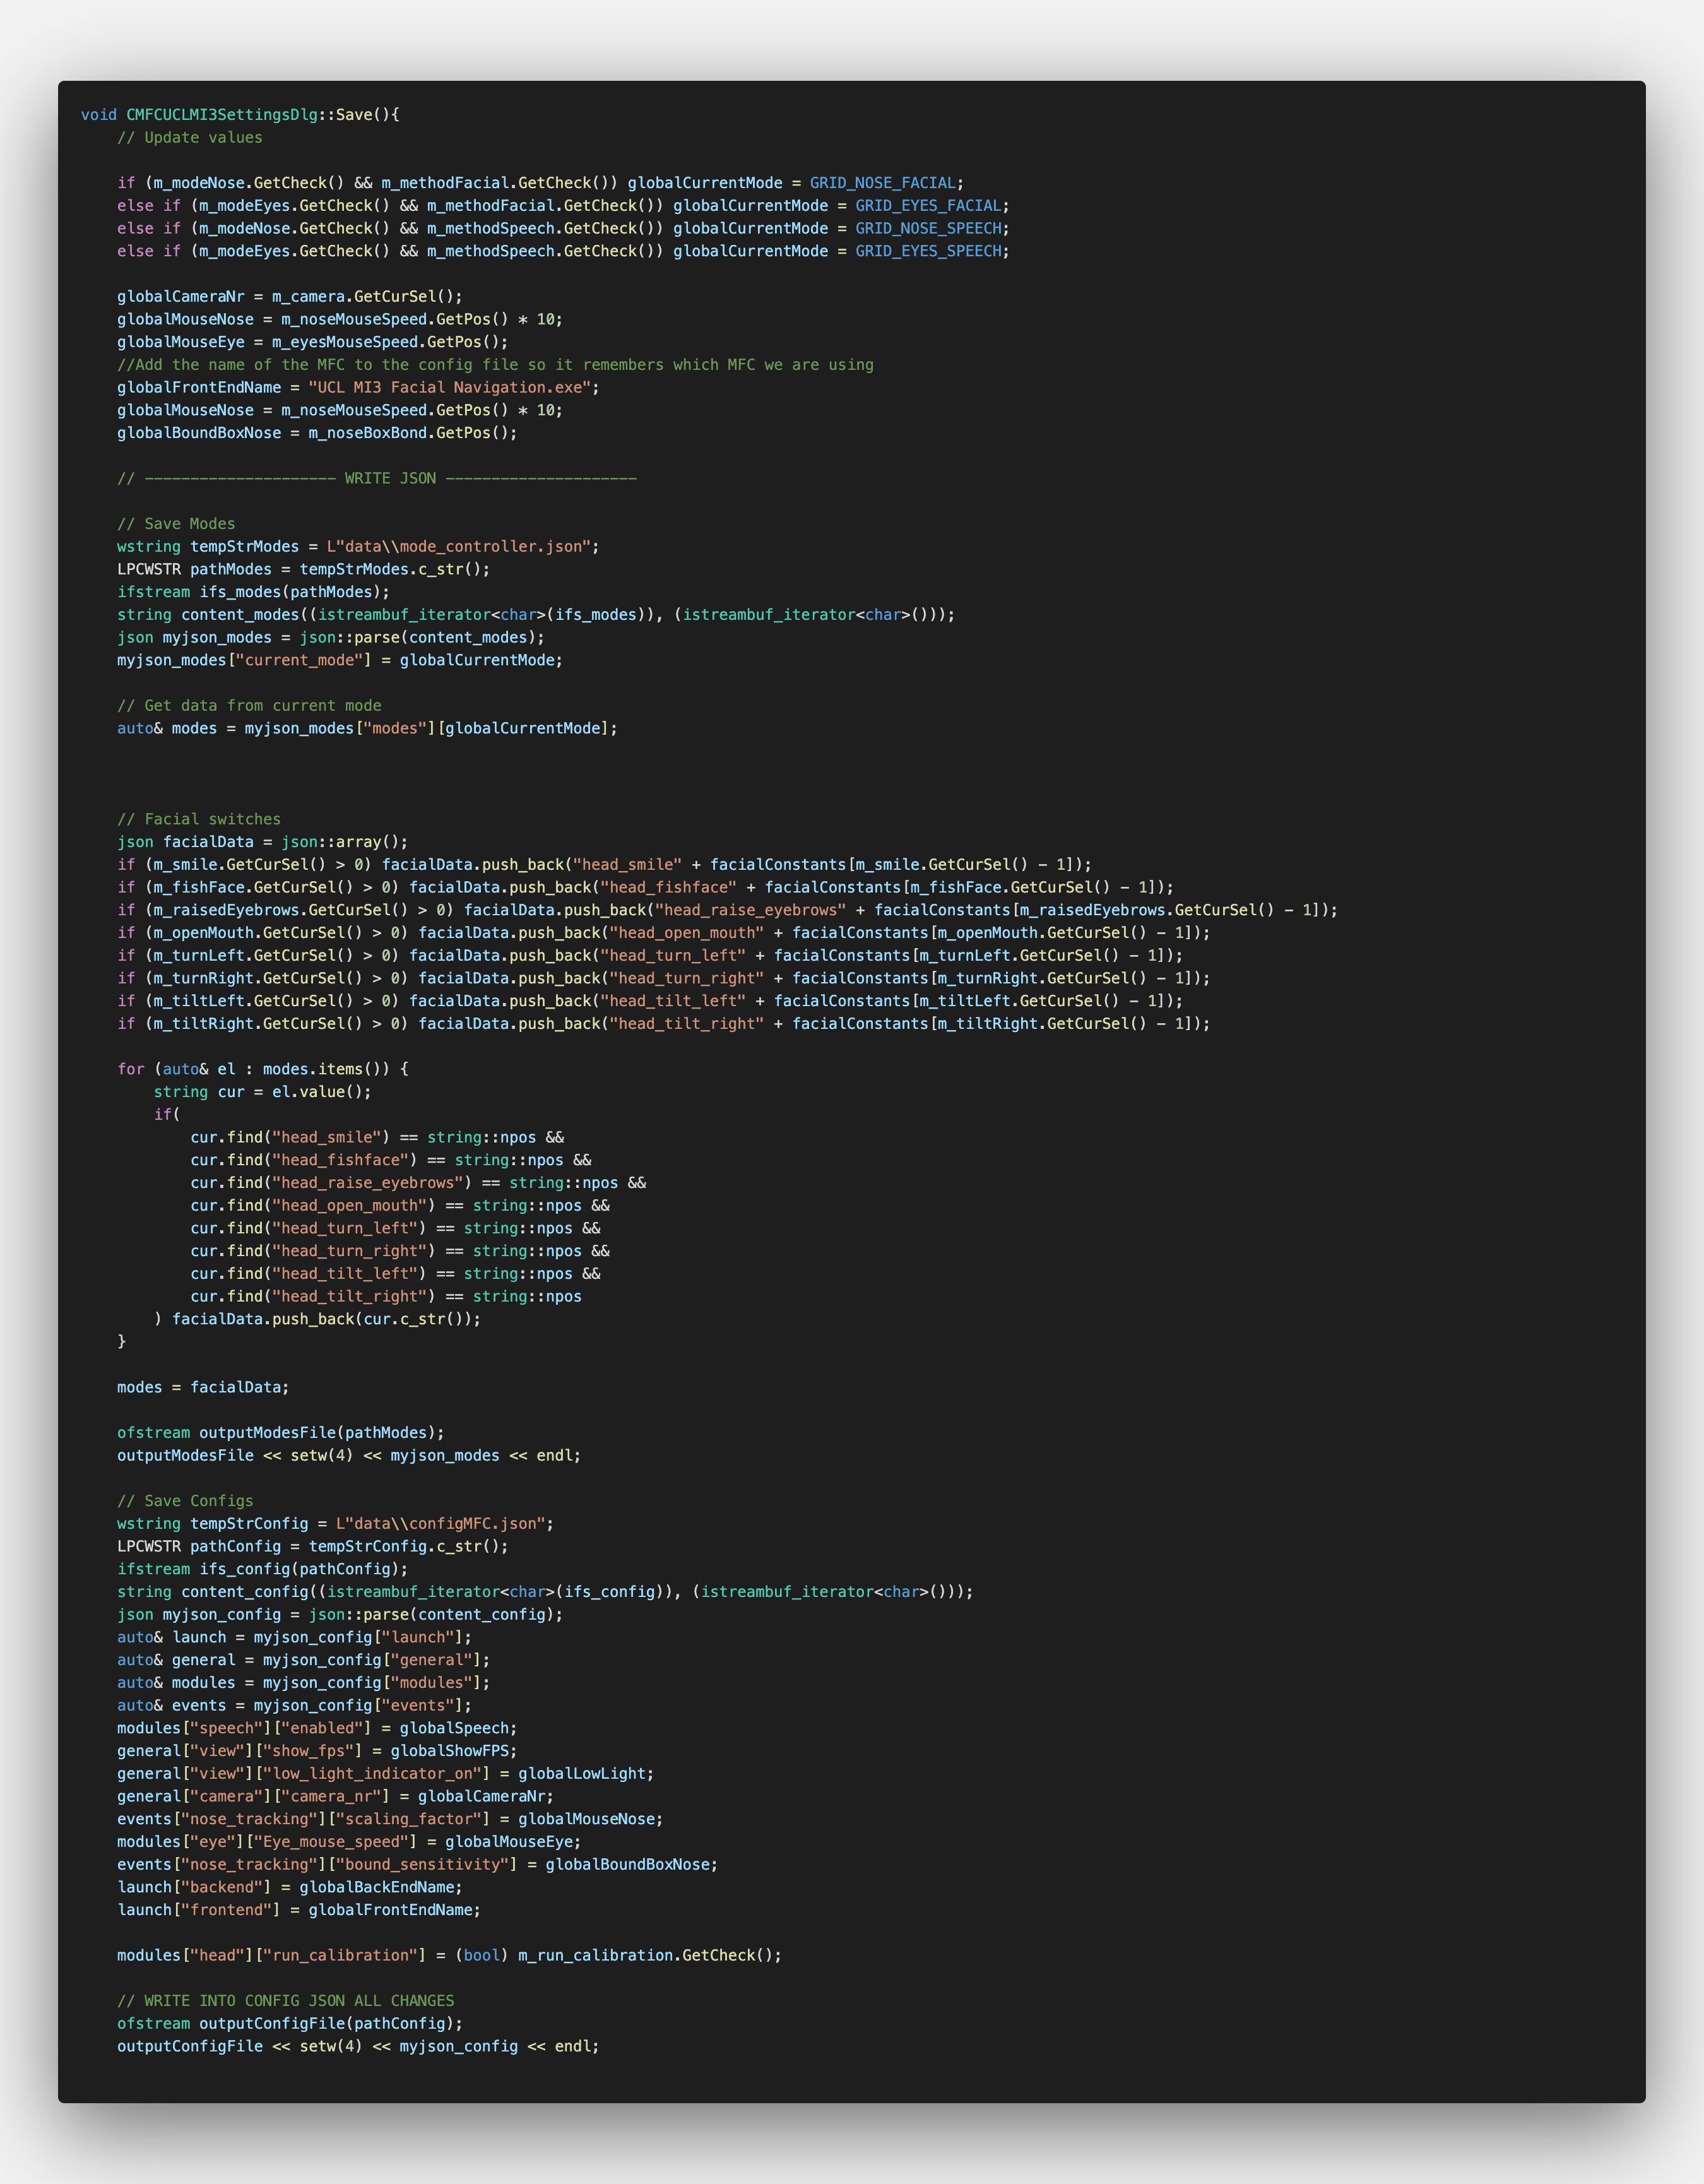
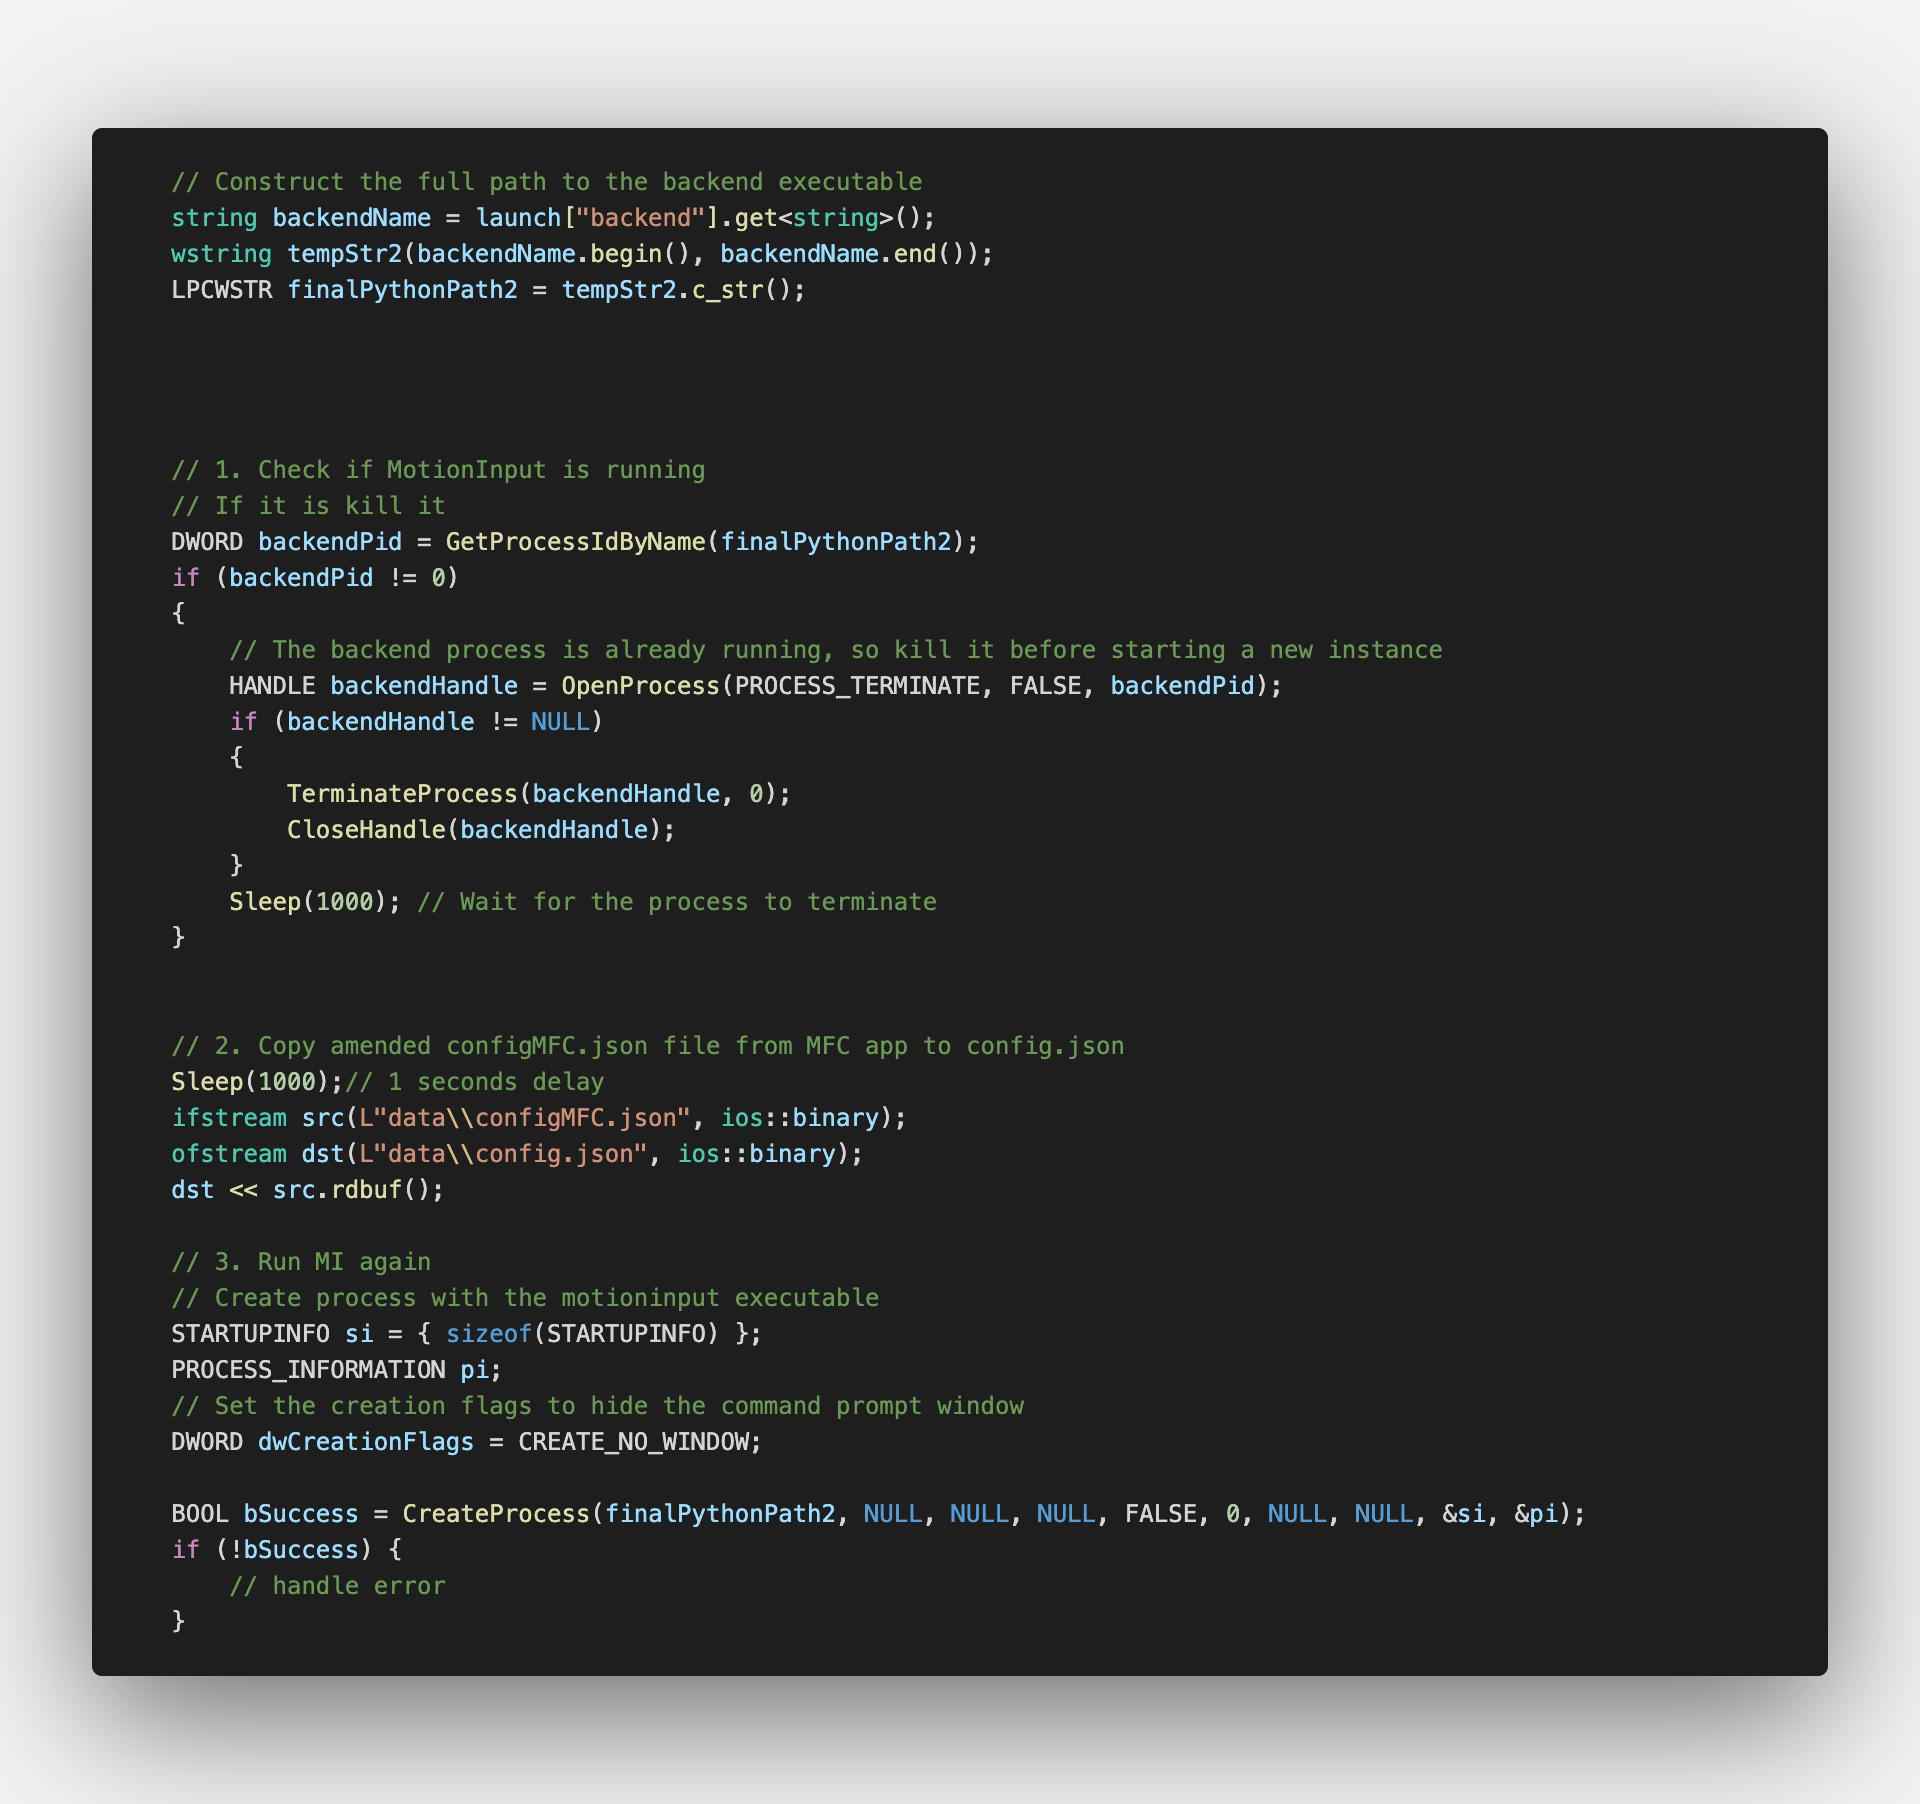
The code block writes JSON files for configuration data and current modes for the MFC application. It reads the existing JSON files and parses them into json objects using the json library (in our case nlohmann). Then, it updates the current mode and retrieves data from the current mode to generate a json array of facial switches (in this particular instance for the facial navigation application). The updated json object is written back to the file. The code then reads and parses another JSON file for general configuration data and makes changes to various settings. The updated json object is also written back to the file. Finally, the code restarts the MFC application to apply the changes made to the JSON files. Before restarting, it terminates the existing instance of the application, copies the amended configMFC.json file to config.json, and then launches the application again.
The method for opening the MFC and MotionInput was completely rewritten by us for a few reasons:
- This new format uses the config JSON to check for the name of MotionInput and of the MFC rather than hardcoding how it was previously done which is not future proof and is time consuming as it forces recompilation just to change naming.
- This means it is now possible to change the naming of MotionInput and of the MFC without having to recompile either.
- The MFC also writes its own name into the config JSONs so that MotionInput will remember which MFC you are using.
- Furthermore, linked to the method by which MotionInput used to open from MFC was a bug that would display an empty console window before launch, this needed to be fixed.
- A major bug was caused by the use of if and elif blocks to decide which MFC to launch from within MotionInput as MotionInput would sometimes not know which MFC to open when trying to launch the MFC again from within MotionInput. Furthermore, this same method of checking with if and elif statements was used to know which help.txt file to open and was also causing the software to crash. This was a major problem as firstly it meant that MotionInput was hardcoding every file name in an inefficient process, and secondly it meant a key feature that is necessary for new users (being able to access the settings and help text) was not functioning.
How does the new fix work:
- It utilises the scripts/tools/launch_utils to find the correct names and stores them in config.json and configMFC.json so if you want to change the name of the MFC or the name of MotionInput its searching for just update the JSONS. The name in the JSONs for “frontend” and “backend” must be the name of your MFC and the name of your MotionInput exe, you can find the new lines you must add to your JSONs at the top of the JSONs in the github link at the start of the guide.
- It's useful this way because if you compile under the wrong name you can just rename and then update the JSON rather than needing to recompile.
- Your MFC must have a matching config and configMFC to the MotionInput build as always. The JSON property “frontend” needs to be the name of your MFC under the format “UCL MI3 [YOUR PROJECT NAME]” and the property “backend” needs to be the name of your motioninput build/exe.
- The fix for the empty console window showing up was a simple function “GetProcessIDByName” within the MFC to check if MotionInput is running and if it was then shutting it down before trying to reload it with new config data from the MFC, the old method of doing this was always trying to close MotionInput even when it wasn’t running which caused an empty console window to appear, this simple function fixes this with one check that only needs to return 1 for running and 0 if MotionInput is not running
As for the buttons themselves, explaining how they can be used and then creating uses from them for various teams was also part of our job. In terms of backend functionality, an MFC button works by triggering an event when it is clicked or pressed. When the button is clicked, it sends a message to its parent window, which is usually a dialog or a frame window. The parent window receives this message and then handles it by calling a function that performs the desired action.
The function called by the parent window when a button is clicked can be customised to perform any action desired. This can range from simple actions such as changing the text displayed on a label, to more complex actions such as executing a database query or performing a computation.
To create the custom function that is called when a button is clicked, you would typically define a member function in the parent window's class. This member function would be defined to take the appropriate arguments (such as the button ID), and would then perform the necessary action. The button's OnClick event would then be associated with this custom function.
In addition to responding to the user clicking the button, an MFC button can also respond to other events. For example, you could have the button change its appearance or behaviour when the user hovers over it with the mouse or when it receives focus. You could also associate the button with a keyboard shortcut, so that the user can trigger the button's action without having to click on it.
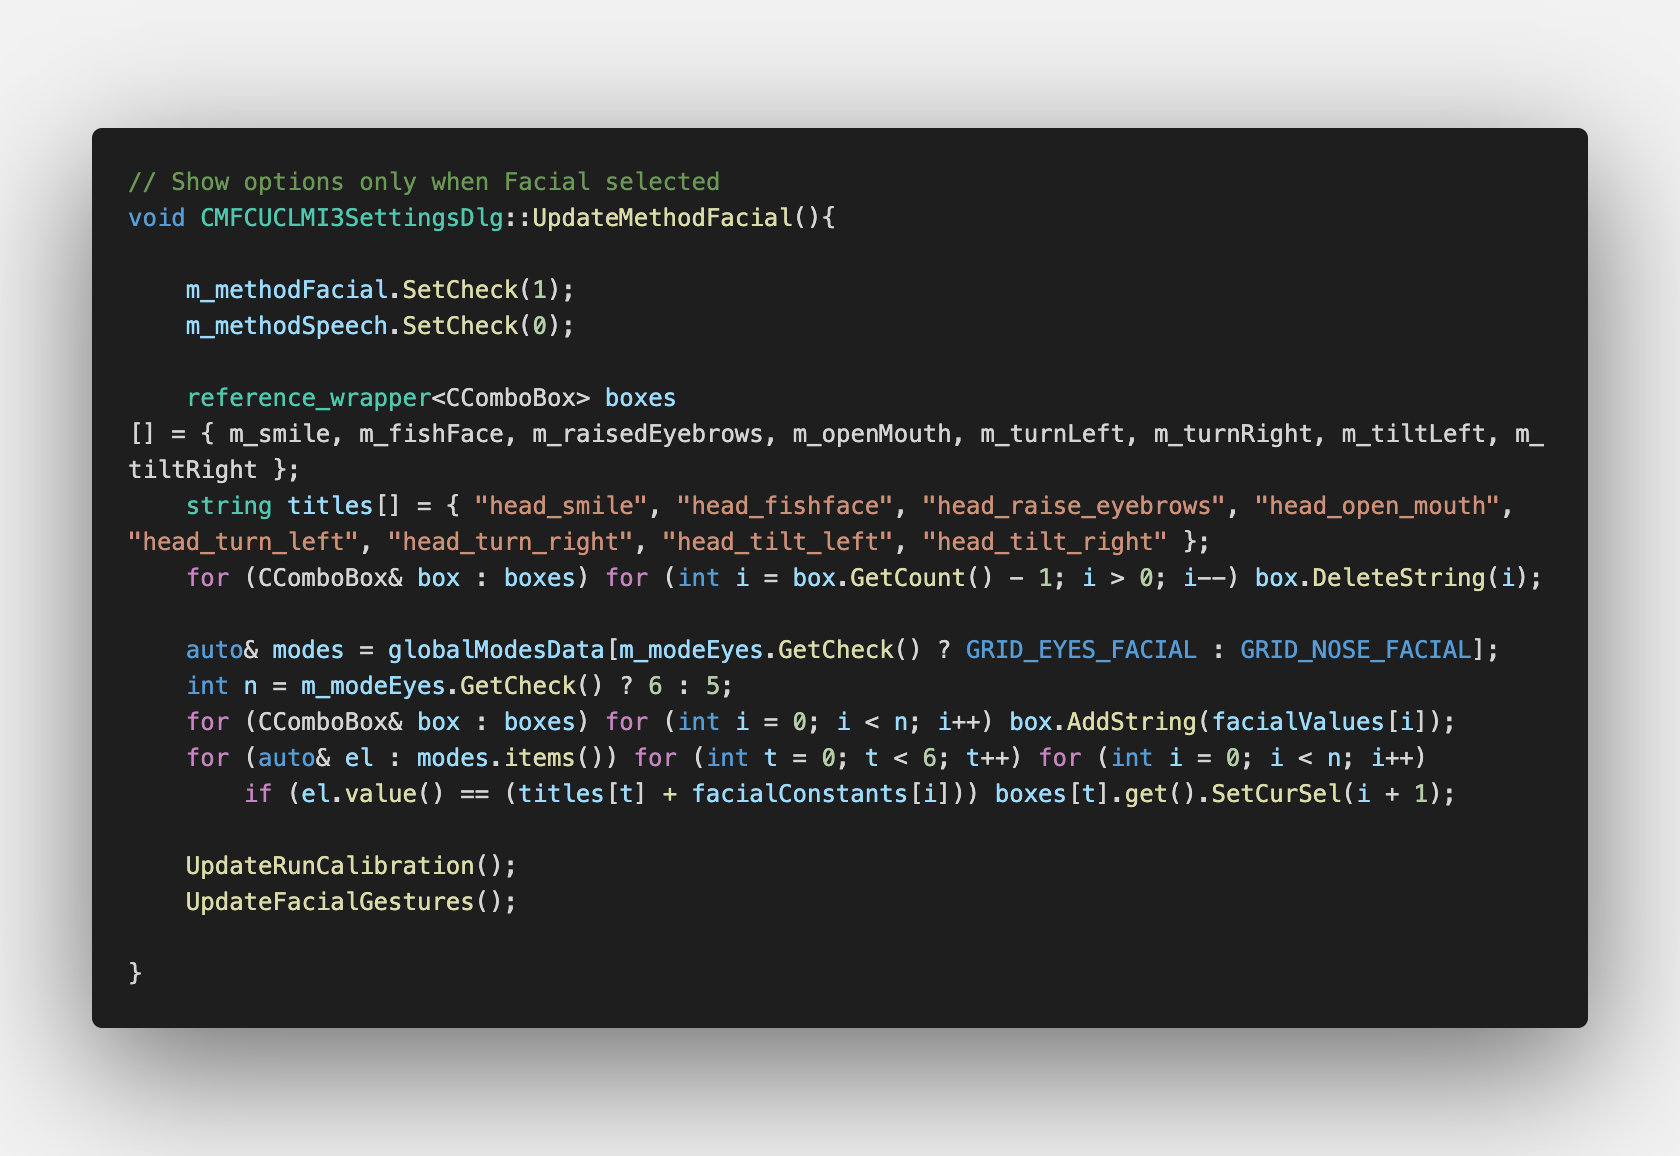
To better understand we can take a look at a button The UpdateMethodFacial() function is called when the user selects the facial method, the button the user sees has ID IDC_FACIAL_BUTTON but all the user will have to interact with is simply clicking the button that says Facial in the Method section. It then sets the check value for the facial method option to 1 and the check value for the speech method option to 0. It deletes all items from the six CComboBoxes (m_smile, m_fishFace, m_raisedEyebrows, m_openMouth, m_rotationLeft, m_rotationRight) except for the first item. Then, it adds five or six items from the facialValues array to each CComboBox based on the selected mode (eyes facial or nose facial). Next, it retrieves the current mode from the globalModesData array based on the selected mode (eyes facial or nose facial) and updates the selected value of each CComboBox based on the facial expression title and value from the retrieved mode.
