Batman Arkham Asylum GOTY MFC Application
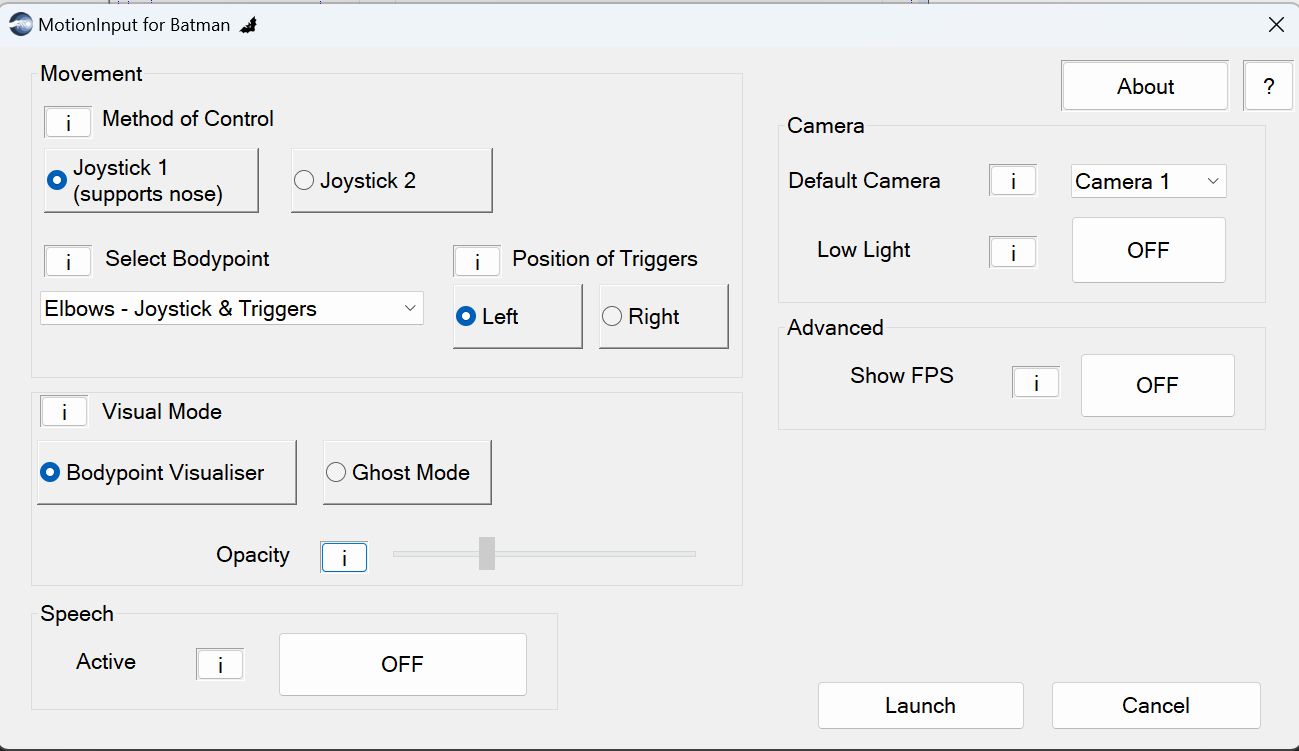
The user may choose to control Batman using either joystick option.
1. Joystick 1 supports using nose, hand, elbow or shoulder as a joystick. Move the selected joystick bodypoint within the box displayed on screen to control Batman. Arrows indicate movement. More accurate than Joystick 2. Please turn speech ON if you choose this option. Say "butterfly" to reset the tracking box.
2. Joystick 2 supports using hand, elbow or shoulder as a joystick. Move the selected joystick bodypoint anywhere around the screen to control the Batman. No box is displayed. Move up = up; down = reverse/ brake ; left = left ; right = right.
The user may select a pair of bodypoints from the drop down menu.
1. Joystick 1: Two bodypoints are chosen, one for joystick and one for pressing triggers. Bodypoints available for joystick are nose, hand, elbow and shoulder. Bodypoints available for pressing triggers are hand, elbow and shoulder.
2. Joystick 2: Two bodypoints are chosen, one for joystick and one for pressing triggers. Bodypoints available for joystick are hand, elbow and shoulder. Bodypoints available for pressing triggers are hand, elbow and shoulder.
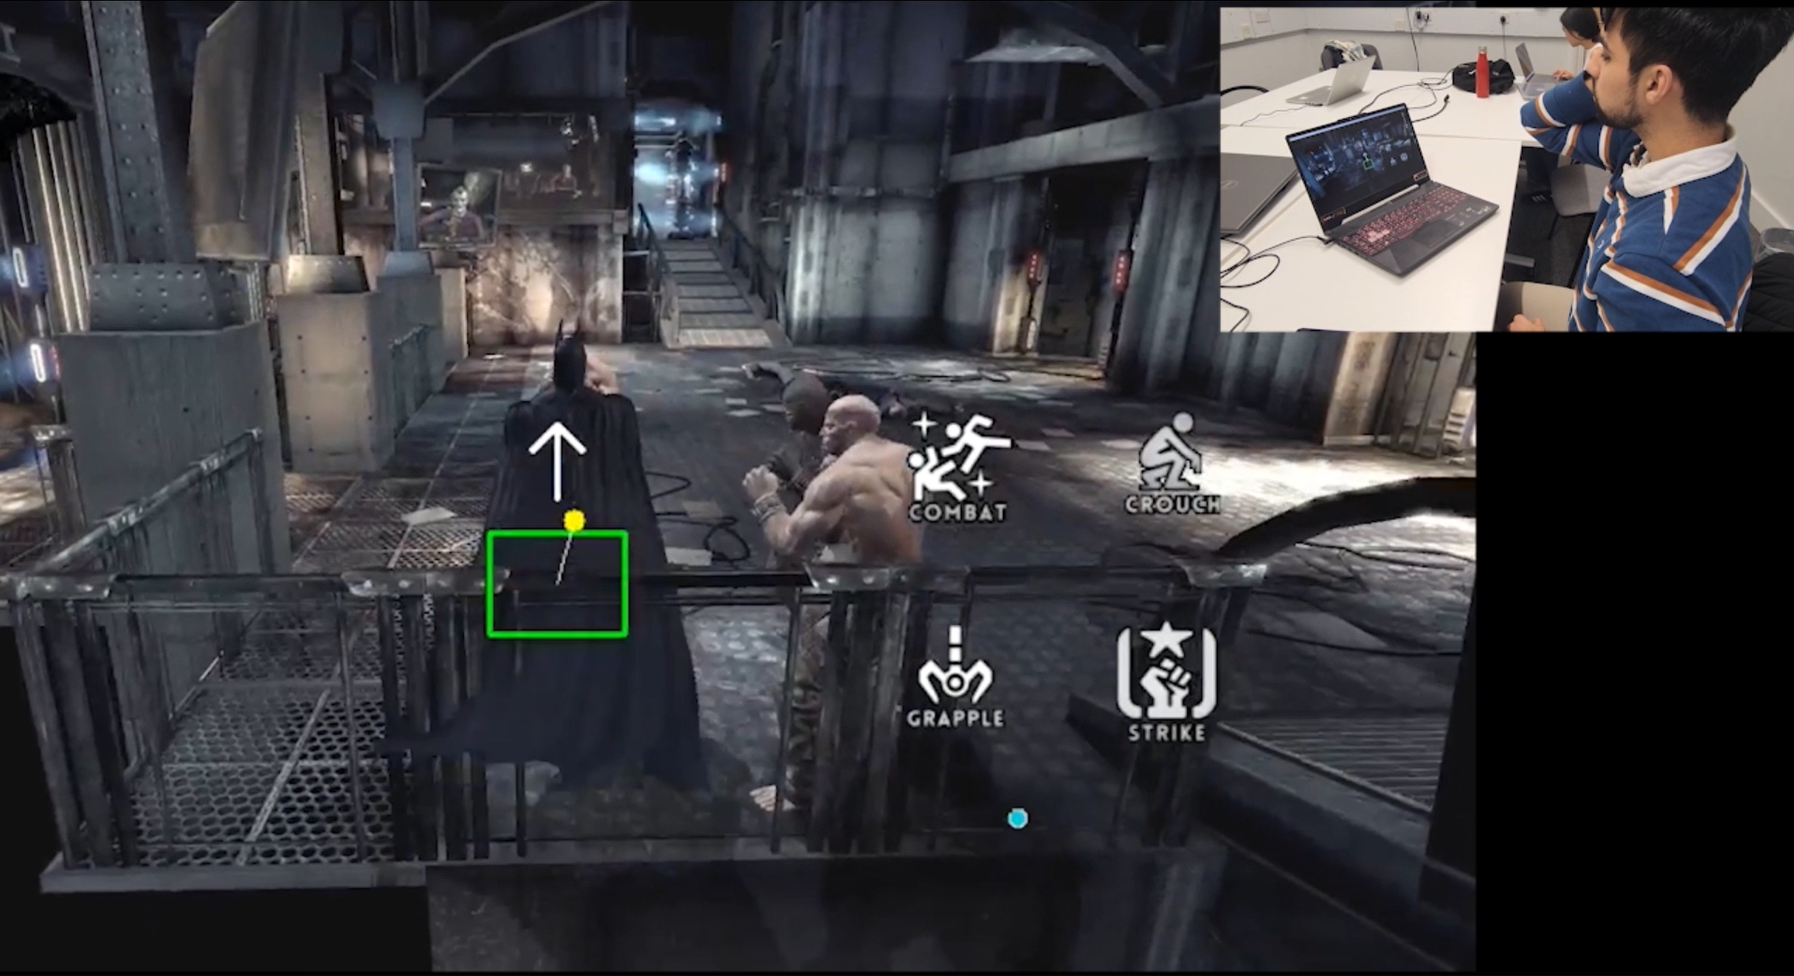
1. Bodypoint Visualiser: Two dots are displayed on screen representing the selected bodypoints.
Below is an image of bodypoint visualiser:
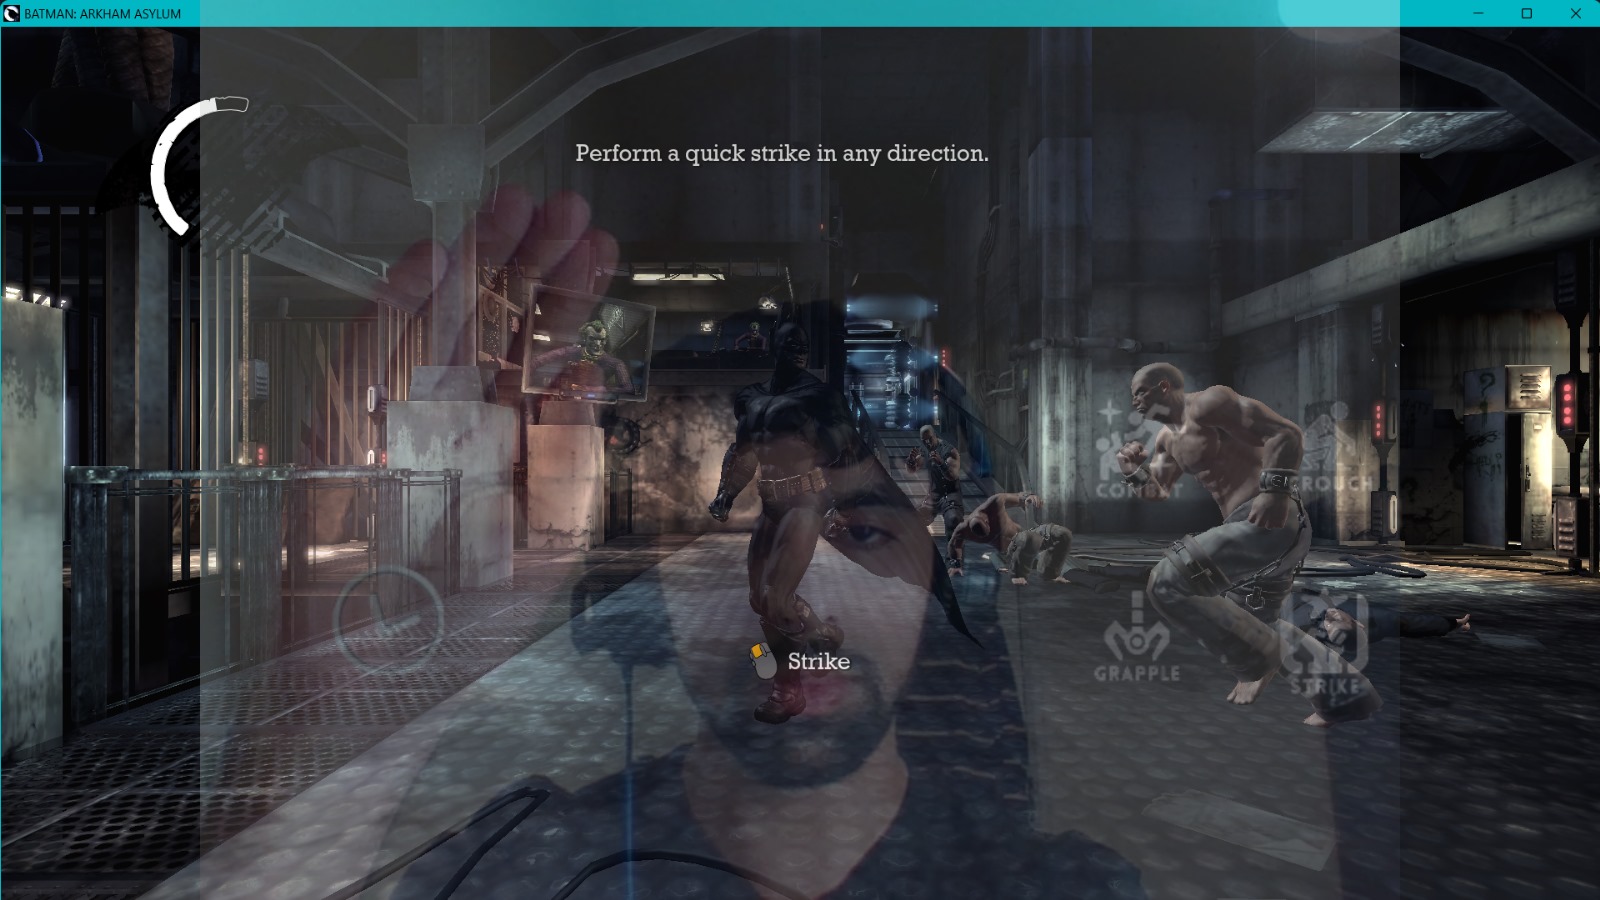
2. Ghost mode: A semi transparent overlay of the user is displayed. Control the opacity by adjusting the slider, a higher value means the overlay is more visible.
Below is an image of ghost mode:
1. Left: Triggers will be on the left, to be pressed by the left selected bodypoint. Joystick will be controlled by the nose or the right selected bodypoint.
2. Right: Triggers will be on the right, to be pressed by the right selected bodypoint. Joystick will be controlled by the nose or the left selected bodypoint.
If the user has multiple cameras to take input from, then the user can select which camera they want to use. If the user is playing in a dimly-lit environment, the low-light button can be toggled ON for an enhanced experience.
The FPS option is set to ON by default. It displays the FPS rate at the bottom-right corner. If the user wishes, it can be set to OFF.
When the speech button is toggled ON, the user can use speech commands to play their games. Speech commands available for Batman is "butterfly" to reset the tracking box (when joystick 1 is chosen).
Click on the ¡ buttons next to each option for information. The help button ? on the top right provides more detailed description of each option.
No customisation of Gestures by the user is needed. The available gesture for Batman is raise eyebrows for detective mode and open mouth to throw batarangs.
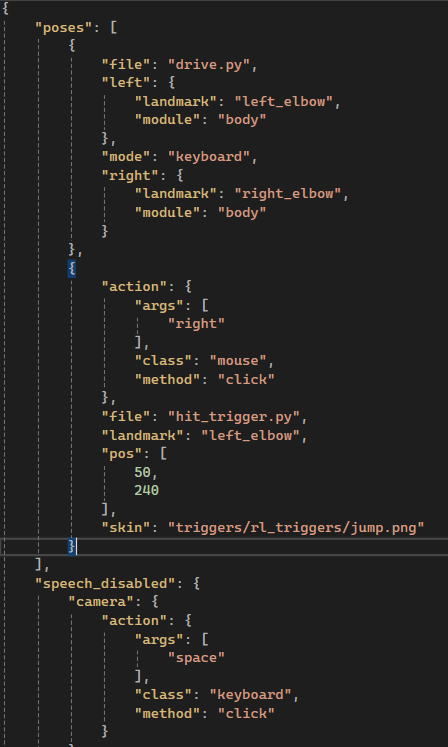
All of the above perferences get updated in either the config JSON file or mode JSON file when Launch is clicked. The JSON files follow a specific structure. Each trigger has a particular format to store keybinds, corresponding bodypoint and other information. Batman has multiple JSONs for different modes: joystick 1 (nose) triggers on left, joystick 1 (nose) triggers on right, joystick 1 (bodypoint) triggers on left, joystick 1 (bodypoint) triggers on right, joystick 2 triggers on left and joystick 2 triggers on right.
Below are a list of configurations that developers may customise.
The JSON structure is as follows and the JSON files can be found in the directory: data/modes/
Below are a list of configurations that developers may customise.
- Change which mode JSON file MotionInput uses
This can be done by changing the "mode" dictonary's value in data/config.json and data/configMFC.json. - Change positions of virtual buttons
Positions of virtual buttons (hit trigger) may be adjusted in the mode JSON files in data/mode. [0,0] is the top left of the screen. For example, if the current mode is "some_game", the position of a virtual button can be changed by accessing data/mode/some_game.json. In the "poses" array, virtual buttons are dictionaries in which the "file" key has value "hit_trigger.py". In this dictionary, the on-screen coordinates of the virtual button may be changed via the "pos" dictionary - Add Gestures
Gestures may be added in the "poses" array in the mode JSON files.
- file: the filename of the gesture (for virtual buttons it will be hit_trigger.py). The gesture must be in the data/gestures/json or data/gestures/python directory.
- action: specifies a dictionary encoding the output function to be performed when the gesture is detected.
- class: the class of the output function.
- method: the method to be called of the class.
- args: an array of arguments to be passed to the method.
-
Add Speech
New speech commands may be added to the value of the "speech" key in "some_game.json", outside the "poses" array. - Add Skins
Skins may be added to each button by adding corresponding PNG images to data/assets/triggers/rl_triggers. Two images are needed for each button: "some_action.png" and "Some_action_triggered.png", for example "jump.png" and "jump_triggered.png". Then, add "skins":"some_action.png" in "some_game.json". "some_action_triggered.png" does not need to be added.
The JSON structure is as follows and the JSON files can be found in the directory: data/modes/