
7 posts tagged with "Bluetooth App"

View All Tags

· 2 min read
Ulk Gerguri

Introducing the Bluetooth Keyboard

Ending this month we added a fully functioning bluetooth keyboard onto the app. It took a while to get the combined mouse and keyboard HID descriptor working, but we finally got it functioning!

The Keyboard Fragment: Seamless Integration

Our latest update includes the integration of a keyboard fragment within the app. When you navigate to the keyboard section, it automatically focuses and brings up a soft keyboard. This allows for an intuitive and familiar typing experience, similar to standard mobile device keyboards.

Key Features of the Keyboard Fragment:

  • Automatic Focus: The keyboard opens and focuses immediately, ensuring a smooth transition for the user.
  • Soft Keyboard Implementation: A soft keyboard is displayed, offering a comfortable and efficient typing experience.
  • Multiline Editing: Supports multiline text editing, catering to various text input needs. Including deleting text, and creating line spaces via the enter key.

Behind the Scenes: Development Insights

The development of this feature involved several technical considerations:

  • Fragment Implementation: The keyboard is implemented as a fragment within the app, allowing for easy access and integration with other features.
  • Hiding the Text Box: To maintain a clean and uncluttered interface, we chose to hide the textbox on the app while ensuring the keyboard remains responsive to user input on the target device.
  • Bluetooth HID Protocol: Each keystroke is captured and sent via the Bluetooth HID protocol to the target device. This ensures real-time text input and response.
Keyboard Image

· 2 min read
Hugh Stanway

Continuing Development

For the remaining part of January we continued with app development. First we added settings to the app to add configurability so users could tailor to best fit their needs.

App Settings

Adding user settings to make the application more customisable such that cursor could taylor it better for their specific needs was a top priority.

Starting off we added a settings icon in the top-right corner of the screen which would be used to open the settings page. When the button was pressed the settings page would slide up from the bottom of the screen - displaying all the options. Then to go back the user could drag it away by swiping down or by pressing anywhere on the screen other than on the settings popup.

In the backend, we use a singleton settings class to deal with getting and setting all the settings variables for the app. It uses Android Shared Preferences to save the current setting states to the devices storage. The class then provides getter and setter methods to retrieve the current state or update a value.

We decided to have seperate settings pages for each component to keep everything organised. These will still accessed by the same button but a different settings page would be displayed depending on which component the user was using - for example, if the user was on the mouse page the mouse settings page would be displayed:

Mouse Settings Image

· 2 min read
Hugh Stanway

Start of a New Year

After the Christmas break and the start of a New Year we got back into development. Starting off in January we made the decision to change the user interface for our mouse. It was decided instead of using a Joystick we would use a Trackpad. We then added two new features: information popups and app settings.

Trackpad Implementation

We decided to switch to a Trackpad instead of a Joystick because it was generally much easier to use and control, especially when trying to make fine mouse movements. To start off with implementation of this we declared a rectangular region of the UI that would be our trackpad. Then in the backend of our apps code we created a listener that would look for when the user presses on the screen inside of the trackpad region. From this we got an (x,y) coordinate and then using the previous (x,y) we could calculate a delta movement, therefore translating the users gesture into mouse movement.

We then added a smaller trackpad bar to the right which would only look at user gestures in the y-axis and would allow the user to scroll the page on their screen.

Trackpad Image

Instruction Popups

To each page we have also added instruction and information popups. These are accessed similarly to the settings page, by pressing an icon placed on the top-right of the screen. Then depending on what component the user is viewing the corresponding instruction popup will be displayed. We have added instruction pages that cover how to pair new Bluetooth devices and how to use the mouse, keyboard and game pad features. For example, if they are using the mouse component the mouse instructions will be displayed:

Mouse Info Image

· 2 min read
Hugh Stanway

Finishing off the Term

To conclude our progress in December and Term 1, we started by further refactoring our Bluetooth code to improve robustness. We then added comprehensive permmission checks to ensure the user has the required permissions enabled before using the app. Finally, we conducted a successful first test on a smart TV.

1. Tested Successfully On SONY Smart TV

We managed to successfully make a connection with a Smart TV. Then after testing we were able to control a mouse pointer on the TV and use the click buttons to open and use applications, such as Netflix and Disney+ on the Smart TV.

2. Added Permissions Check and Request on App Boot

The app needs to use Android location services and perform nearby devices scans. These are Android permissions which need to be specifically enabled by the user in the devices app settings. Upon app start we have added a check that makes sure that the user has these permissions enabled. If the check fails and the user doesn't have them enabled the app will then launch a popup on the screen and prompt the user to enable them.

If the user declines the request to enable permissions the app will launch a page that locks the main features of the app until the permissions have been enabled. There is a button on the page that the user can press to launch the prompt to enable permissions again.

Permissions Pupup Image

3. Improved General Bluetooth Robustness

We have added checking that permissions are enabled and bluetooth is enabled before attempting connections or scans. Without these permissions enabled, trying to make a Bluetooth connection would cause the app to crash. This adds general error handing to reduce any points similar to this in which could cause any crashes of a similar nature.

· 2 min read
Hugh Stanway

Continued App Improvements

Moving into December, we started the month by improving the resilience and code quality of what we currently had implemented. We also made UI changes, adding information to pages to inform the user on how to use the app. Finally, we finished with adding Bluetooth scan functionality to enable the app to search for nearby devices the user may want to connect to.

1. Added Not Supported Popup

Not all Android devices support Bluetooth HID. We have added a check when the app starts which will check that the users device does infact support Bluetooth HID. If the devices doesn't support HID then a popup page will be launched to inform the user that their device is not compatible. This also then disables the main functions of the app to stop the user for using the app further.

Not Supported Pupup Image

2. Added Bluetooth Scan for Nearby Connections

We have add a new page that performs a Bluetooth scan for nearby available devices. The scan is triggered by a button on the main bluetooth page and will start a scan for nearby devices that are available to connect to. The result of this scan is displayed as a list of devices on the screen, including the found device name and MAC address. Then in the same way that the user can connect to a paired device, they can click the item in the list of found items to add it to the devices paired items.

Not Supported Pupup Image

3. Improved the UI - Added Text on the Bluetooth Page to Help User and Give Instructions

This includes simple UI improvements. We have added instructions and text boxes around the apps UI to provide instruction and information about how the user can use and interact with the app. This is a minor update but improves the usability of the overall app and user experience.

4. Stop Adding of Duplicate Devices

We added a simple check to stop users from adding devices with the same MAC address mutliple times.

· 3 min read
Hugh Stanway

Further App Improvements

In the second half of the month we starting with making UI improvements to the app. This included added a navbar to basic app navigation and updating the logic for how moving between different content pages was handled. We then added the logic required to save a list of paired devices to the devices storage and finished off the month by writing comments for all code we have written.

1. Added UI to Display List of Already Paired Devices

We added UI to the main page that displays all of the previously and current paired devices to the app. This will be the main interface used to manage the apps currently known devices as well as connect to a given device and remove a given pairing.

When the app first starts the backend queries the device storage to find all the currently saved devices. It will return the result as a list of all the known devices. Each item is then displayed in a list on the devices main page.

For each item in the list we display the device name and its MAC address. Then we also have delete icon for each device which the user can press to delete an item in the list. When this is pressed it will remove the item from the list of paired devices. This removes it from the device storage therefore it won't be displayed anymore unless the user adds it again.

The user can click on a given device in the list and it will start the connection process to that device. Once the app has connected to the device it then will turn to a darker shade of grey to signify which device is the one connected. To then disconnect from that device the user can then click on that device again.

2. Added Support to Store Paired Device Stroage

We defined a 'Target Device' class that each know device will be initiated as. This class contains the reference to that derives name and MAC address as well as its connection status. This class then provides the required getter methods.

We then defined a 'Target Device Storage' class that makes calls to and from the Android devices storage to save and recieve the list of known devices. To achieve this we used the Jackson library to convert the list of Target Device objects to a JSON string which can then be saved to the device storage and vice versa.

Upon app boot the JSON string is retrieved from the device storage and initialised as a list of Target Devices using Jackson. This list is then retrieved and used by other components of the app when needed.

Then when devices are deleted or added the list of saved devices these chanegs are automatically updated in the devices storage.

3. Added Comments To All Files

We went through and added documentation comments and Javadoc comments to all methods and classes within the project to maintain a high level of readability. We will ensure to keep doing this throughout the project.

· 4 min read
Hugh Stanway

Beginning to Write Code

Now that our project research was complete and we had a clear plan and roadmap of what we wanted to achieve we could begin writing code. Starting off, we created a blank project in Android Studio using Gradle and our chosen language Java.

1. Created a Vitual Mouse Interface

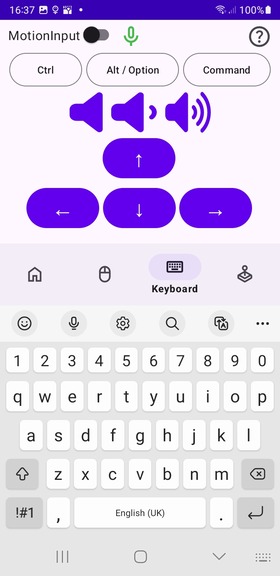
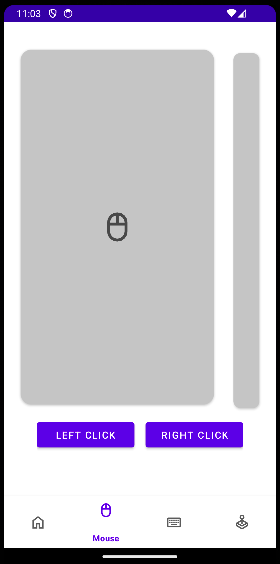
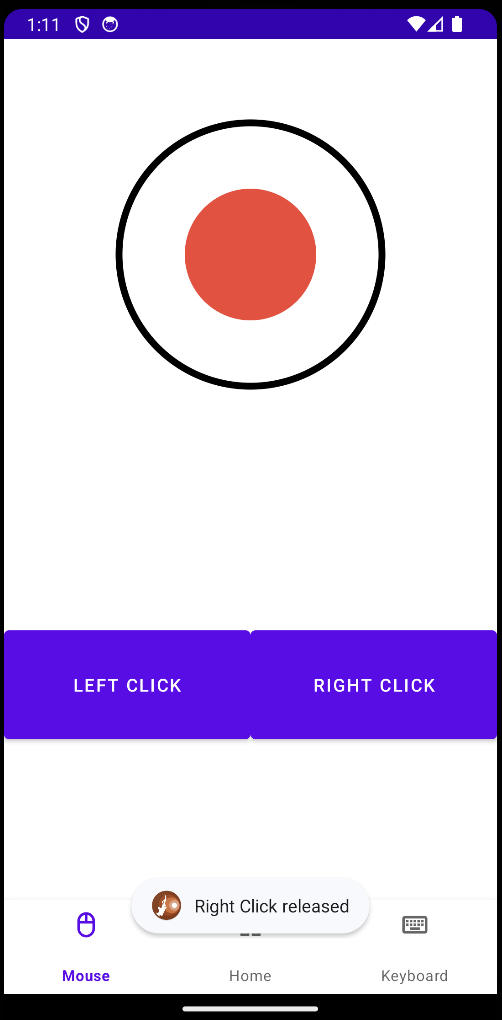
We needed to design a mouse interface within the controller that the user would use from within the app. We then went onto implement a joystick that the user could press and move on the app screen to input X and Y mouse movements and two buttons on the screen for left and right click. This simple but effective interface gives full control over mouse input from within the app.

Not Supported Pupup Image

2. Added HID Device Support For Mouse

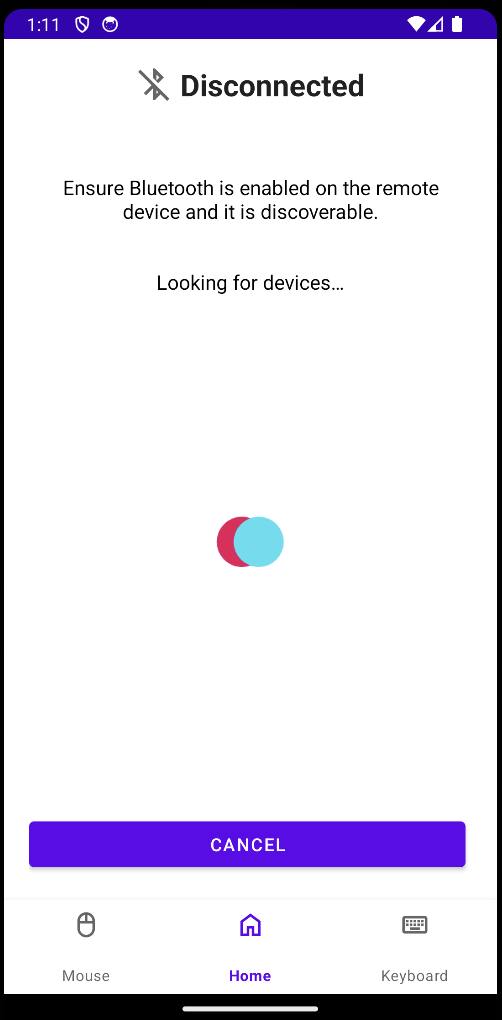
Added the required functionality to make a bluetooth connection using the HID protocol using Androids native libraires.

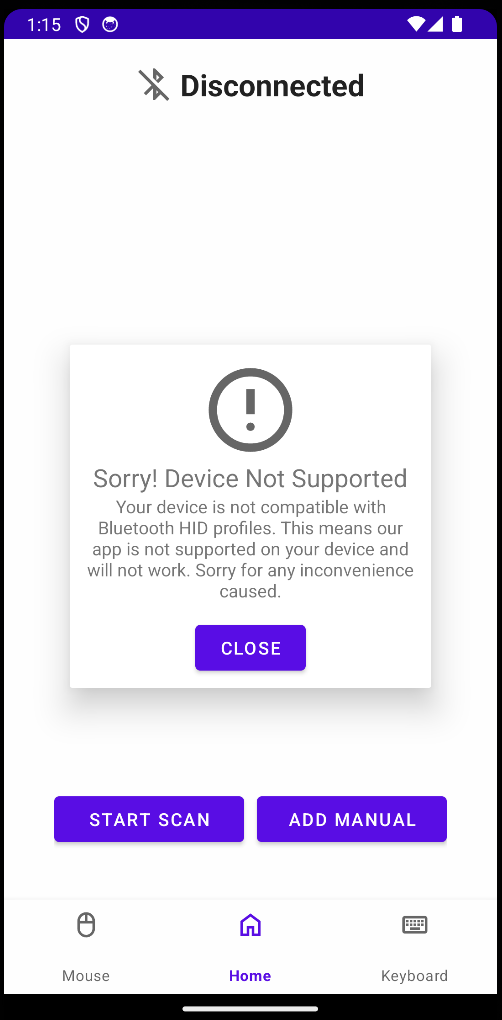
First we defined a 'BluetoothMain' class that is instantiated on app start. This contains all the high-level methods needed by the different app components to create bluetooth connections and send data. This initialises a bluetooth adapter which checks whther the devices supports the required Bluetooth profiles and also whether Bluetooth is enabled on the device. It then initialises this using the BLUETOOTH_HID profile to allow us to use the bluetooth HID protocol.

Once everything has been initialised the Bluetooth Main class provides methods to connect to a given Bluetooth MAC address and also send data packets.

Finally we had to define our own Bluetooth HID descriptor. This took a lot of research to find the correct packet formatting we needed to use. Once we understood what was required we then defined out descriptor to use 3 bytes. The first byte was used for the click buttons, each button uses one bit of space therefore we designated 3 bits for the left, middle and right clicks and the other 5 bits were reserved for padding. The second and third bytes designate a 16-bit signed integer that would give the integer range -127 to 128. This would be used for the relative X and Y position of the mouse.

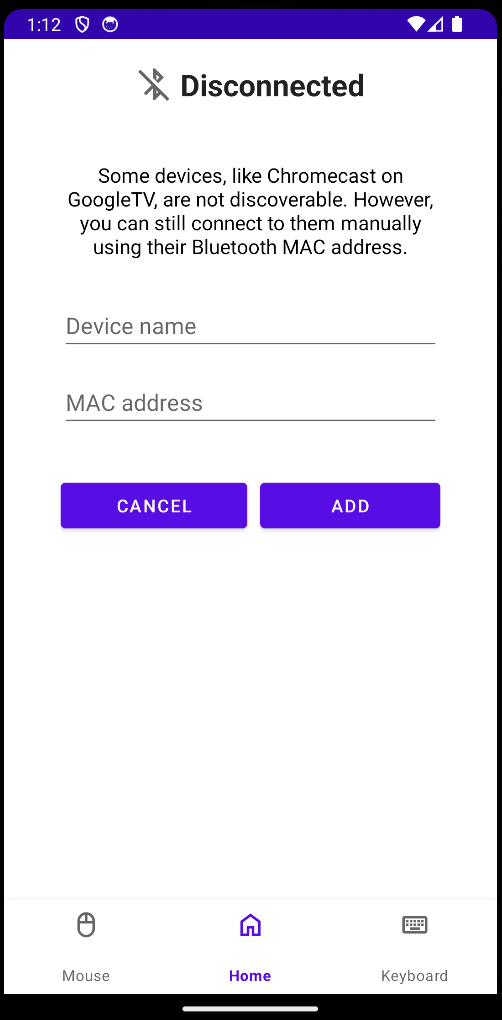
3. Added Manual Connection Via Bluetooth MAC Address

We have added functionality to manually add devices to the app by entering the target devices MAC address. This includes all the UI and backend functionality necessary.

The UI now has an 'Add Manual' button which when pressed takes you to the new page to add devices. This new pages contains two buttons, 'Cancel' which takes you back to the main page and 'Add' to submit the new device. There are also two input fields 'Name' and 'MAC Address' where the user can enter the MAC address and the name identifier of their chosen device.

The UI also includes error handling. It will only allow the user to submit a valid MAC address of the format 'XX:XX:XX:XX:XX:XX' and will display error messages on the screen if the user enters something otherwise. It will also not allow the user to submit a empty field and will also display the respective error message in this case.

Once the user submits a new device it will be commited to the apps device storage and saved for future usage.

Not Supported Pupup Image

4. Tested Sucessfully on Ipad and Mac

We were able to connect to Mac and IPad devices using the 'Manual Connect' feature and control their respective cursors using our apps JoyStick interface. This included successful usage of X and Y movement and both left and right click.