System Architecture Diagram
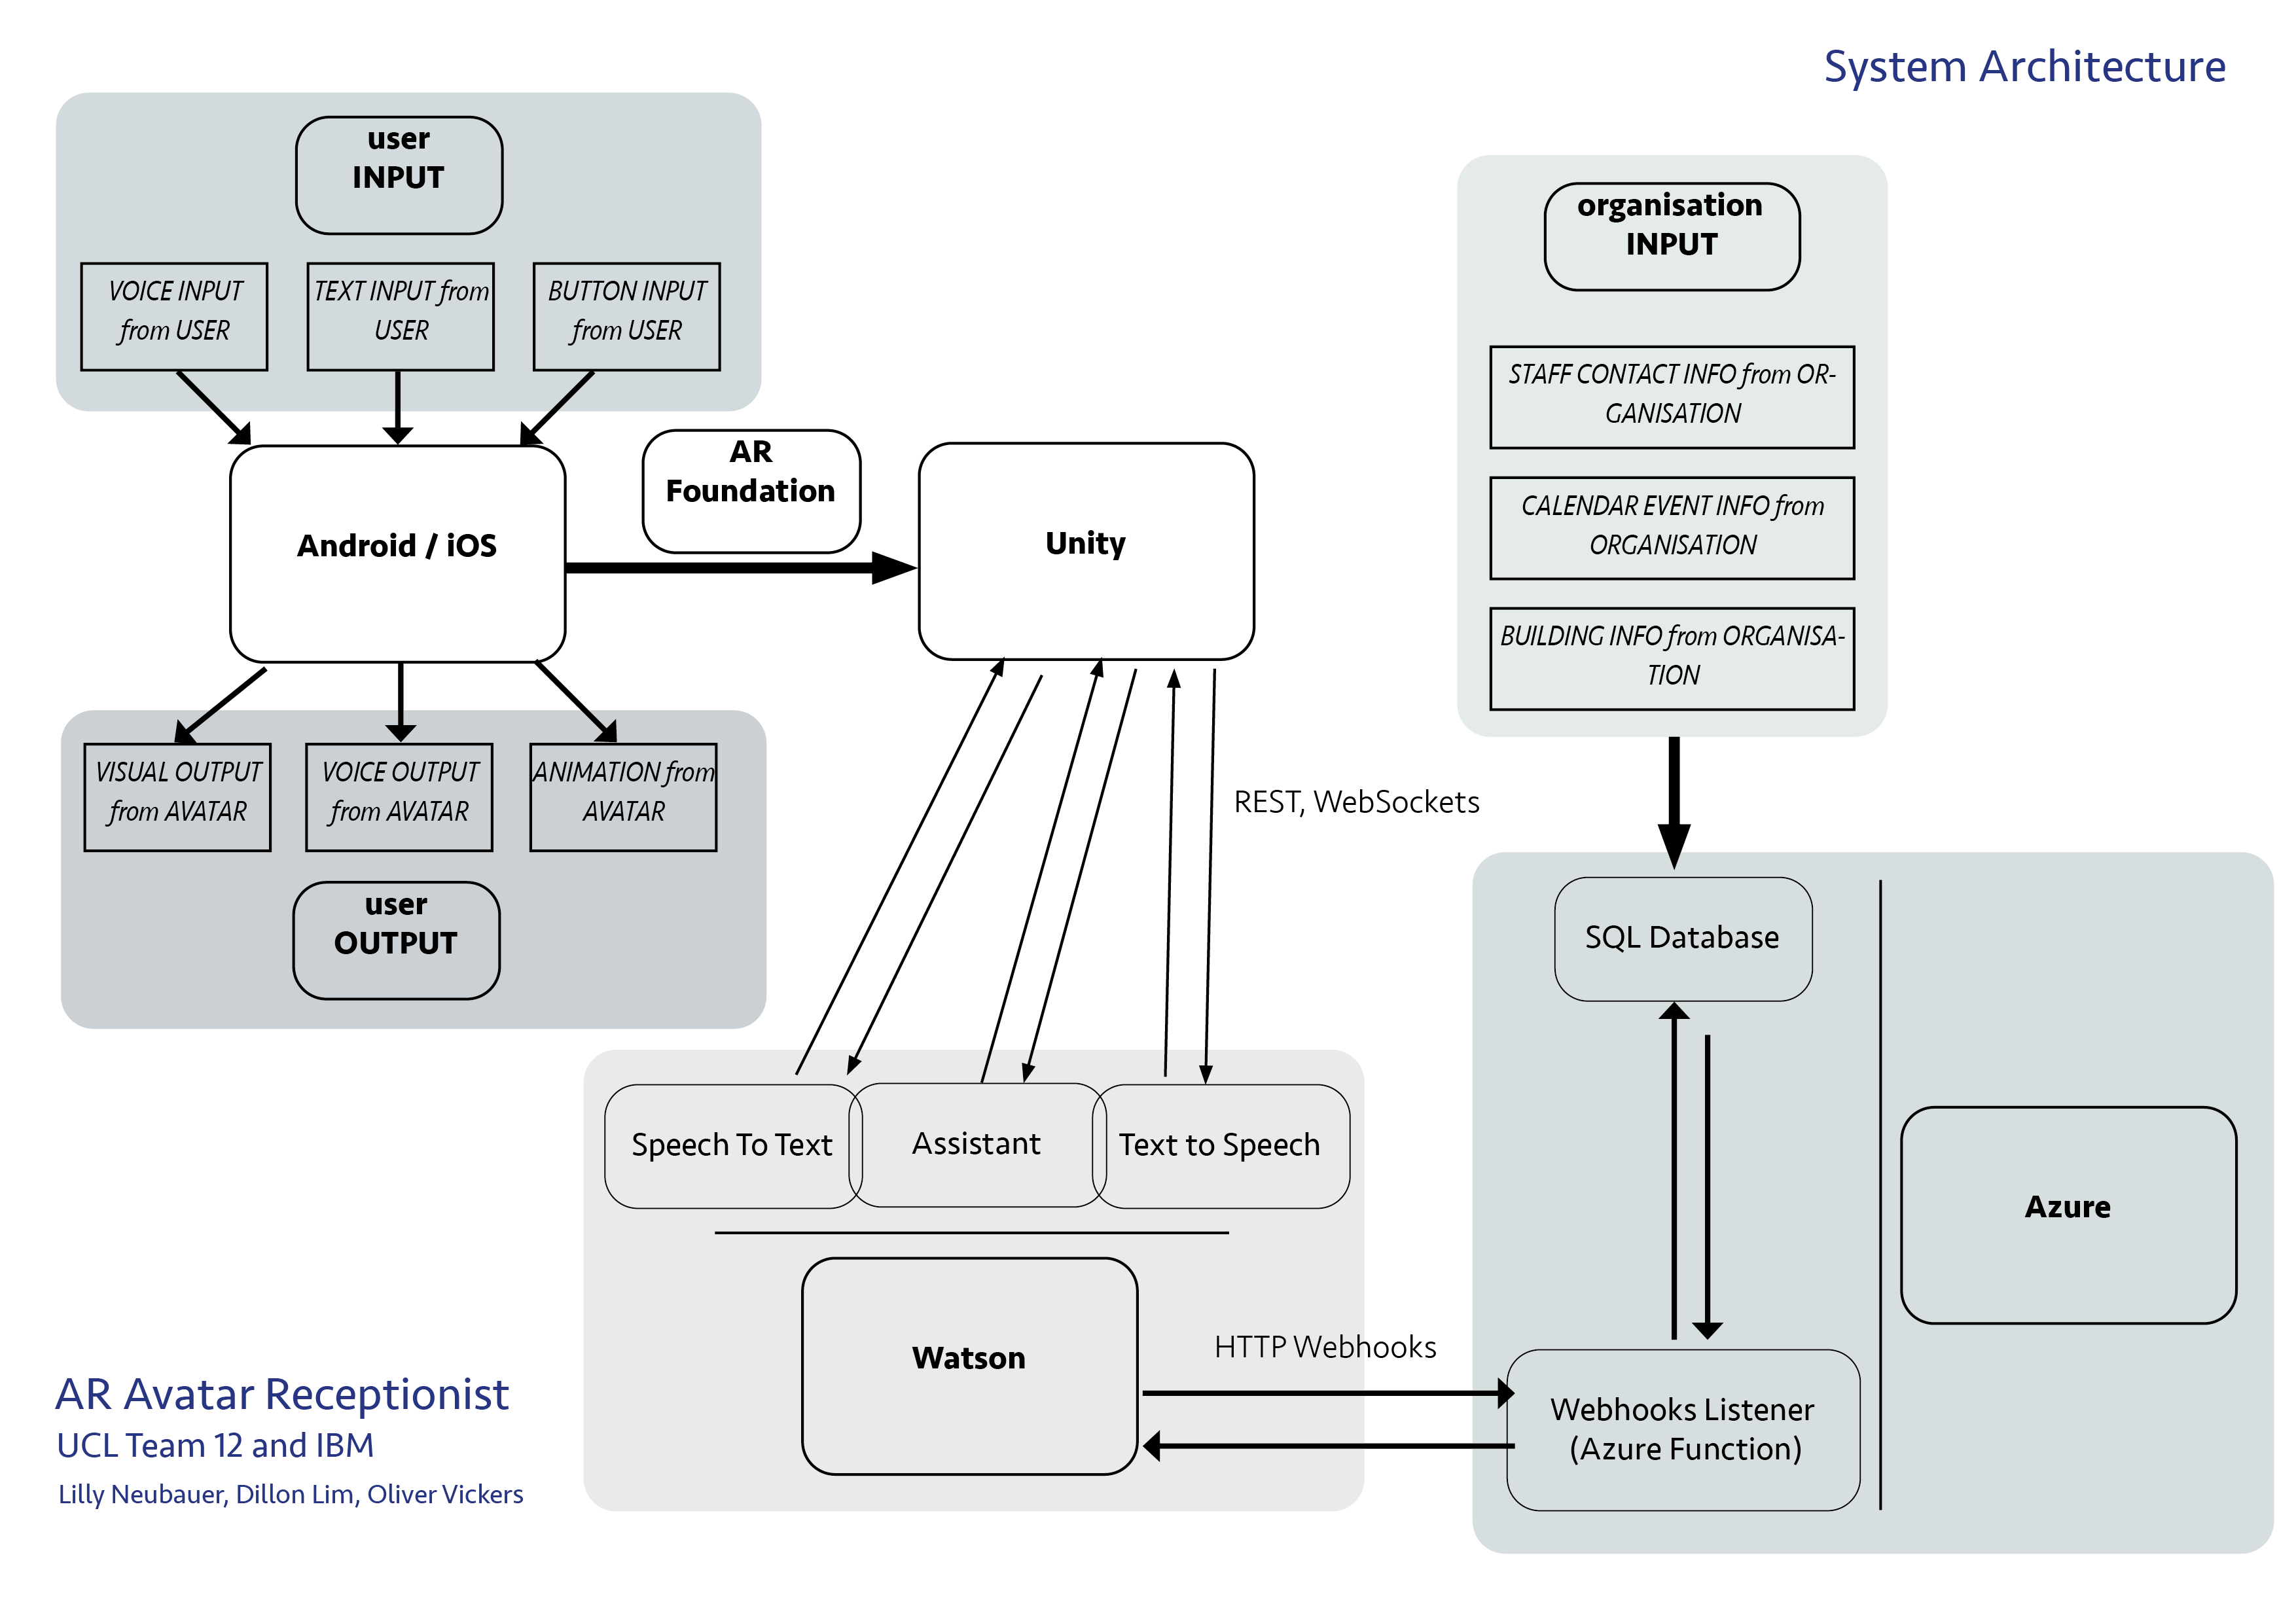
Overview of System Architecture
As seen here in our system architecture diagram, our architecture consists of four main software frameworks:
Android/iOS, Unity Game Engine, IBM Watson Cloud and Azure Cloud.
Detailed Implementation of our project
Here we describe in detail how we implemented our avatar. For an even more in depth description including
Unity object hierarchy and class descriptions, please see our technical video and Deployment Manual (in the downloads section).
Starting at the top left-hand corner of the diagram, the avatar app accepts input from the user in the form of
voice, text or buttons. Voice input is sent through the Unity Scripting Backend to the IBM Watson Cloud Text-To-Speech
service via a WebSocket, where it is converted into text which is then returned to the Unity script. Unity then sends
this text to Watson Assistant via Websockets. If the user provides text or button input, the first step of converting speech
to text is skipped, and information is sent directly to Watson Assistant in the cloud. Much of the functionality of
communicating with the Watson cloud from unity is handled by the Watson Unity SDKs which sit underneath our code for
how the application and avatar should behave given particular inputs and outputs.
When Watson Assistant receives text input, it analyses this using the chatbot backend. Our chatbot backend has been
written mostly using the Watson Assistant GUI, but can also be edited in a more automated way using JSON and csv files.
It consists of Intents, Entities and Dialog that allow the chatbot to interpret user intention and direct the conversation accordingly.
We have three separate chatbot backends, adapted to different organizational settings (IBM HQ, GP surgery, and library).
In the following use case diagrams, you can see the various use cases for each chatbot backend and how these requests link
with Watson Assistant and our Azure Webhook.
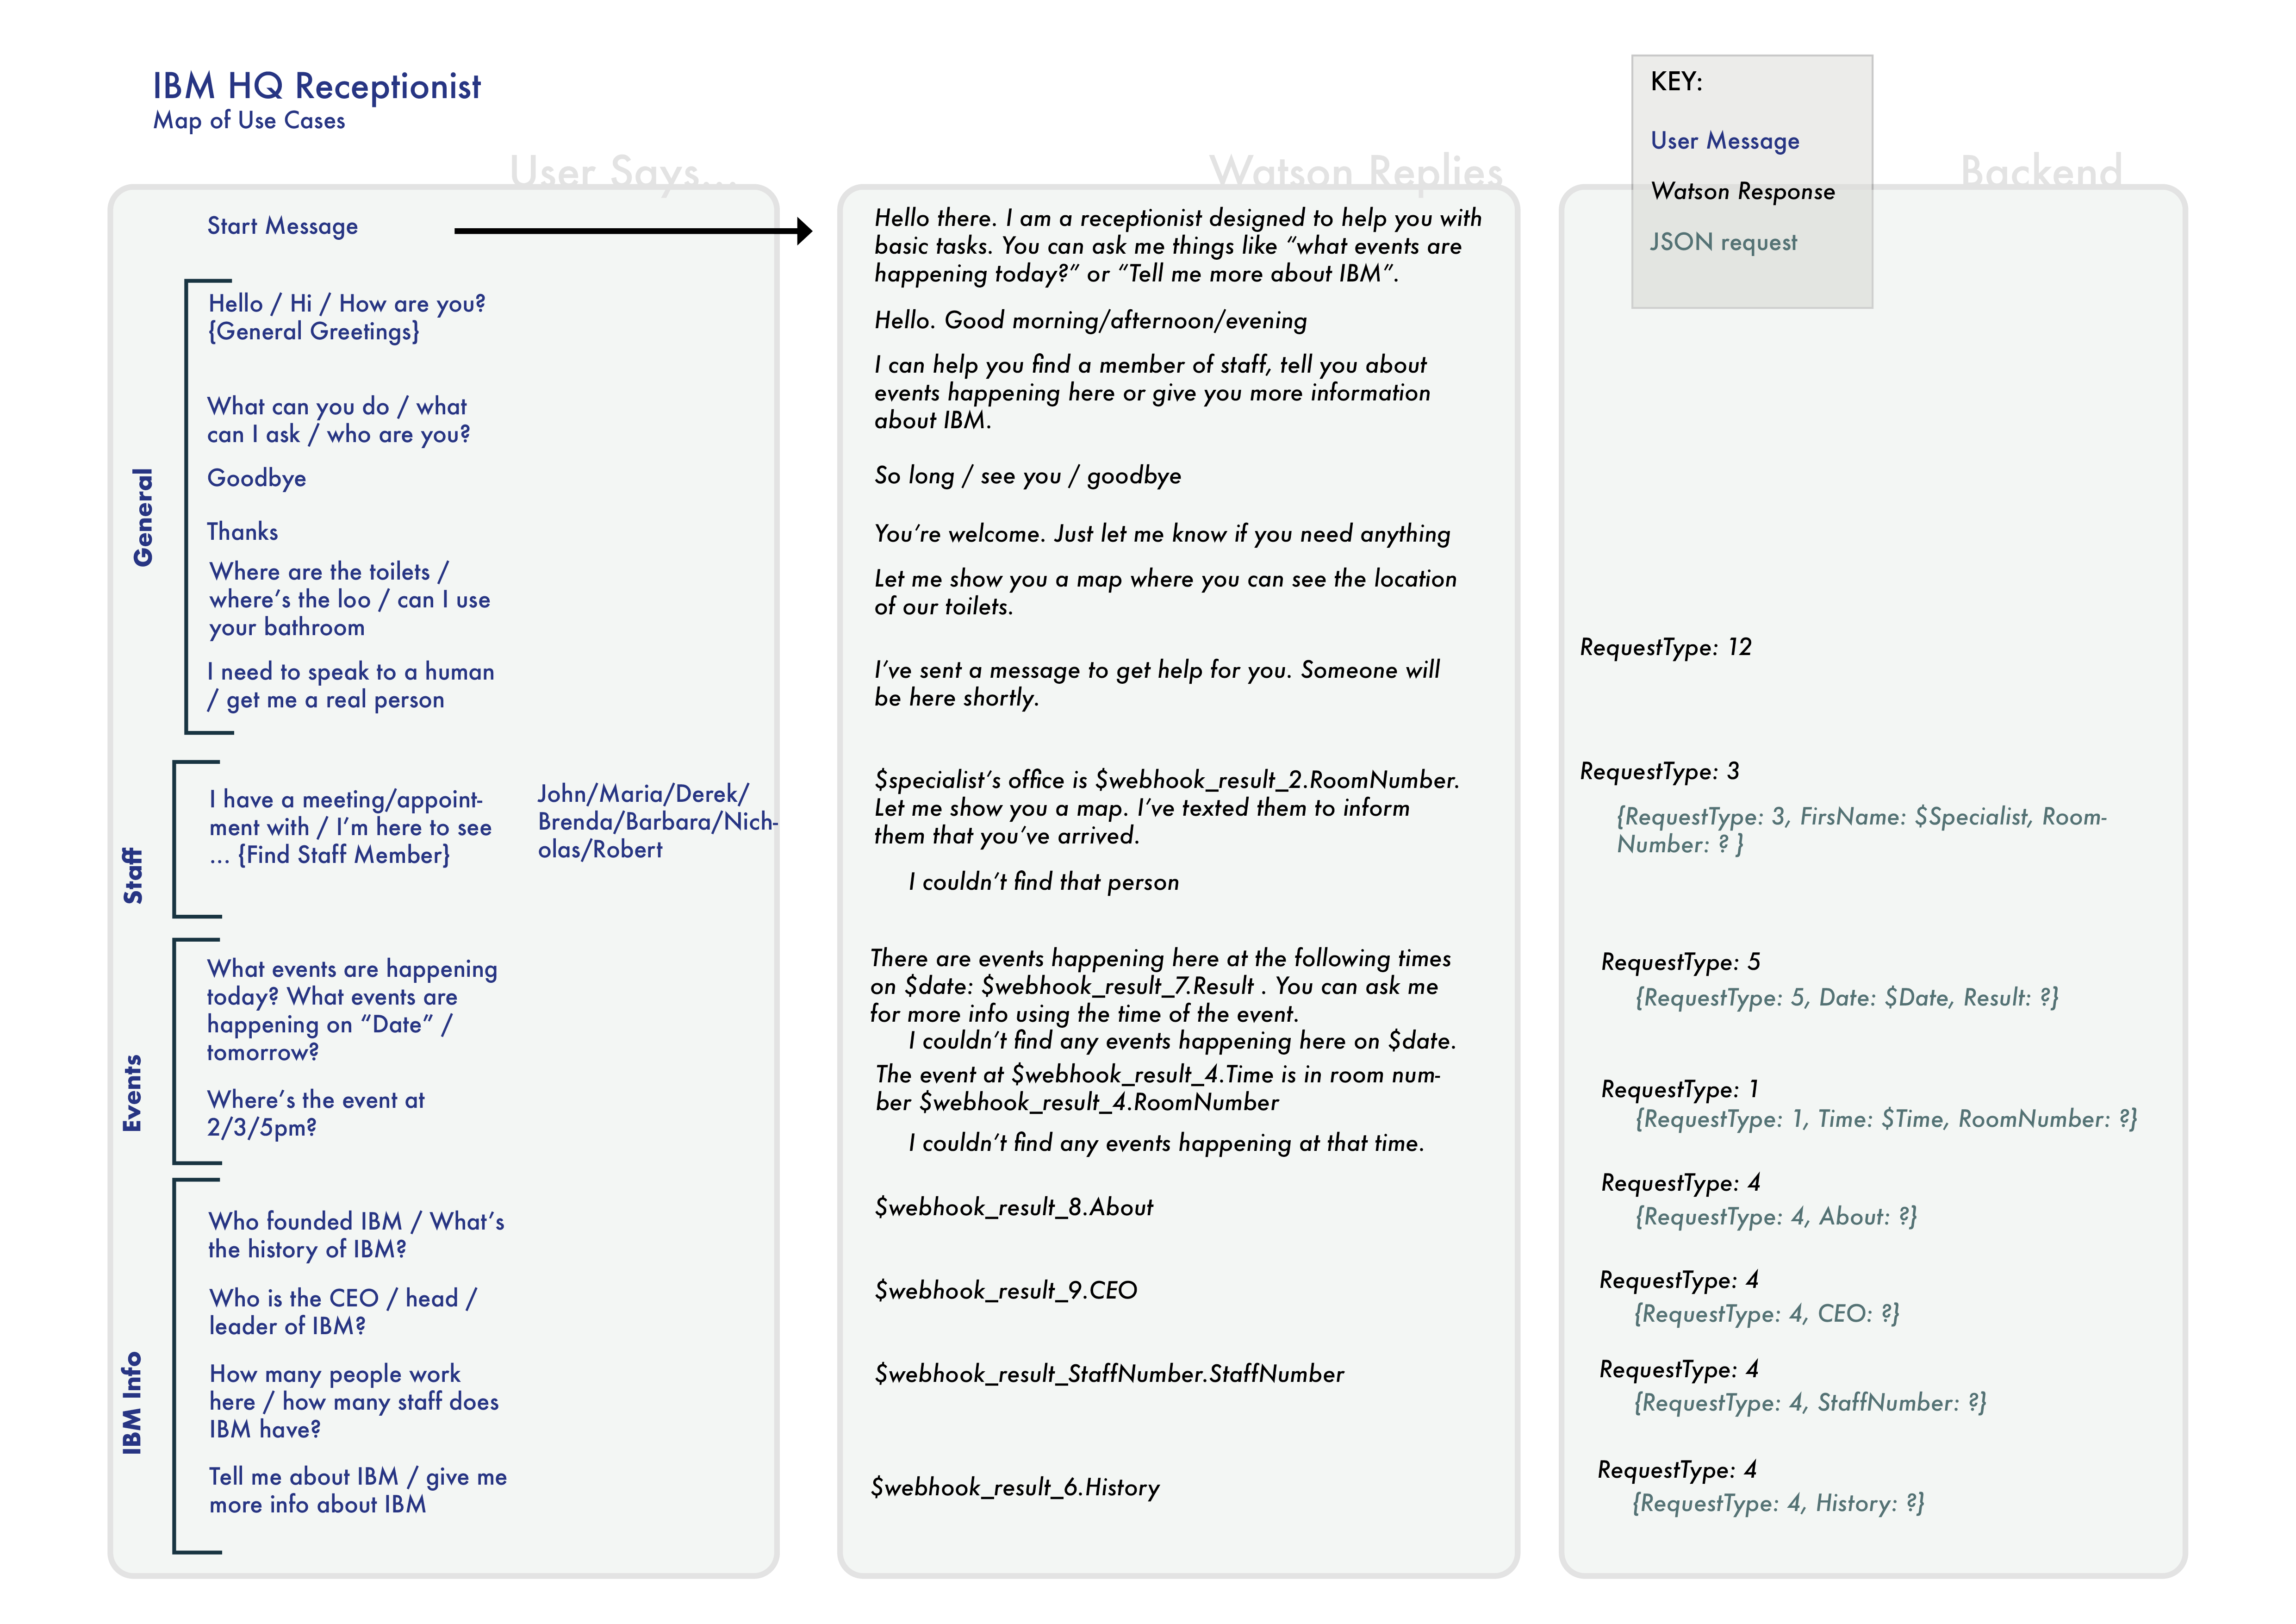
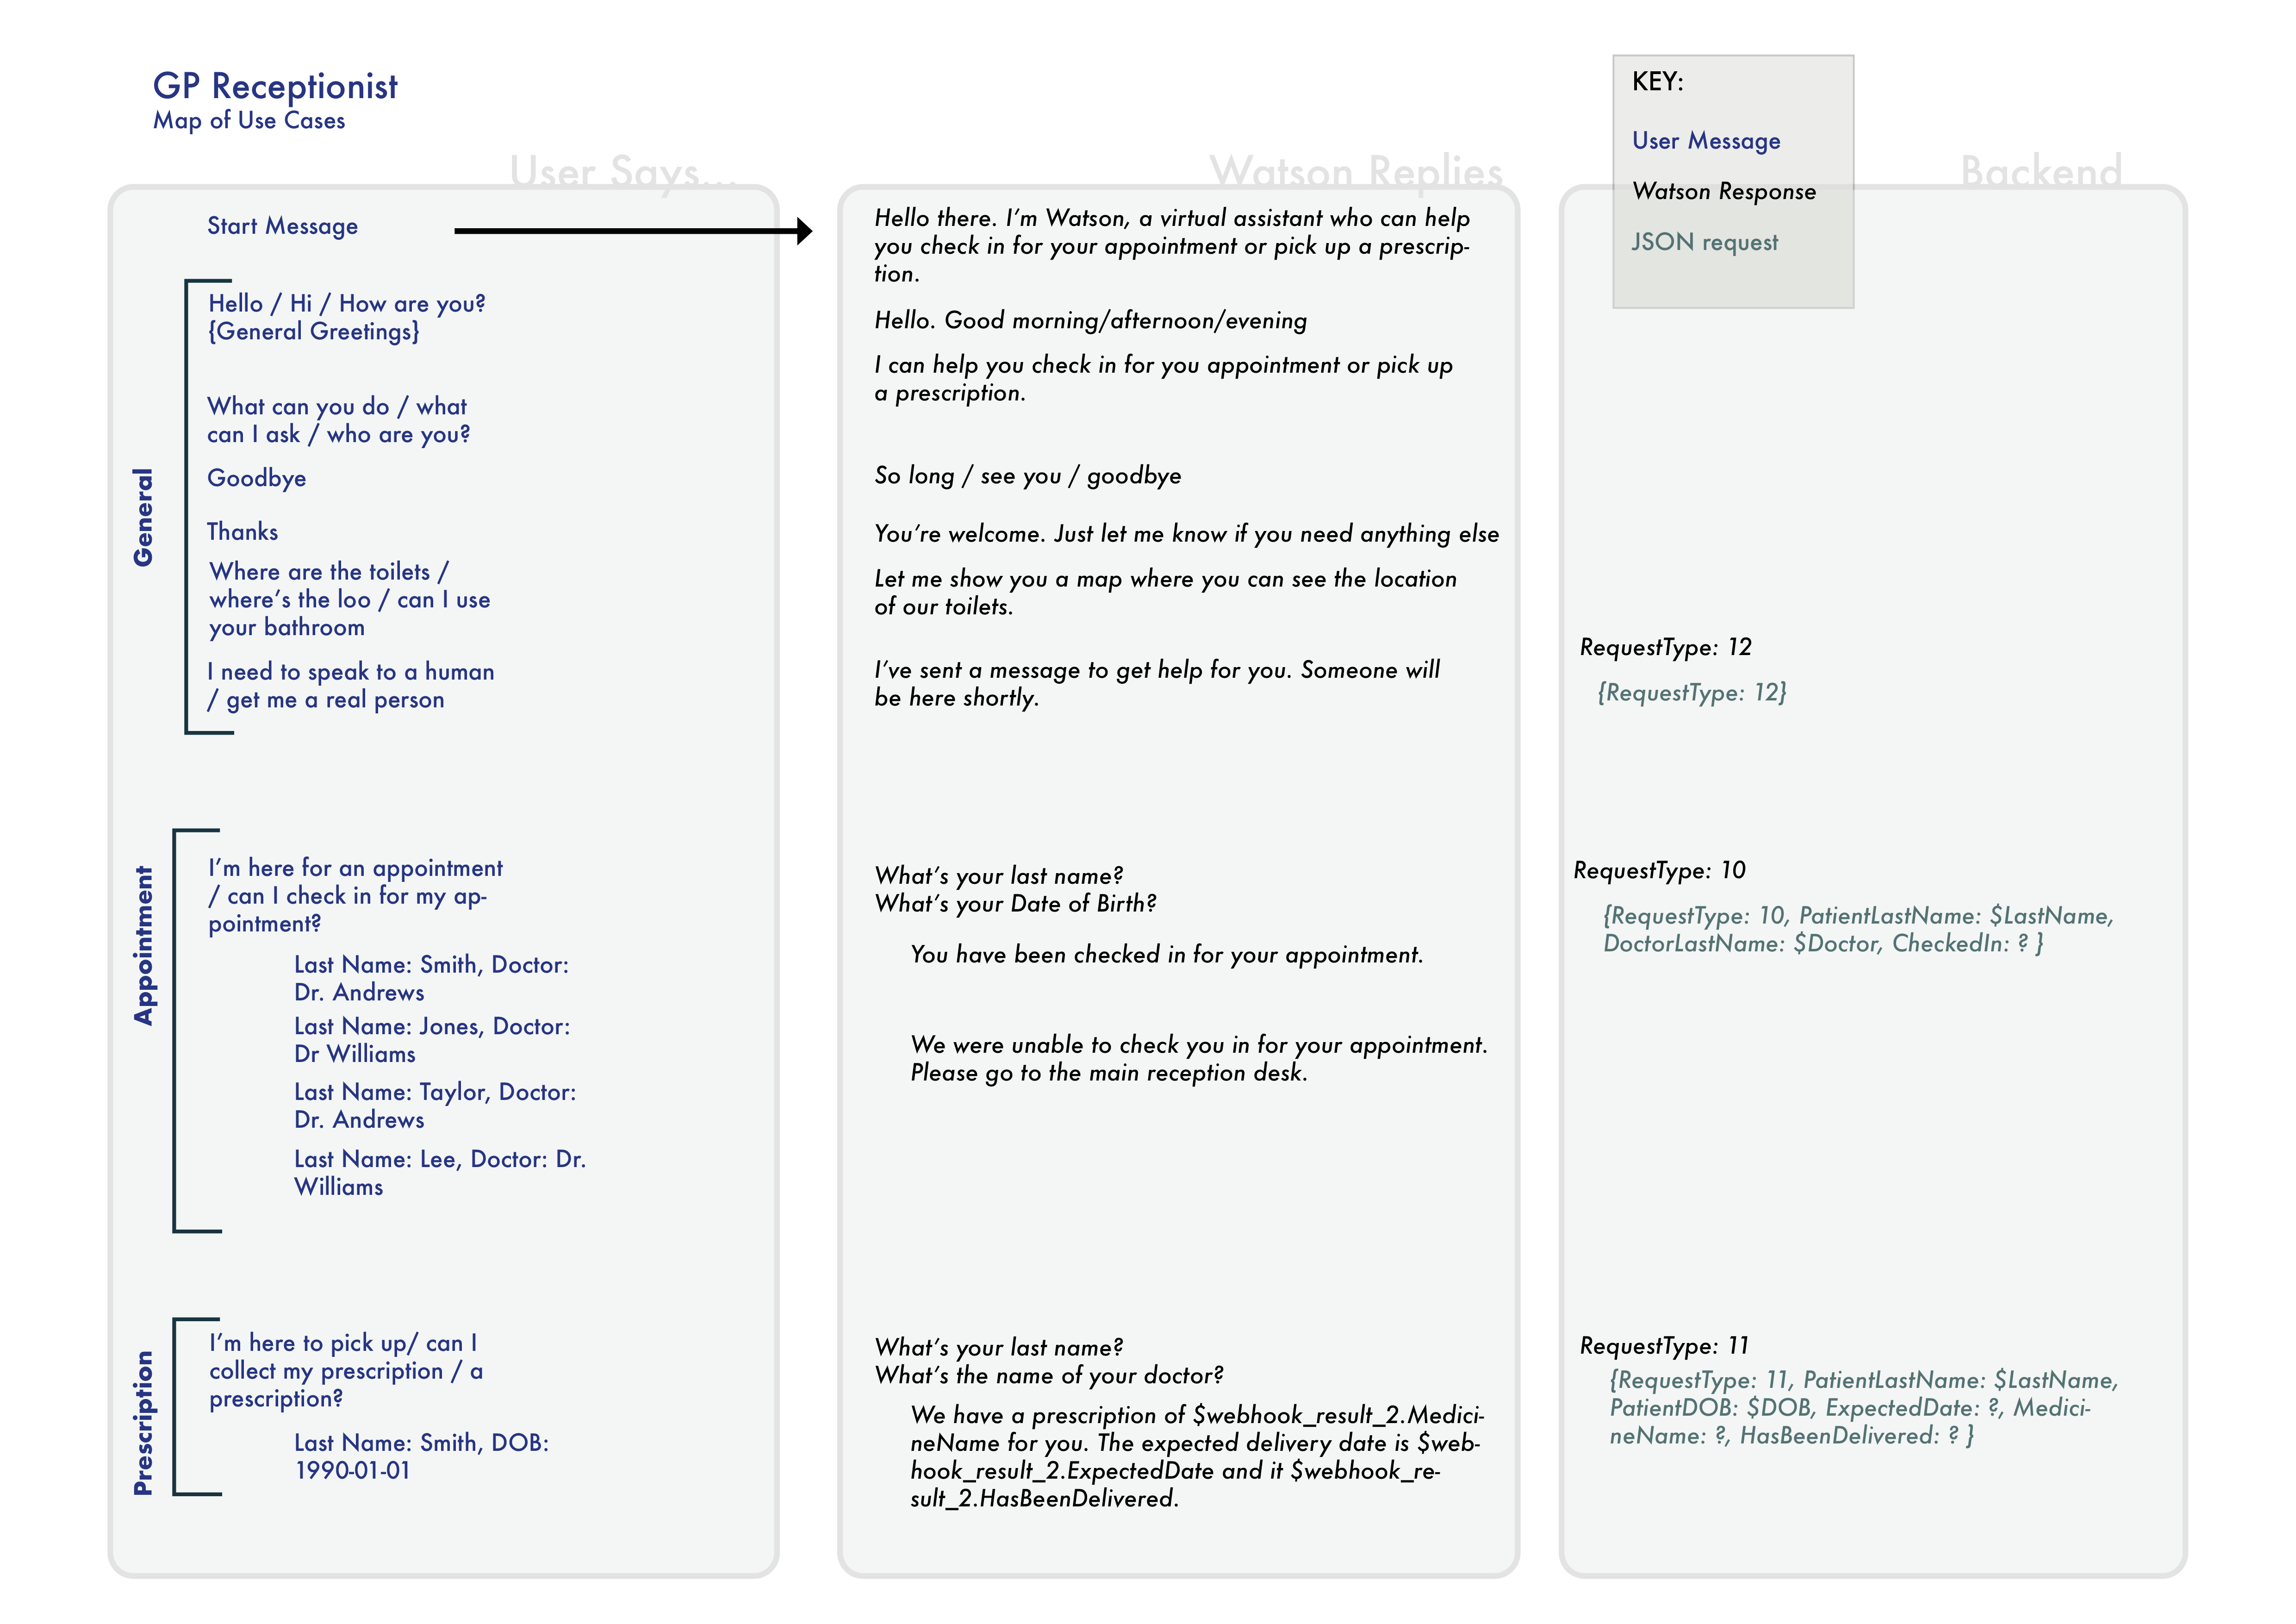
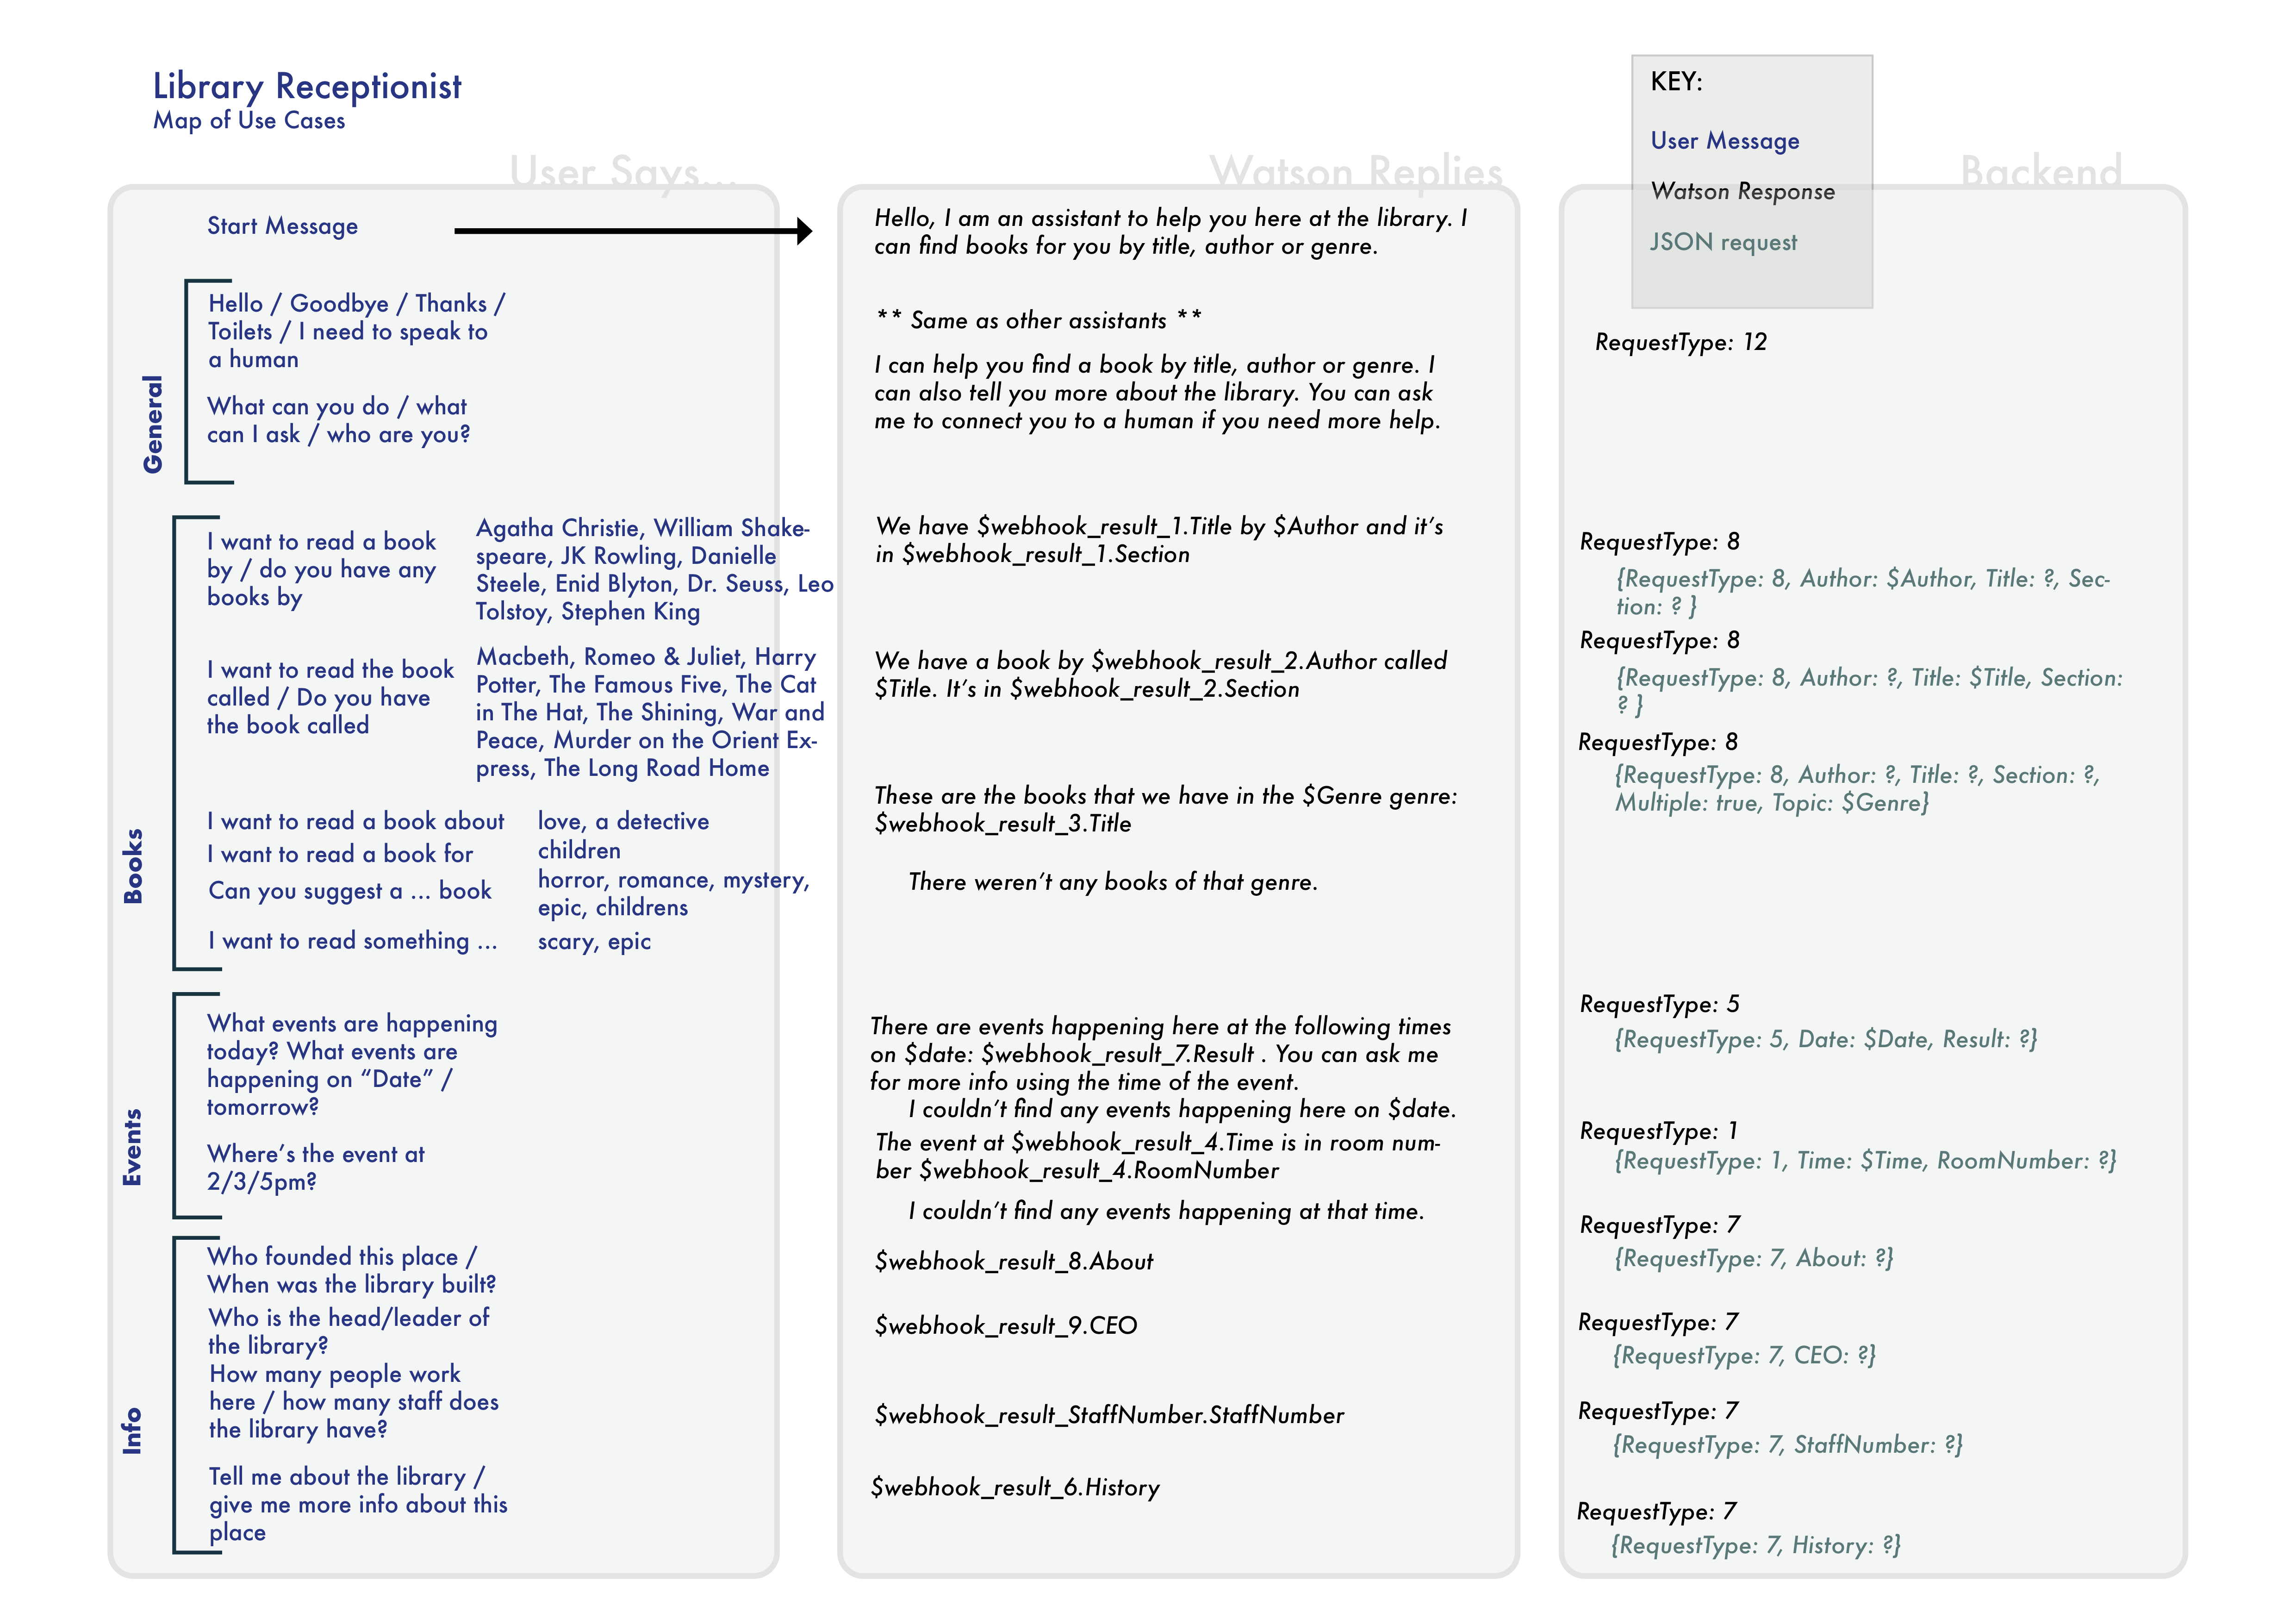
Some of these conversation nodes require additional information in order to answer the user’s question, and this is achieved
by directing these nodes to call an external webhook. The webhook is hosted in the Azure Cloud as an Azure C# Function.
It receives requests in the form of JSON, each including a “requestType” parameter, indicating which type of information
the chatbot is looking for. These requestType parameters are hardcoded into the appropriate nodes in the chatbot, and the
arrangement of these is shown below in the above user case maps. Additionally, the JSON contains additional parameters
depending on the query type, that allow information to be taken from the user and fed to the webhook, and a “?” token is put
in the value field of any parameter for which the chatbot would like a returned value. A more detailed diagram of a typical
user interaction, showing the sent and returned JSON queries, is shown below.
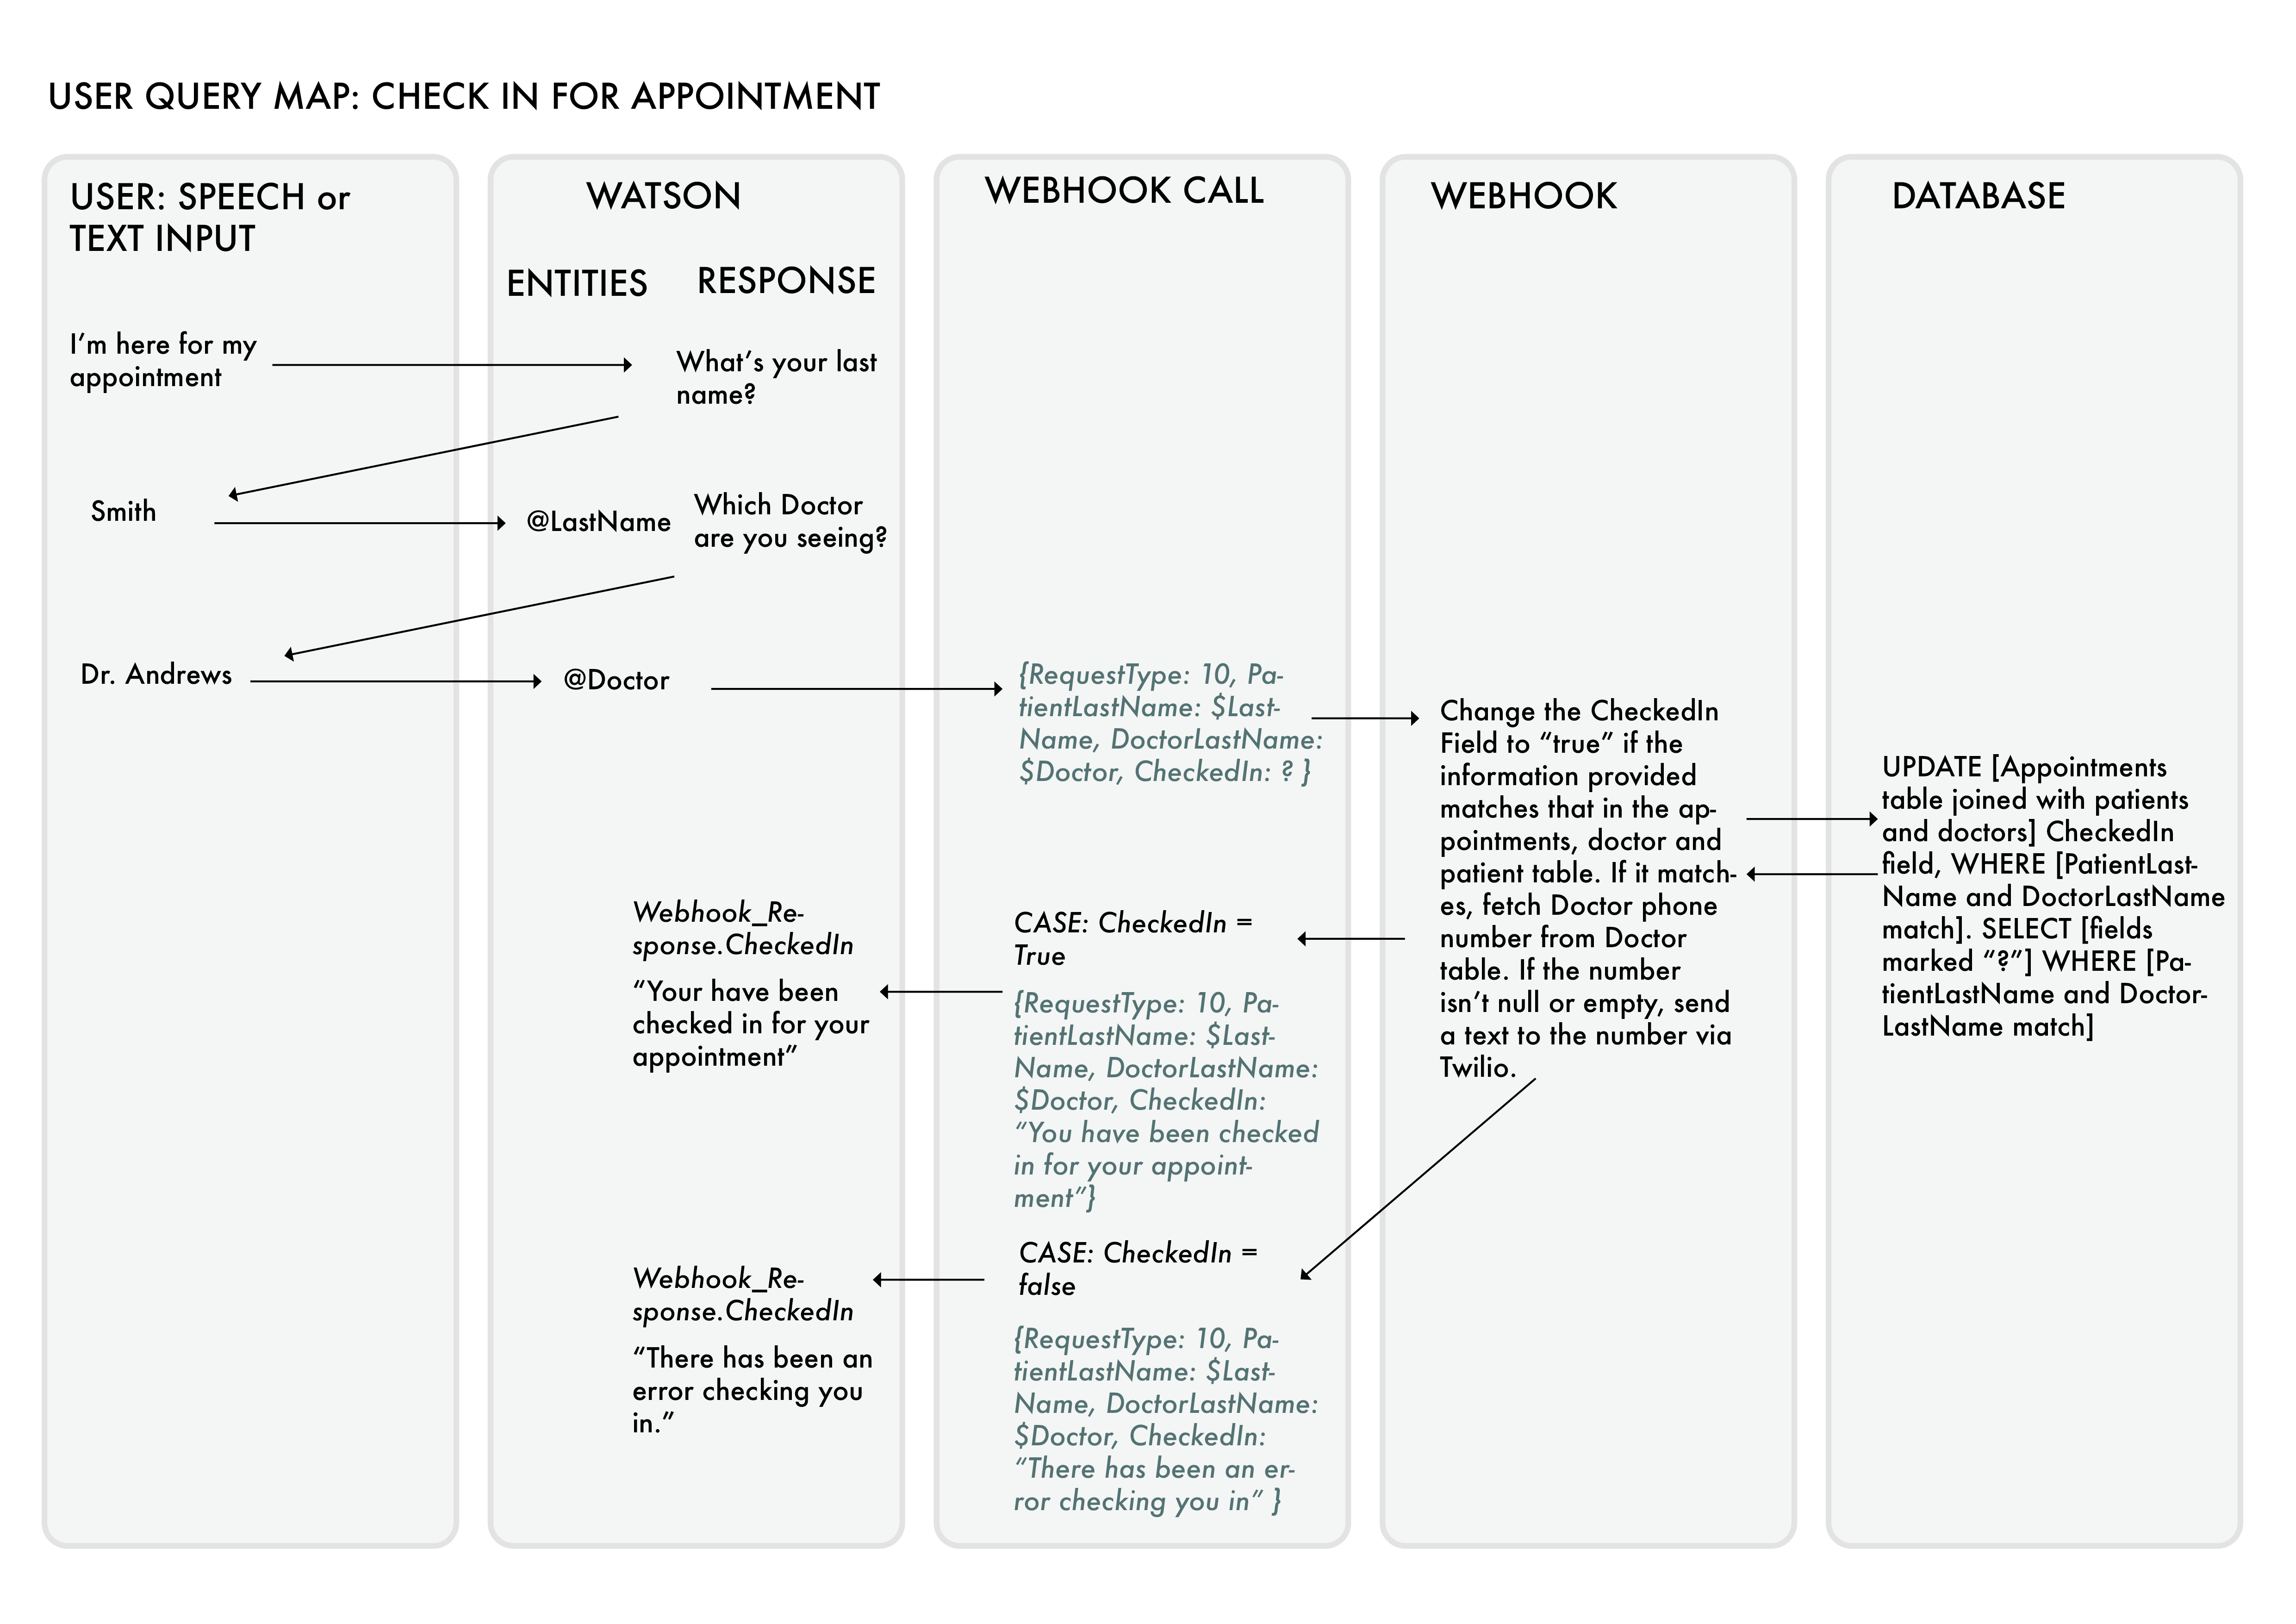
How does our webhook work?
The webhook is designed to take an HTTP request formed by IBM’s Watson Assistant and return a JSON object with the desired information. This started with simply returning a JSON object with a single key and value but has been developed to be more extendable for both sides.
On the Watson Assistant end, the request includes a request type, each of which denotes a different intent, the values which are known and values which are desired. The Webhook takes the HTTP request and converts it into a JSON object, getting the request type and finding out which database table is required.
It then uses a switch statement to perform the relevant task. These all involve getting a list of valid keys from an environment variable, which denotes which keys in the JSON object aren’t mistakes or for a different purpose. The webhook then makes the SQL query, which can take a few formats; the most common one is simply following SELECT with all of the valid keys from the HTTP request that don’t have a corresponding value, FROM the necessary table, WHERE the known keys equal the given values. Variations on this involve forcing it to select a single given column, selecting all events on a given date, getting information about an organisation and updating the table rather than selecting information.
A connection to the database is made using the connection key stored in an environment variable, and the query formed previously is executed. The result is then returned. Some request types include a further step, to request a phone number of the database and then text the staff member via the Twilio service or to update the database, for example checking someone in for an appointment at a GP surgery.
Finally, the result is added to the blank keys in the JSON object by once again looping through the valid keys, and this is then returned to the Watson Assistant to be processed into a human readable output.
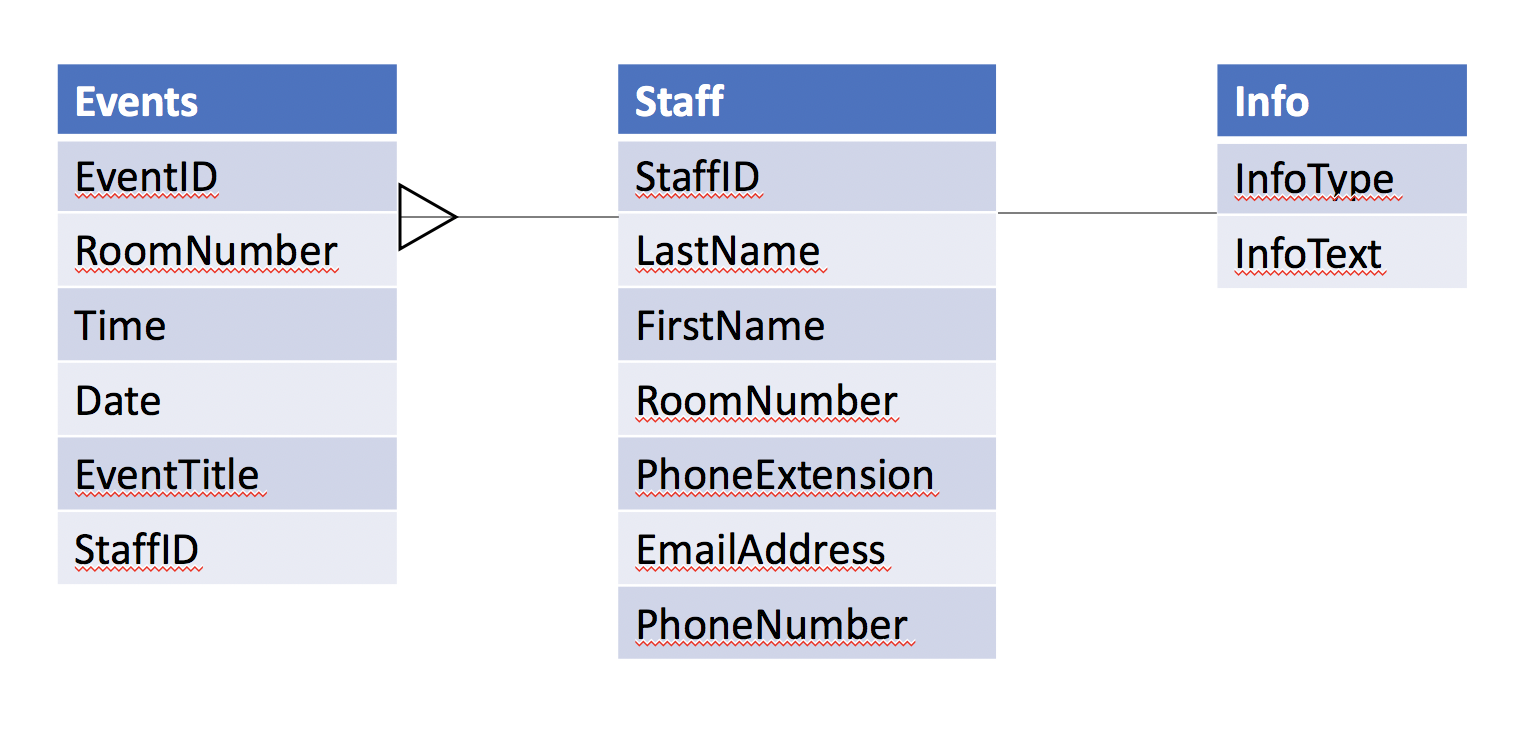
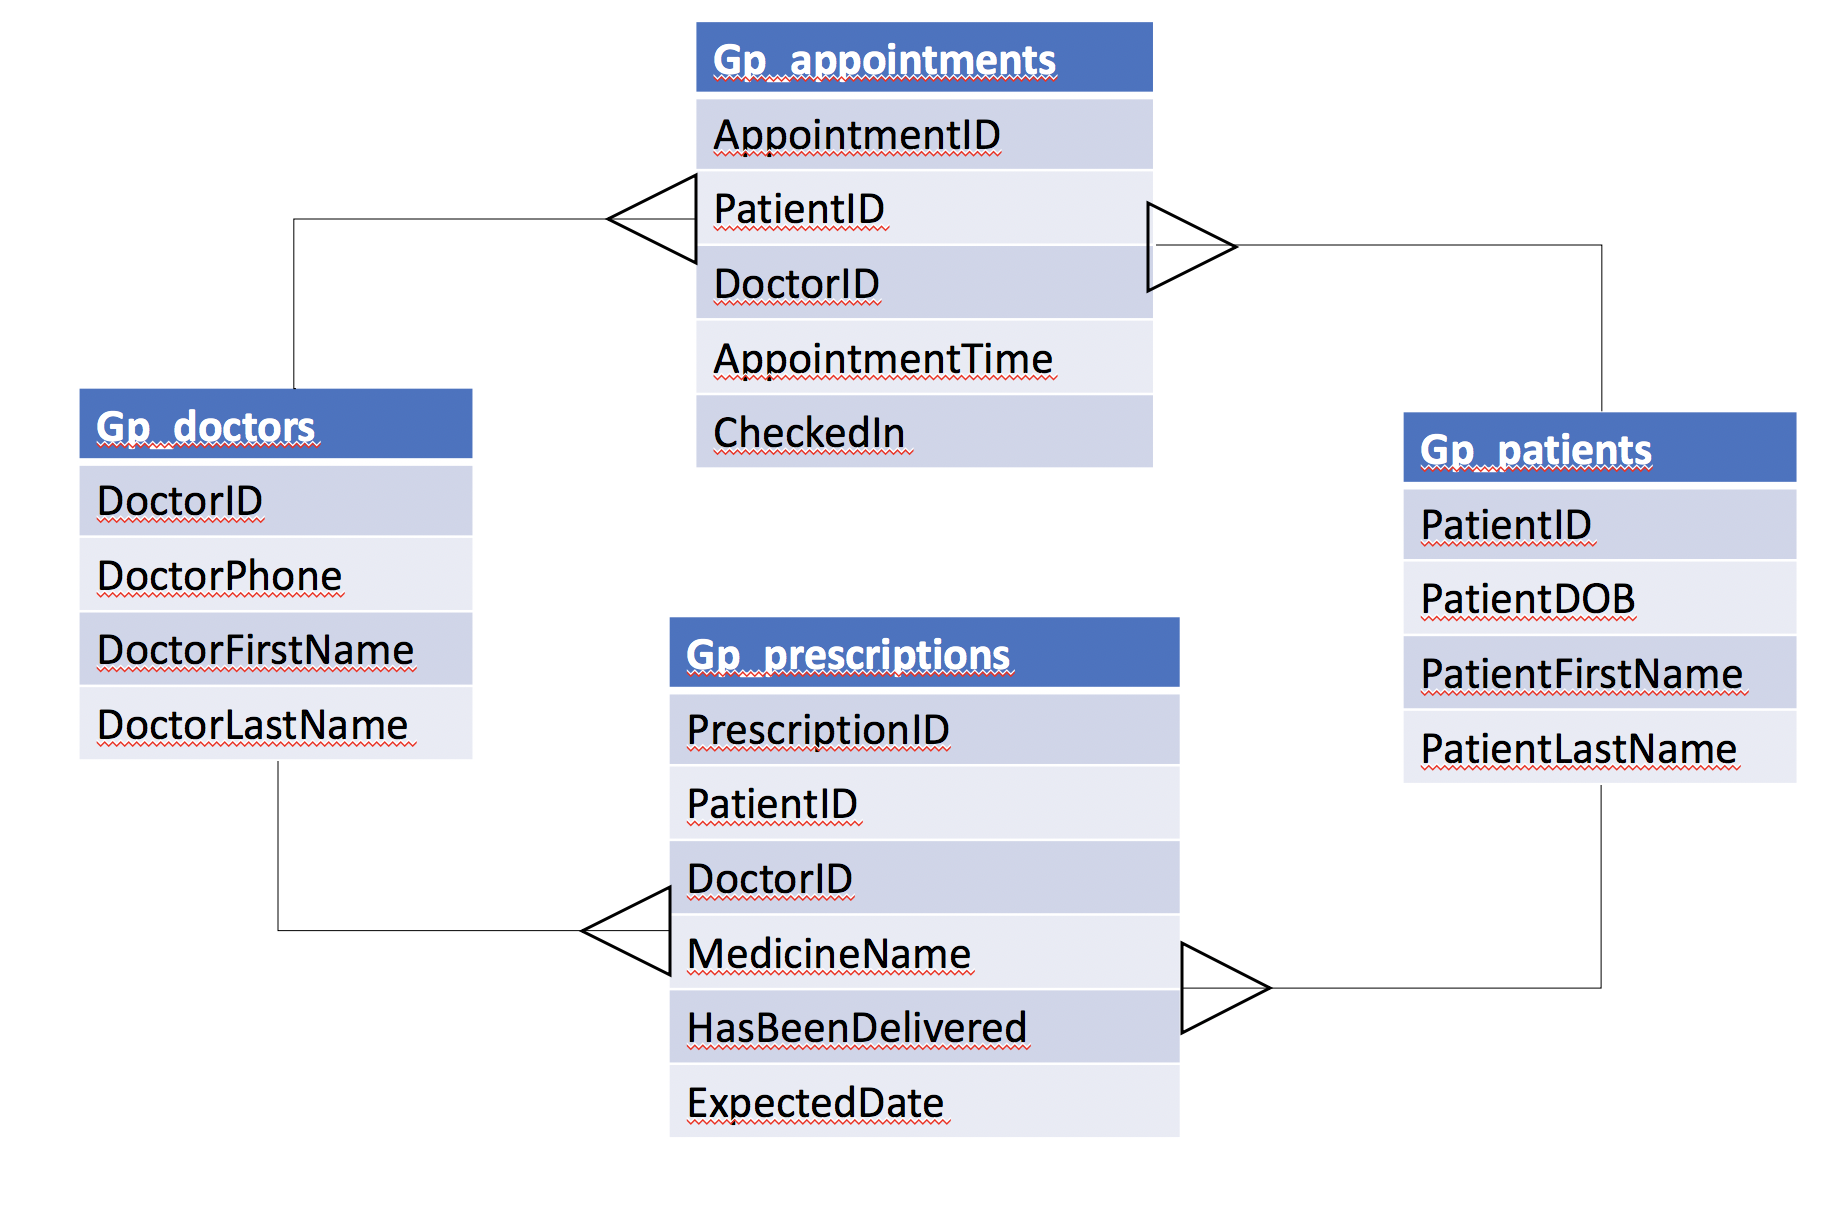
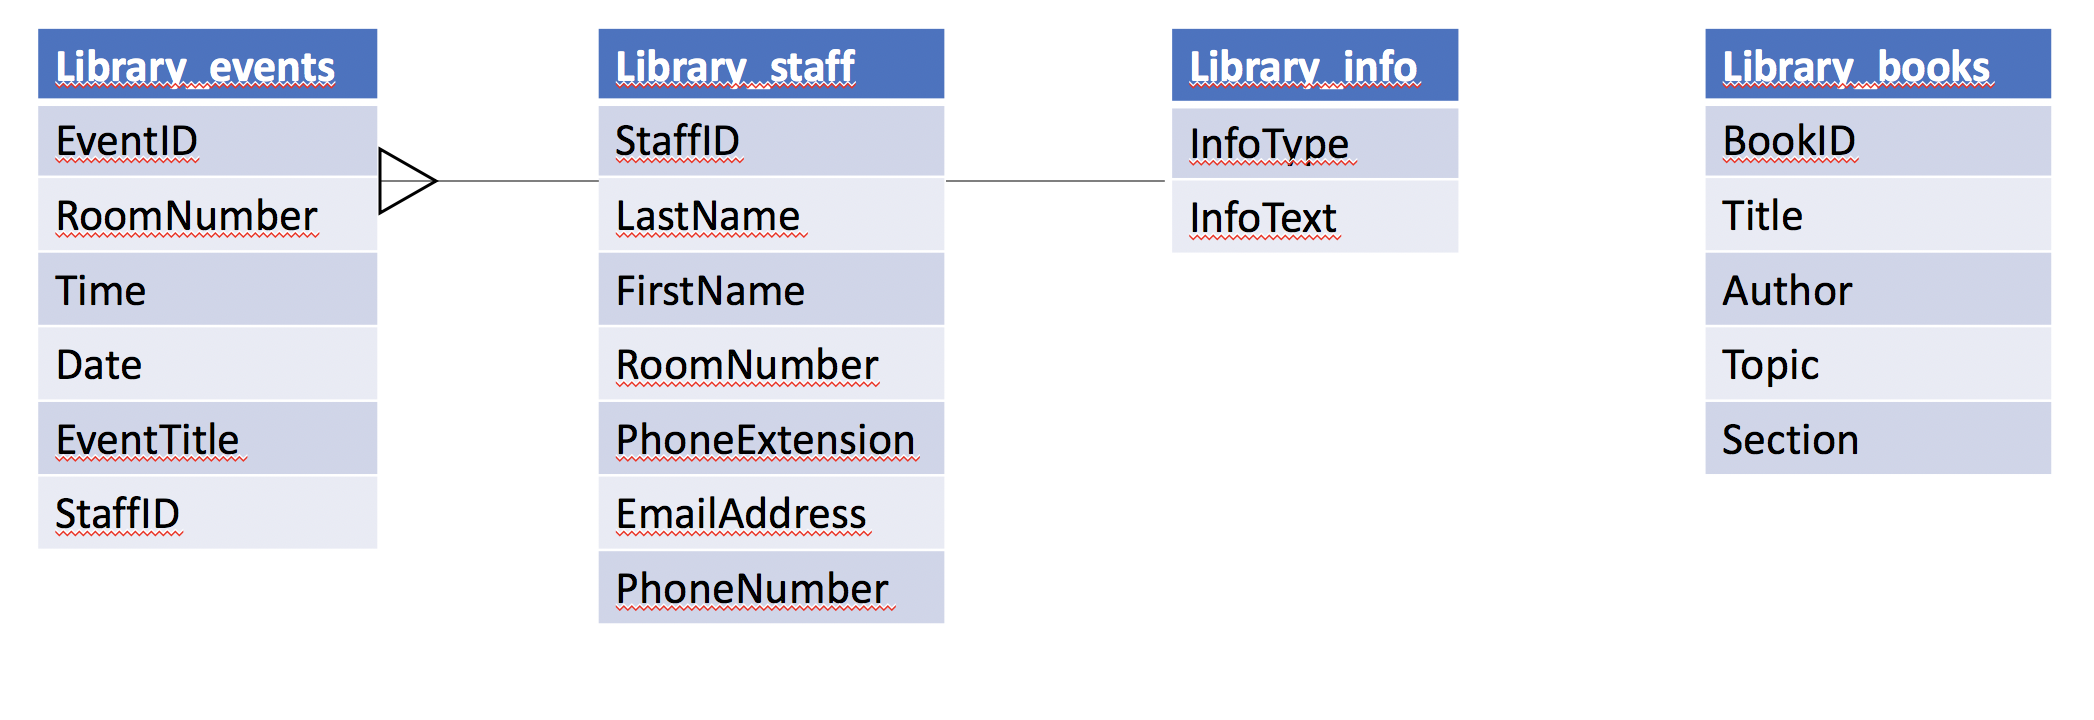
Below you can see an entity relationship diagram showing the structure of our Azure database.
Experiments
We tried several things that didn’t make it into the final project for various reasons.
- An alternative avatar. The current avatar we are using is a variation of the default unity avatar. It is not particularly
aesthetic, and we did buy an avatar from the Unity app store to try and replace it. However, this avatar used a lot of
processing power because it has some complex textures that are difficult to render in real time when the avatar is both
animating and moving in world space depending on how the user moves the camera in relation to the trigger image.
This meant that it kept crashing on our mobile device, so we decided to return to using the original avatar. In a future
iteration we could spend more time optimizing the new avatar model, but we didn’t have time to do this given that it
wasn’t one of our core requirements. - Isolating parts of the skeleton to follow the camera. We tried to isolate the head or eye components of our avatar
skeleton so that it would follow the camera with its head and eyes, rather than having its entire body rotate to face
the user (which is what happens in our final project). This turned out to be much more complicated than expected
because the eyes and head would spin unnaturally or move outside their range of normal motion. Due to time constraints
we decided that having the entire avatar body turning to face the camera looked more natural and achieved the same
effect, without putting extra time and effort into animating the head or eye components. - Allowing the user to create an appointment. We tried to build the webhook and Watson functionality so that a user
in a GP surgery could create an appointment via our chatbot. Unfortunately, we didn’t succeed in finishing this because
we couldn’t find an efficient way to search through a database for “empty” gaps in a doctor’s appointments schedule.