Introduction
In order to allow the user to pick the function they want to run in the program, we need to set up a menu system.
We want to allow users to keep using the program after one function has been run. Therefore, we will use the loop function to allow for infinite repetition of the menu system.
The Main Function Calls
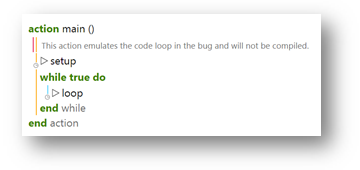
The main function of an engduino script automatically calls the loop action. Therefore, all we need to do is change the content of the loop action, and implement our menu there.
Programming Steps
1. Prompt the user to pick a choice.
We need to set up a method of receiving and interpreting input from the user. There are plenty of ways to implement this.
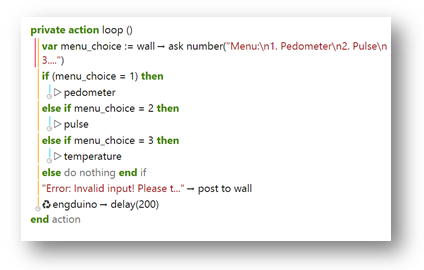
We have chosen to have the user input a number, conveying the meaning of each choice. This means, we will give the user a number of choices, in form of numbers.var menu_choice := wall -> ask number(“Menu:\n1. Pedometer\n2. Pulse\n3. Temperature\nMenu choice > “)
This prompts the user for their menu choice(a number from 1 to 3), then places their answer in the variable menu_choice.
2. React to user input
Next, we need to supply a set of if statements, prompting a reaction according to the menu_choice value. If menu_choice = 1, run the pedometer action. If menu_choice = 2, run the pulse action. If menu_choice = 3, run the temperature action. If the menu_choice value is not one of the suggested numbers, we need to display an error message.
After making the action calls, we will allow for a 200 millisecond delay, in order to allow the user to read the results of the action. This number can be changed to whatever suits the programmer best.
Final Code
Plain text file containing the final version of the code for the menu.
Current Script
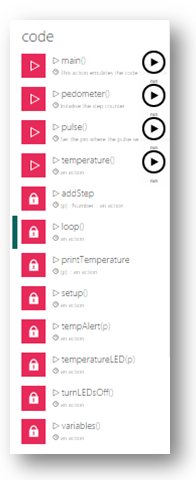
If you followed the previous lessons, your script should contain the following actions:
Congratulations! You have just completed the Biometrics Project!
You can see an example of how your program should look here.