Our project focused mainly on discovering TaPaS model features and improving its accuracy when used in clinical context. Therefore our user interface is just a basic bot that can be accessed from a website. The goal of this bot is to provide users with an easy and not complicated access to interact with the TaPaS model and explore its question answering feature.
The interaction with a bot starts with a welcome message from a bot. After the user's greeting message the bot gives the user a chance to upload a relevant file with medical data and consequently lets the user ask questions about the given information.
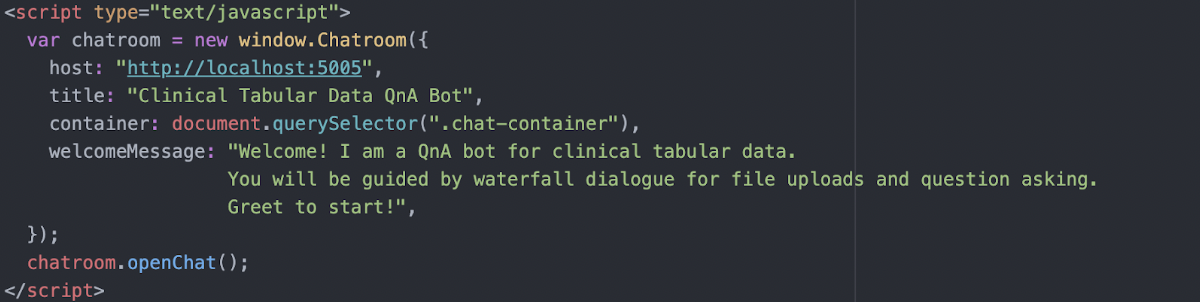
All the code implementing the user interface can be found in the index.html file in the source code of the project.
In order to be able to focus on the research side of the project and not designing the interactive platform, we decided to use a React-based Chatroom component for Rasa Stack. We settled to use this library for a number of reasons. First and most important is compatibility with Rasa's REST channel; another one is it supports Text with Markdown formatting, Images, and Buttons, that make the bot-human interaction easy and straight-forward.
To implement the bot we used two plug-ins, namely chatroom.css, to style and layout the web page, and chatroom.js to make the page interactive.

To customise the imported code we set title and welcomeMessage to our own text, describing the purpose of the bot application.
At the time of writing this text our bot, that is all the data, is stored locally and the bot can be accessed through localhost:5005. Later on we will use UCL servers as a hosting platform.
After researching, we selected the Rasa package due to its open source nature. Furthermore, it comes with natural language processing (NLP) and natural language understanding (NLU), thus making it convenient to create training data and customise the bot. Most importantly, Rasa allows customising new APIs to fit the project needs, where in our case, it is needed for TaPas integration.
For the Rasa bot to understand user inputs, a set of intents and examples is needed. The initial model is then trained with our input data so that it could learn from them.
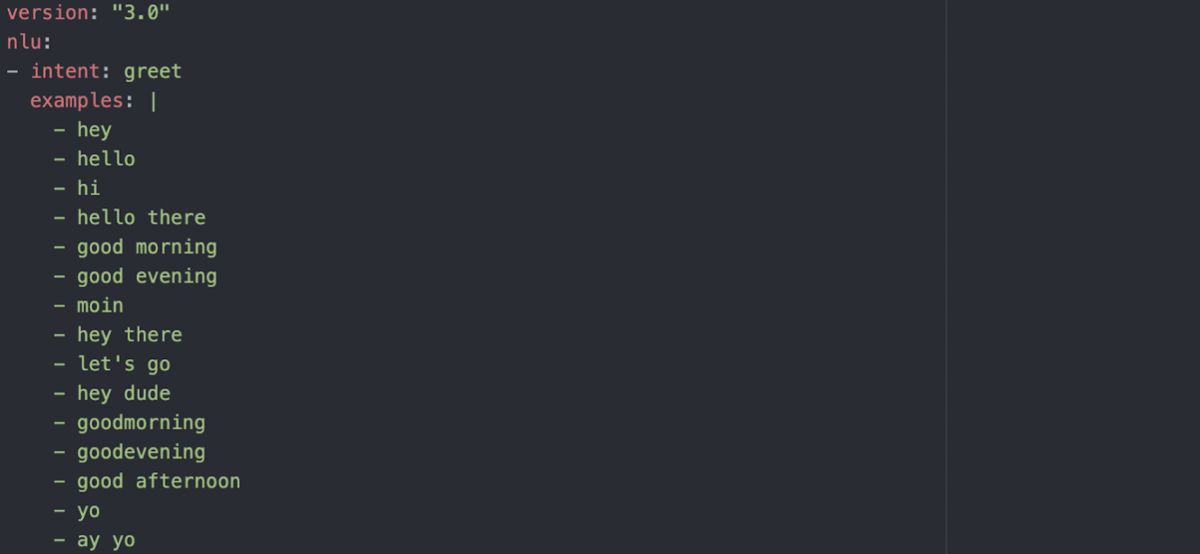
For example, a “greet” intent is prepared in the NLU training data so that whenever a user greets, the bot could accurately determine its meaning and category, then return the appropriate actions.
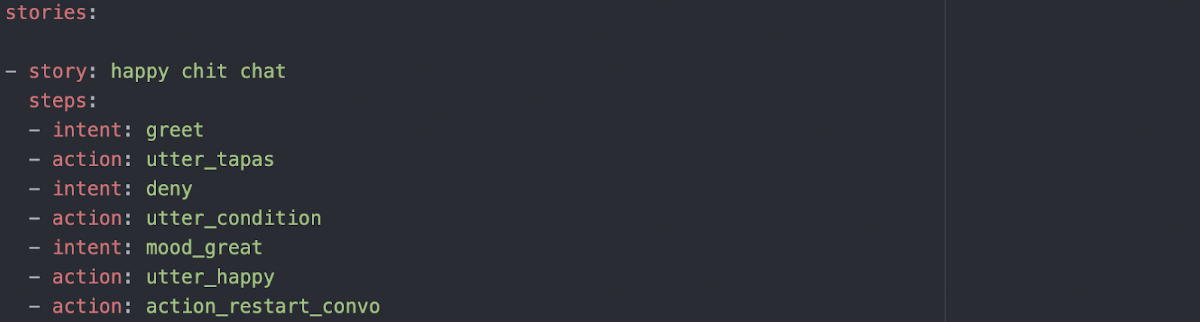
For the bot to take the next step correctly, dialogue flow is created in the form of stories. For example, the “happy chit chat” story allows the user to have a casual chat with the bot. In this story, if the user’s mood seems great, the bot will cheer happily and ask the user to keep up their happy day.
Even though Rasa provides default actions to accommodate basic needs, we are still required to extend the custom actions to offer more functionalities.

The first type is text response, which could easily be implemented in the “domain.yml” file. Simple utterances are listed under responses in the form of action name and the text to be returned.
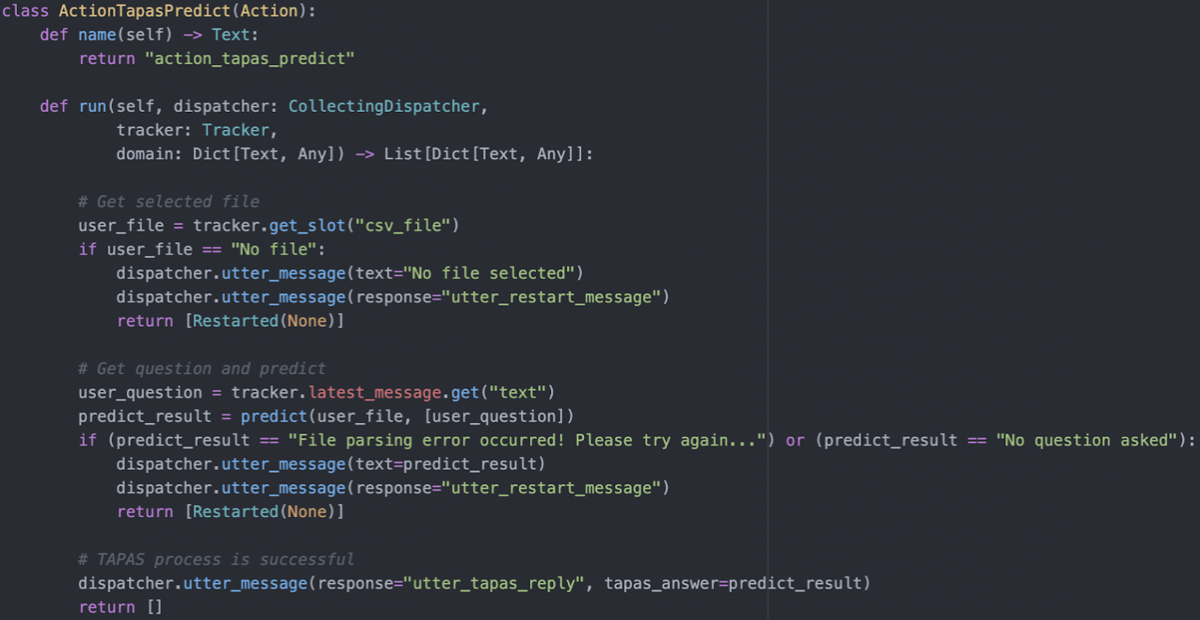
For TaPaS prediction support, a custom API is needed to send the files and questions to the prediction function. Once the answers are returned, they are dispatched to the user through the Rasa Dispatcher. If errors related to files or questions are sent back, error messages will be displayed to the user and the session will be restarted to restore the file and question slots.

Lastly, the action endpoint is specified in the “endpoints.yml” file so that the bot is aware of the correct Rasa Action server to request and query.
TaPas is a low-level supervision question-answering model that reasones over tables without establishing logical structures. TaPas identifies a subset of table cells and a likely aggregation operation to be performed on top of them to forecast a minimal programme. As a result, TaPas may learn operations using natural language without requiring them to be expressed in some form of formalism. This is accomplished by adding more embeddings that capture tabular structure to BERT's architecture, as well as two classification layers for picking cells and predicting an aggregation operator.
The extended BERT’s masked language model has been pre-trained on Wikipedia's millions of tables and related text segments. The model's designers also propose a pre-training technique for TaPas, which is important to its ultimate performance.
We chose to implement WTQ (WikiTable Questions) to increase certain functionality with TaPas. The model is pre-trained on MLM and an additional step called intermediate pre-training, and then fine-tuned in a chain on SQA, WikiSQL and WTQ. Fine-tuning is done by adding a cell selection head and aggregation head on top of the pre-trained model, and then jointly training these randomly initialised classification heads. It uses relative position embeddings meaning it resets the position index at every cell of the table.

With the help of the Hugging Face Transformers library, we imported the Google WTQ-tuned TaPas model with the TapasForQuestionAnswering method. This simplifies the process as model instances are downloaded through it. As for TapasTokenizer, it is used as a utility for tokenizing information into a TaPas-compatible version for processing and inferencing.

The tabular data is kept in a Pandas Dataframe for inputs (table and questions) tokenizing. In the tokenizing process, max_length is set to 512 as that is the maximum sequence length that the model can take each time. Moreover, truncation is set to True so that the tokenizer will be able to split large tables into chunks of tensors that are smaller than a sequence length of 512 to avoid errors. [1]
By feeding the tokenized inputs into the model function, outputs are returned in the form of logits. In order to make it easier to analyse, it is converted into the predicted coordinates and aggregation indices pair. They represent the answer coordinates list and aggregation value respectively. Aggregation will be explained in the next section.
From the photo above, it can be seen that the cell classification threshold is limited to 0.7. This is raised from the default 0.5 for the model to return answers with higher accuracy, which are those with a prediction score of at least 0.7.

The aggregation indices are computed by the developers, where each index means:
The method shown in the photo is used to convert the indices to their respective string equivalent.
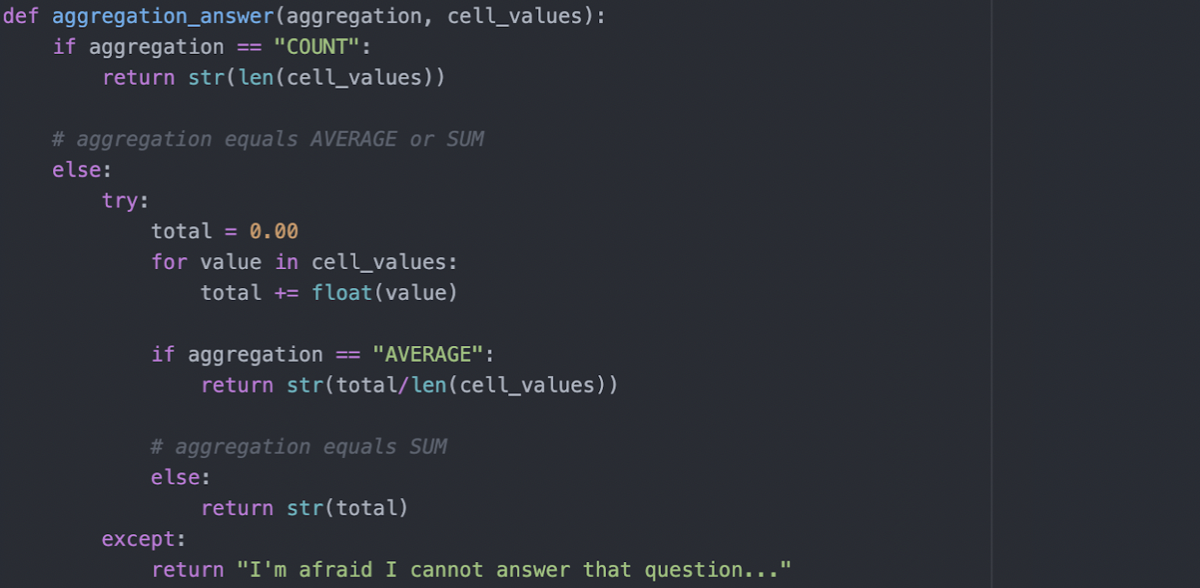
In order to carry out the additional computation, the method shown in the photo is created. Counting involves returning the length of the coordinates list, which equals the total number of returned answers.
As for average and sum, the values have to be totaled and processed accordingly. If this process fails, the answers consist of strings which do not support mathematical operations. An error or failing message will be returned so that the user could change their questions or rephrase their original one.
Reference: [1] How to Apply Transformers to Any Length of Text [Online] Available at: https://towardsdatascience.com/how-to-apply-transformers-to-any-length-of-text-a5601410af7f [Accessed: 28 February 2022]
Given that we are working with medical and sensitive patient data, post-processing is a fundamental feature in our chatbot pipeline to ensure there’s no room for error. We have to make certain every response that returns to the user passes checks that we can cross reference with a database. This will ensure all responses are accurate enough to not mislead and impact the wellbeing of patients.
With the help of Django, we are able to easily create a database which fits the project. Our model is kept simple and equipped with necessary entities for post-processing only.

As shown in the photo, four entities are created which represent test name, example result, and lower and upper bound of accepted range. The model’s object diagram is shown in the System Design - Data Storage section.

In order to access the database endpoint and retrieve the JSON object of the data, different paths for each functionality is stated in the “database/urls.py” so that visiting the respective URL offers the implemented functions. For example, the hosting address ending in “admin/” shows the database administrator login page, whereas the one ending in “labtest/” offers data requesting.

As for the data retrieval process, a function is defined so that whenever a GET request is sent to the endpoint, a complete list of data in JSON representation will be returned to the requestor.
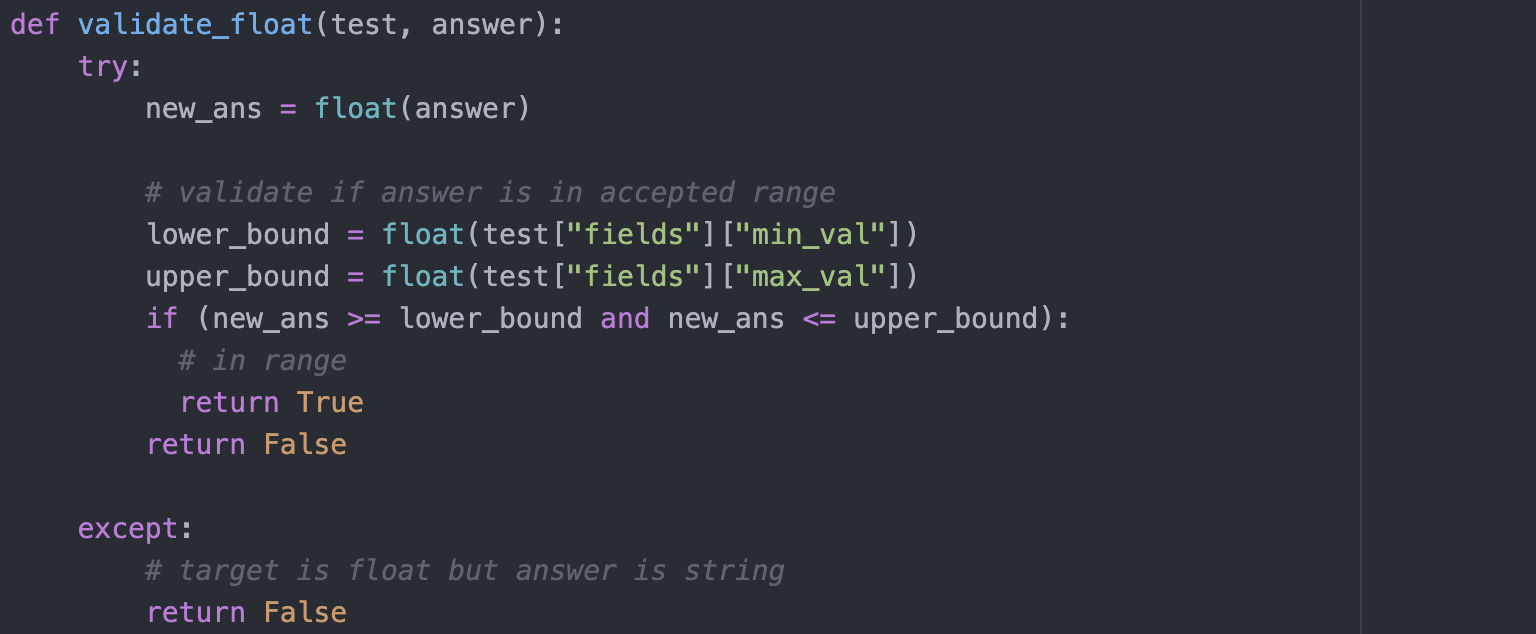
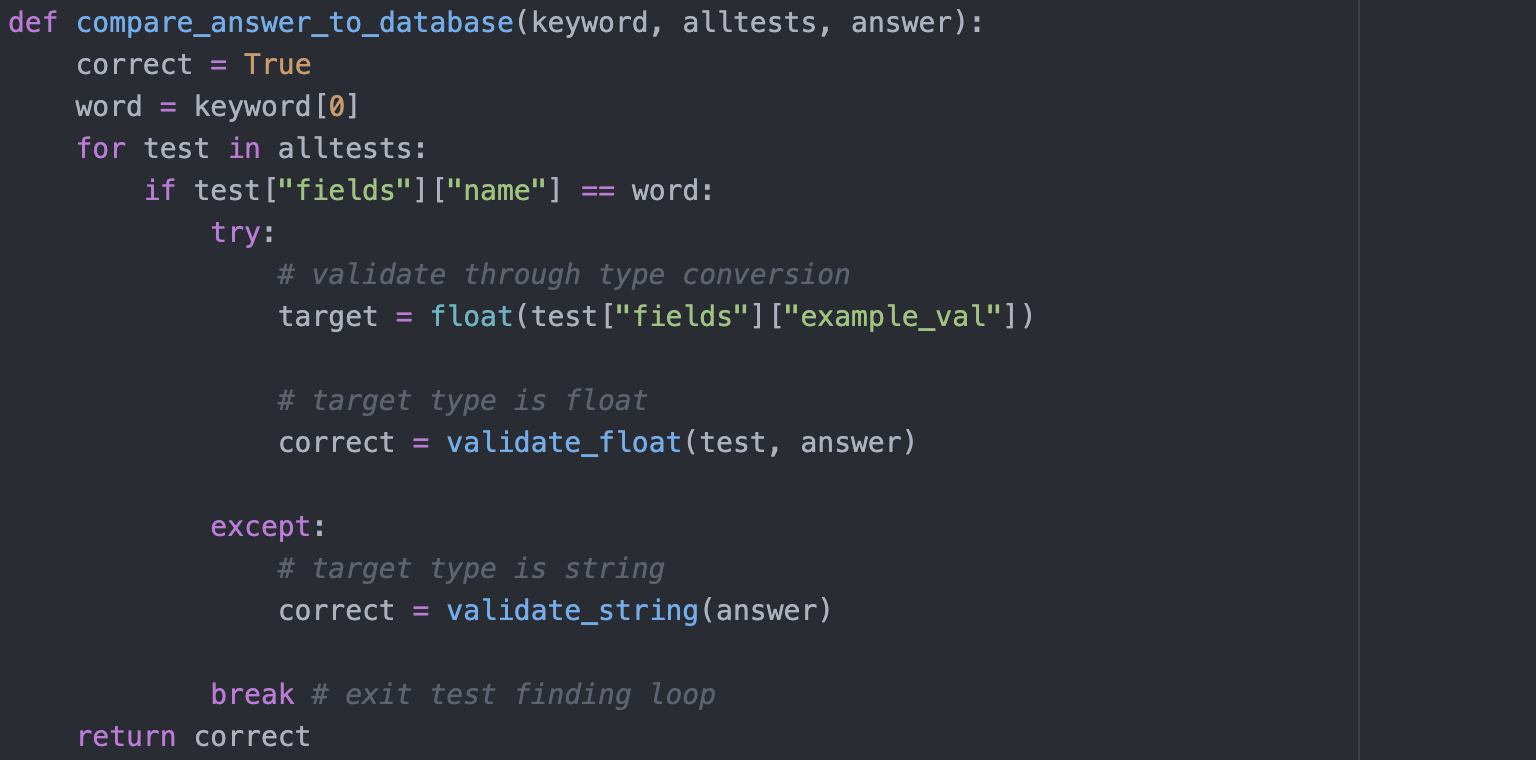
We begin by cross-checking the datatype of the TaPas response with the type we expect and have stored in the database as ‘example_val’. If the types do not match then we stop the response going back to the user. If the types match and are a string the answer goes back to the user. If the types match and are a float the TaPas answer enters its second check.
The second check distinguishes if the response falls within a given range, in the database these are stored as ‘min_val’ and ‘max_val’. For instance, we know that glucose levels should fall anywhere between 80 to 300mg/dl (milligrams per deciliter). If the TaPas response falls outside this range we prevent the answer from going back to the user as an error may have occurred.