Technology Review
Integrating PixelPilot with VSCode
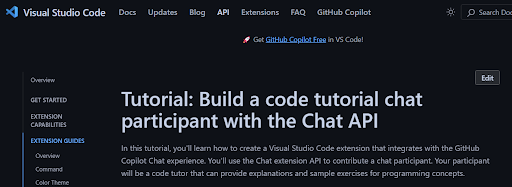
To support an integrated and offline-friendly AI assistant within Visual Studio Code, we began by researching how to build a chat participant extension. Our goal was to allow users to input prompts in a chat-like interface and receive model-generated outputs, while maintaining full local control without internet dependency.
We referred to VSCode's official guide on creating a chat participant [1] to implement the initial interface. The chat participant was developed using TypeScript, as recommended by the guide and required by the API. This became the foundation for PixelPilot's integration with VSCode.
Although the chat participant worked well, it only supported connections to online large language models such as OpenAI's GPT-4o and Anthropic’s Claude 3.5, as documented by VSCode. This posed a significant challenge because our project required offline usage to ensure accessibility for all users.

To enable offline model support, we had to find a workaround that would bypass the restriction of the VSCode chat participant only supporting online LLMs. We accomplished this by redesigning the flow so that user prompts would be routed through a local backend instead of an external API. The steps we implemented include:
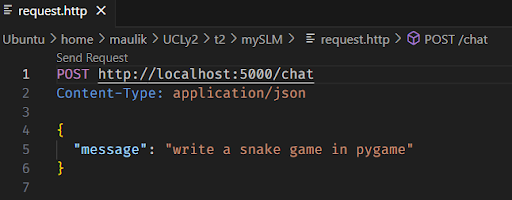
> Package user prompts into an HTTP request: When the user types a message in the chat, the extension uses the fetch() API in TypeScript to create a POST request. This request contains a JSON body that wraps the user's prompt.
> Send the request to a locally hosted server: This HTTP request is directed to an endpoint hosted on localhost. The endpoint (e.g., /api/generate) is served by a Python webserver running Flask.
> Process the request using a local AI model: The Flask server receives the prompt, forwards it to a locally loaded LLM (e.g., Qwen-2.5-Coder), and waits for the response. The model processes the input and generates output tokens, which are decoded into a final string.
> Send the model output back in an HTTP response: Once the model generates a result, the Flask server responds with the output string as the body of the HTTP response.
> Display the output in the VSCode chat interface: The extension reads the response and renders it in markdown format inside the chat window, making it appear like a natural assistant reply.
This architecture allowed us to simulate a real chat experience powered by offline AI models. The local server was implemented in Python, using the Flask microframework due to its lightweight design, minimal configuration, and strong community support. We chose this stack because it allowed rapid prototyping and easy integration with the Hugging Face Transformers library, which was used to load and query various models during testing.
To identify suitable code generation models, we explored Hugging Face [2], a widely-used platform offering access to thousands of pre-trained machine learning models. It provides a convenient web interface, extensive documentation, and Python-based tools such as the transformers library, which allowed us to experiment with models using just a few lines of code.
This enabled us to iterate quickly: we could select a model from the Hugging Face Hub, load it into Python with AutoModelForCausalLM.from_pretrained(), and begin testing without worrying about manual configuration or setup.
Our initial focus was on models specifically fine-tuned for code generation. Early candidates included:
CodeT5
A model designed for code understanding and generation, trained on a large corpus of code from GitHub.
StarCoder
A multilingual code generation model from the BigCode project, trained on a diverse set of programming languages.
To test each model:
> We launched the Flask server with the model loaded in memory
> We crafted simple programming prompts related to game logic
> We sent the prompts to the model via HTTP POST requests
> We analyzed the responses to check for completeness, relevance, and accuracy
Here is the http request:
Unfortunately, both CodeT5 and StarCoder failed. CodeT5 to meet our quality expectations, whilst StarCoder was too big to be run on memory. Codet5 in particular often misunderstood the prompt context, produced syntax errors, or failed to generate coherent code blocks. These limitations made it unsuitable for our use case, which demands high-quality, modular, and runnable game code.
This shows StarCoder Failed to run:

This shows that CodeT5 failed:

After underwhelming results from our initial tests, we turned to the Hugging Face BigCode Leaderboard [3], which provides benchmark rankings for LLMs specifically focused on code generation.
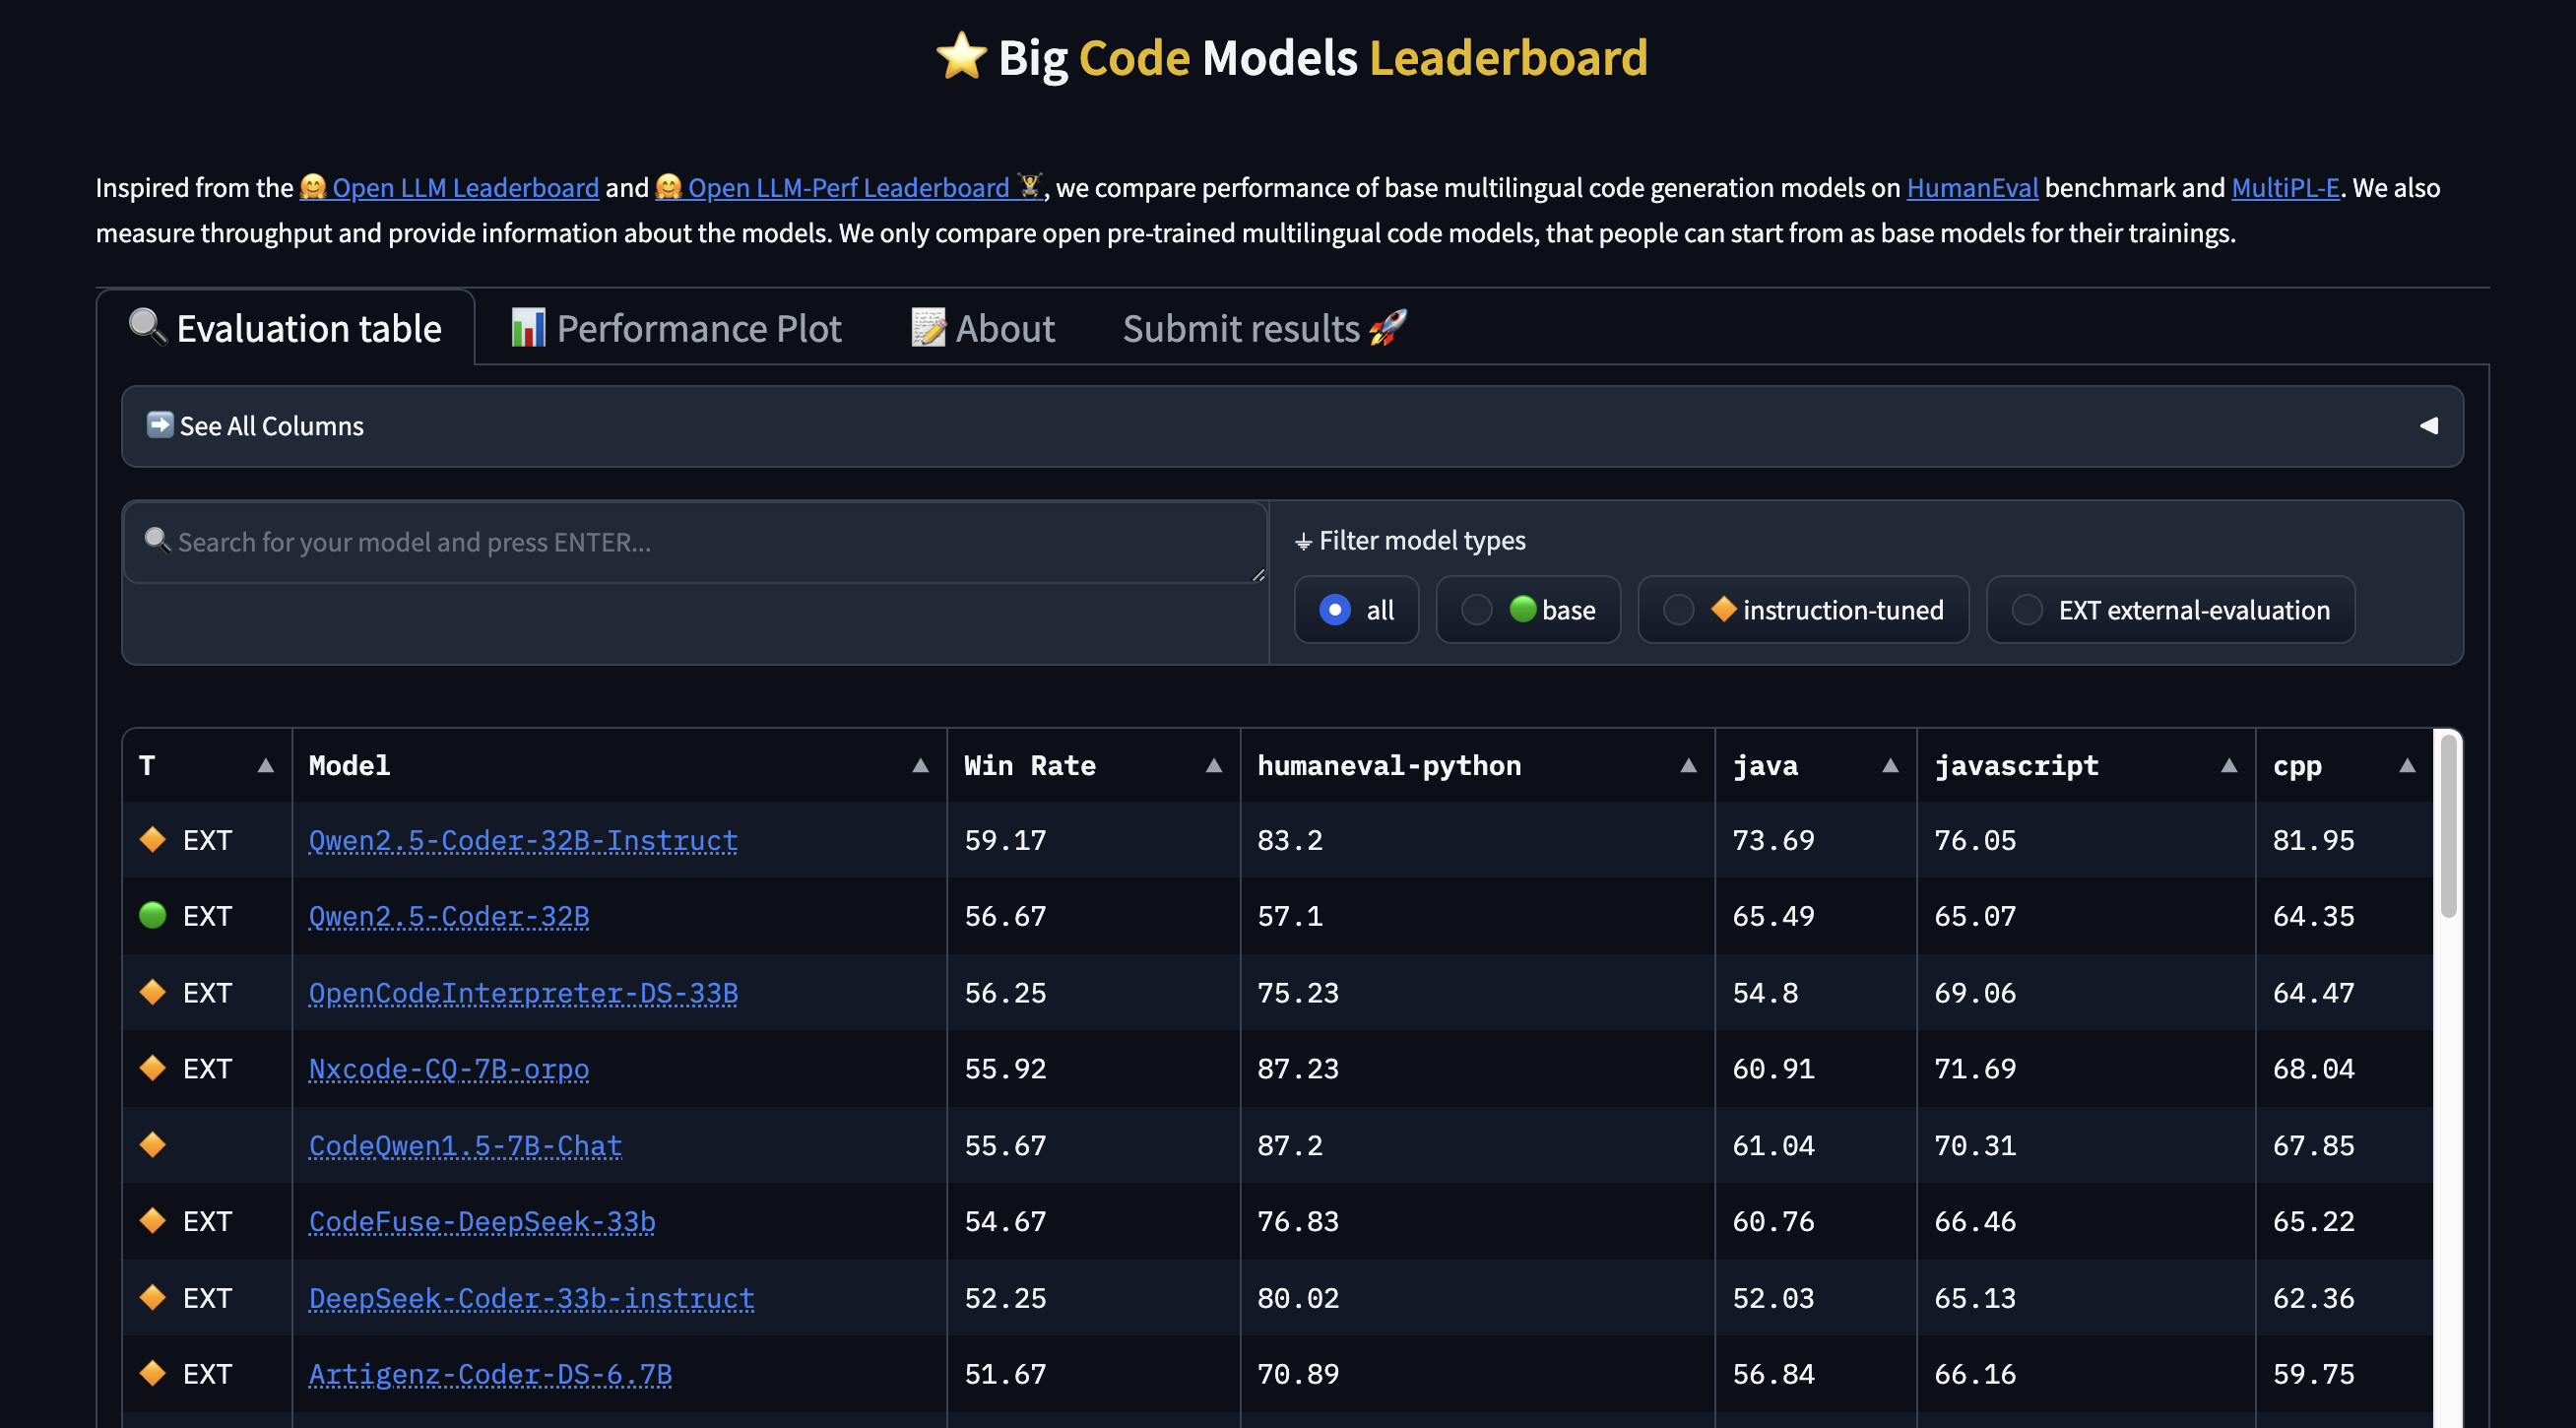
At the top of the leaderboard was the Qwen-2.5-Coder-Instruct family, developed by Alibaba. These models were trained with instruction-following capabilities, making them well-suited for conversational prompt-based interactions like ours.
We tested three model variants to evaluate trade-offs between performance and output quality:
0.5B parameters
Extremely lightweight and fast, but limited in output complexity
1.5B parameters
Delivered a strong balance of generation speed and coding precision
3B parameters
Capable of the most sophisticated and complete responses, but significantly slower
For each model, we used consistent prompts related to game development (e.g., making a Pong or Snake game) and evaluated whether the outputs:
> Were syntactically correct
> Followed the prompt instructions closely
> Produced modular code that could be easily assembled
Qwen-2.5-Coder significantly outperformed previous models, producing usable game components with clear documentation and coherent logic. This made it our top candidate for final integration into PixelPilot.
One of the challenges with large language models—especially the 3B parameter version of Qwen—was slow inference time, which made the assistant feel unresponsive. To solve this, we integrated OpenVINO, Intel’s open-source toolkit for optimizing deep learning models.
OpenVINO allows models trained with frameworks like PyTorch to be converted into intermediate representations optimized for Intel hardware (CPUs, VPUs, etc.). We used the optimum library from Hugging Face to convert the Qwen models into OpenVINO-optimized versions.
We benchmarked model response times before and after optimization:
> 0.5B (without openvino) : 527694ms
> 0.5B (with openvino) : 230367ms
> 1.5B (without openvino) : 1185490ms
> 1.5B (with openvino) : 135384ms
> 3B (without openvino) : 2369890ms
> 3B (with openvino) : 258718ms
These performance improvements made the models far more usable on consumer-grade laptops, even without GPUs. As a result, we chose to bundle OpenVINO-optimized versions of the model with PixelPilot. We then modified the chat participant’s code to allow it to communicate with the webserver.
Image Generation
After heavy analysis of the user requirements, scenarios and personas, we thought about how we can add offline features for children that do not have access to the internet. One of these features included generating images offline on the user’s local computer. Hence, a thorough examination of the numerous Stable Diffusion implementations that were optimised for CPU contexts was required. The primary goal was to achieve reasonable producing speeds without requiring specialised GPUs. This study looked at a variety of options, each with its own advantages and disadvantages. During our research, we came across a lot of options that we could use to implement offline image generation. These included Standard Stable Diffusion using the diffusers library from Hugging Face, ONNX Runtime, FastSD CPU and other optimized CPU implementations. Out of these, the diffusers library is widely used however its implementation is heavily optimised for GPU acceleration hence running it on a CPU would result in extremely slow generation times. ONNX Runtime and other optimized CPU implementations generate images in much less time compared to diffusers library however, they still do not provide the level of speed required for practical offline generation. FastSD CPU [6] was the only option that was designed to maximize Stable Diffusion performance on CPUs, leveraging techniques like OpenVINO and Latent Consistency Models (LCMs).
This enabled FastSD CPU to produce images way faster than the other options. The integration of LCMs drastically reduced the number of inference steps required, leading to substantial speed improvements without significant loss of image quality. This was a key requirement for achieving acceptable generation times on a CPU. Hence we specifically decided to use the LCM-LoRa mode provided by FastSD CPU. For this mode to work efficiently, we had to find a base model and a LCM-LoRa model that the FastSD CPU model would use to generate images while maintaining high performance. We chose Dreamshaper 8 [7] as our base model and lcm-lora-sdv1-5 [8] as our LCM-LoRa model. Dreamshaper models are renowned for their capacity to generate visually appealing and adaptable graphics. They are appropriate for a variety of image generating jobs because they frequently achieve a balance between creative style and reality. Dreamshaper is a widely used and well-supported model within the Stable Diffusion community hence it is thoroughly tested, making it a very stable model. This also means there's a wealth of resources, tutorials, and community-generated examples available. lcm-lora-sdv1-5 is specifically designed to be used with LCMs andiIt is built for Stable Diffusion v1.5-based models, making it compatible with Dreamshaper 8. LoRa files are small, and can be stored locally, which makes them ideal for offline use. Hence, these set of models were a perfect match to be integrated with our extension to generate images for game assets.
In conclusion, after evaluating multiple image generation strategies, we selected a setup that not only meets our performance requirements but also aligns with our core goal: making game development more accessible to children, even without internet access. By integrating FastSD CPU with Dreamshaper 8 and the LCM-LoRa model, we ensured that PixelPilot can generate high-quality visuals locally, supporting a seamless offline experience. This approach reflects our commitment to accessibility, inclusivity, and practical design within the constraints of real-world usage.
Implementing Walkthroughs in VSCode Extensions
As part of designing an onboarding experience for PixelPilot, we researched how walkthroughs can be implemented in Visual Studio Code using the official extension API. The walkthrough feature in VSCode offers a way to guide users step-by-step through a product's functionality, improving accessibility and user retention—especially useful for first-time users of PixelPilot.
Walkthroughs are defined in the extension's package.json and are surfaced in the "Getting Started" page once the extension is activated. A walkthrough consists of one or more steps that can:
> Display markdown-based descriptions
> Include media (e.g. screenshots or GIFs)
> Trigger commands or link to other UI components (like webviews)
Each step can be interactive or informative and can optionally be marked as complete when a command is executed or a file is opened [4].
{
  "walkthroughs": [
    {
      "id": "pixelpilot.gettingStarted",
      "title": "Getting Started with PixelPilot",
      "description": "A quick guide to building your first game",
      "steps": [
        {
          "id": "pixelpilot.startGamePrompt",
          "description": "Write your first game idea into the chat...",
          "media": {
            "path": "media/start.png",
            "altText": "Example of game prompt"
          },
          "when": "true",
          "completionEvents": ["onCommand:pixelpilot.sendPrompt"]
        }
      ]
    }
  ]
}
Key Considerations Before Designing a Walkthrough [5]
- Activation Events: To display walkthroughs correctly, the extension must define the appropriate activation events (onView, onCommand, etc.). Otherwise, the walkthrough steps won’t be registered or triggered.
- Command Integration: To track progress and make walkthrough steps dynamic, commands must be linked to steps via completionEvents. These should be declared in the extension's command contributions and invoked using the vscode.commands.executeCommand API.
- Webview Integration If a walkthrough step needs to lead into a custom UI (like PixelPilot’s code generation UI), a webview panel must be registered using vscode.WebviewPanel.
- Localization & Media Support: Walkthroughs support localization via markdown and media alt-text, making them accessible and user-friendly. However, care should be taken to use appropriate path references to media files.
- Conditional Display with Context Keys: Walkthrough steps can be shown or hidden based on context (e.g., after installing the extension or after completing a tutorial). This allows for progressive disclosure of features.
const panel = vscode.window.createWebviewPanel(
    'pixelPilotWebview',
    'PixelPilot Interface',
    vscode.ViewColumn.One,
    {
        enableScripts: true
    }
);