Final System in Action
Final System in Action
This section is purely dedicated to screenshots and videos of the final system running to showcase the design settled on by the team. The following video gives a run through of how to use the system and its various augmentation:
The following sections give a breakdown of each of the augmentations and other features of the system, including screen recordings and screenshots.
Tool Proximity
The following screen recording and screenshot shows the ToolProximity augmentation running in the final system.
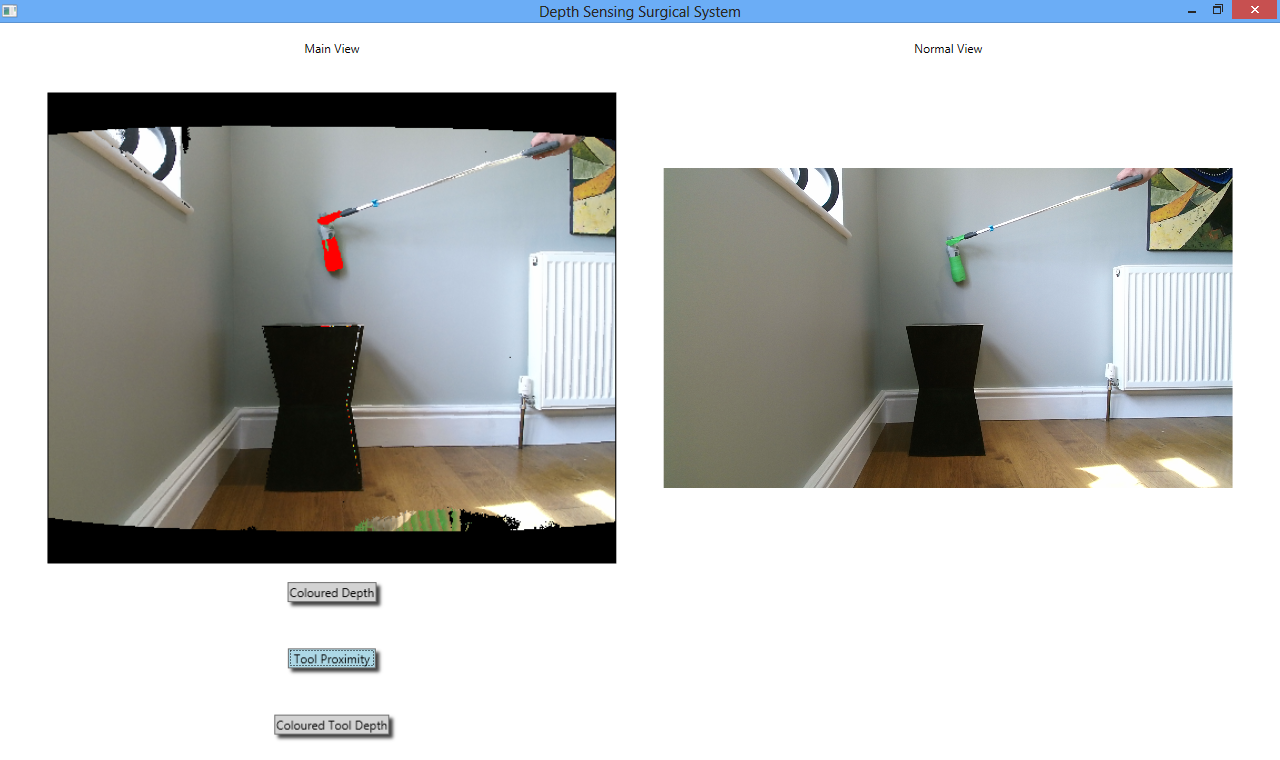
As can be seen, as the green prop is moved towards the background it moves through a spectrum of green, yellow, orange and red as it gets closer to the background, red signifying that the tool is very close to or touching the background. Due to the scale of the Kinect, the threshold at which the tool turns red is when it is less than 10 centimetres away from the wall. In actual surgery, this threshold would be more like 1 millimetre, but as the Kinect is not accurate to this degree, 10 centimetres away from the background is a suitable threshold.
The ToolProximity algorithm has two different versions. The one shown in the above screenshot and recording works by averaging the depth values of the twenty pixels directly adjacent to each green pixel, calculating separate averages for the adjacent pixels that are green and those that are not. The average depth of the adjacent green pixels is then subtracted from the average depth of the non-green pixels, and the pixel coloured according to this value.
However the other version of the ToolProximity algorithm is far more developed than this and has much more potential, but unfortunately the team ran out of time before this augmentation version could be perfected. The algorithm works by finding the edges of the green tool, and then looking at the depth of the pixels directly adjacent to these edge pixels that are not green (meaning they are not part of the tool). The depth values of the edges of the tool are then subtracted from these depths and currently just the edges of the tool are coloured according to this value.
The issue with this augmentation is that the colouring of the edges is extremely granular which can be misleading. A screenshot is shown below:
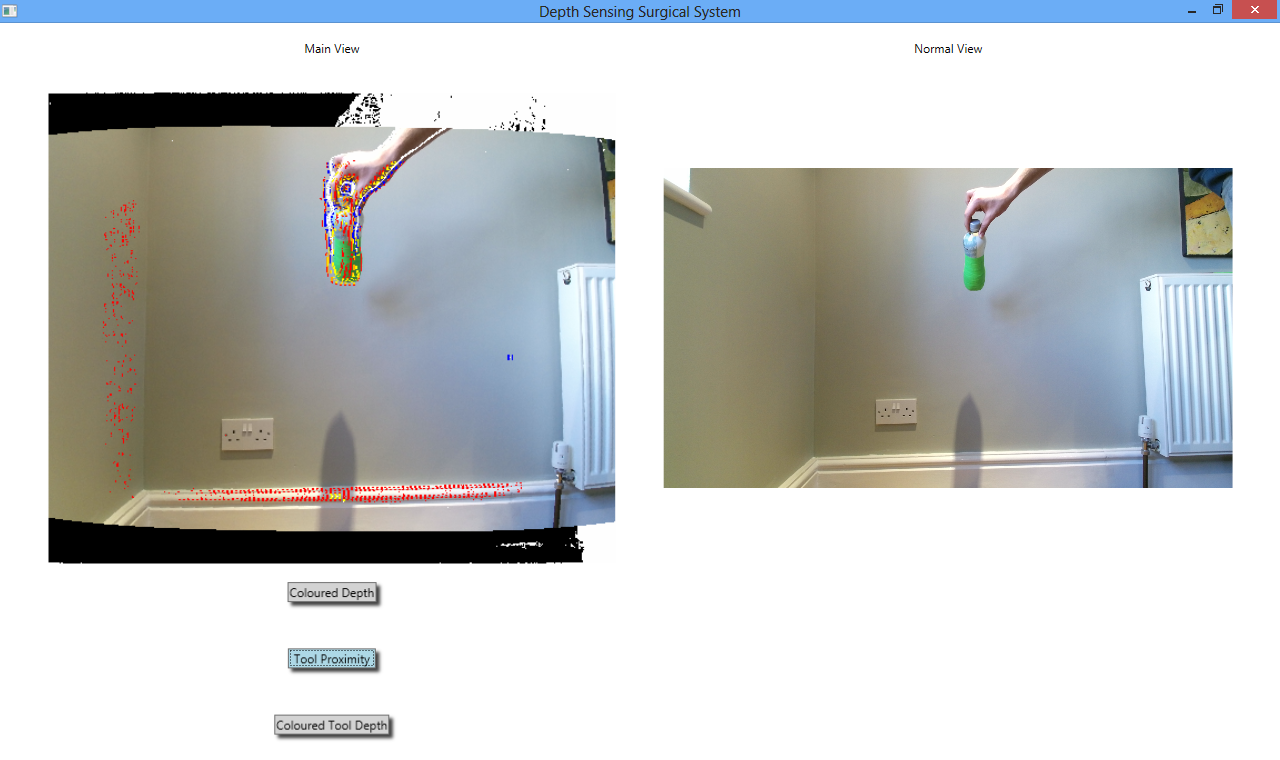
To make the algorithm deployment ready, this granularity needs to be removed and the whole tool coloured according to its depth rather than just the edge.
This version of the algorithm would be more useful than the version that works by taking averages of the twenty pixels adjacent to each green pixel because it would be able to tell the user when the tool is getting close to objects that are not necessarily part of the main background; for example a large blood vessel running down the middle of the image would not be a part of the main background, which would be other body tissue.
This would be useful for procedures such as “slinging” a blood vessel which is commonly performed in surgery where the surgeon passes a string around a blood vessel to pull it out of the way. The first version of the augmentation would not be useful for this because of the twenty adjacent pixels analysed, only a small subset may actually belong to the blood vessel and a larger subset belong to the main background, which would result in the tool being coloured according to its distance from the main background as opposed to the blood vessel. As the second version of this augmentation only analyses the pixels directly next to the tool’s edges, it would be able to tell the distance to the blood vessel, not only to the main background.
ToolProximity would be particularly useful for when a surgeon is using a cutting tool such as diathermy equipment to cut through body tissue, for example a layer of fat. It would inform the surgeon when the tool is getting close to the body tissue by turning red, meaning that they need to exercise caution in how fast they now move the tool forward and be careful not to apply too much force to it.
The team was shown a video when we went to Middlesbrough to watch surgery of when a surgeon was unsure of how far a tool was away from the body tissue, pressed it too hard and cut into a major blood vessel which meant that the patient lost a lot of blood very quickly. If the surgeon had been able to see this ToolProximity augmentation, they would have known when the tool was approaching the body tissue and so would know to stop applying as much pressure to the tool, which would have avoided this injury altogether. The team therefore has presented a viable solution to this problem that could be extremely dangerous for patients.
Colored Depth
The following screen recording and screenshot shows the ColoredDepth augmentation running in the final system.
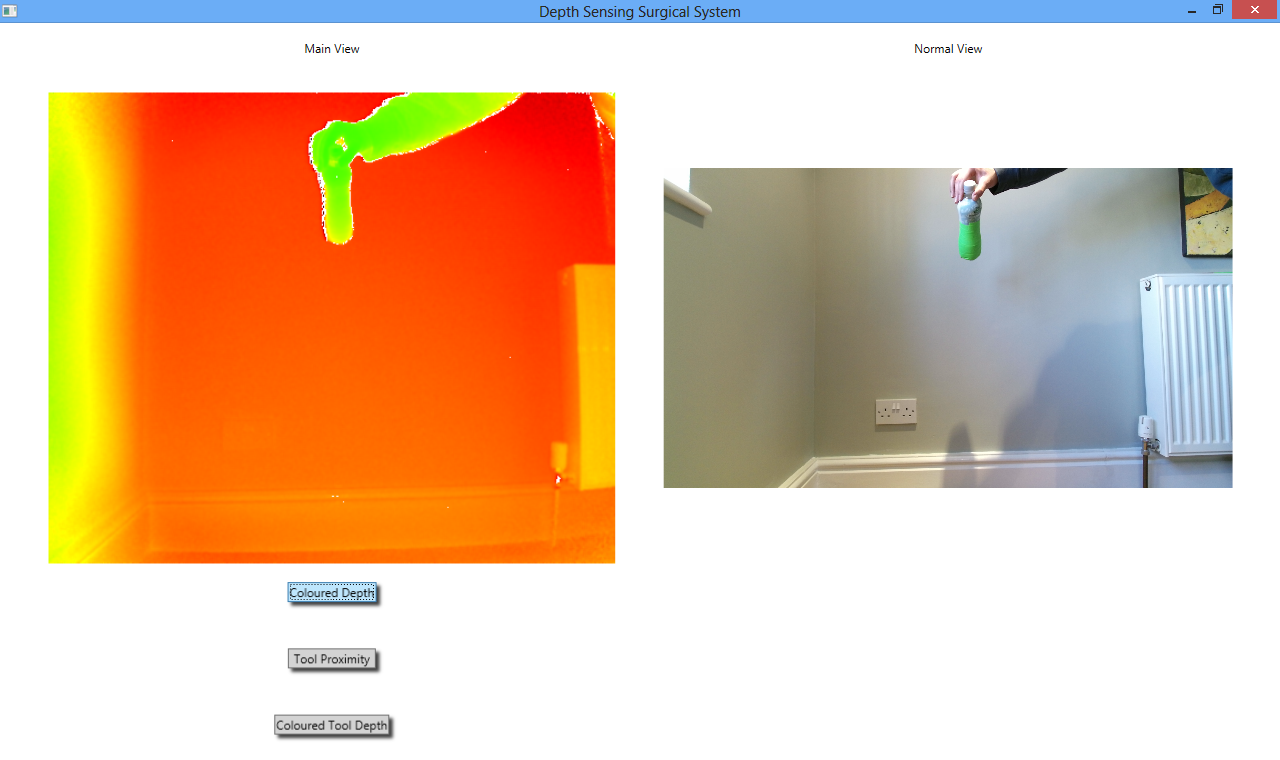
In this augmentation, every pixel of the image is coloured according to its depth value, meaning its distance from the camera rather than its proximity to the background, rather than just the pixels that belong to the tool. The spectrum of colours ranges again from green to red, with green pixels being closer to the camera and red pixels further away. The colour of each pixel is individually determined by a heat map algorithm in place of simple rigid thresholding. Doing this has once very large advantage - it is possible to see tiny variations in depth because the colour of each pixel is mathematically determined. If the colour were being determined by a simple threshold then minute variations in depth would not be visible because all pixels within a depth boundary would be the same colour. However given that the colour is determined by the heat map algorithm, there are very few pixels that have the same colour value.
One of the main advantages of the ColoredDepth augmentation is that it would give the surgeon an intuitive feel for the 3D landscape of the operational area so that they could get a general feel for the distance of everything in the camera’s field of view from the camera. The other advantage is that it can be used to judge when how far away tools are from body tissue in the camera’s view, as the surgeon can simply watch the ColoredDepth view and move the tool until it becomes the same colour as the object he wishes to use the tool on, then he would know that the tool was at approximately the same depth as the object.
An example of this could be if a surgeon was going to perform the procedure of “slinging” a blood vessel, as was described earlier. In order to check whether the tool was indeed further away from the camera than the blood vessel and so could be passed behind it, the surgeon could use the ColoredDepth augmentation. When the tool’s colour has moved more toward the red end of the spectrum than the blood vessel was at, then they would know that the tool could safely be passed behind the blood vessel and would not just crash into it.
This augmentation is different from how the team originally planned it look. After looking at our user interface design PDF ( UI design) it can be noticed that the “General Depth” augmentation (which became “ColoredDepth”) colours the closest pixels to the camera red, and those further away green. The heat map algorithm does the complete opposite of this, turning pixels further away from the camera more red and those closer green. The team agreed that it actually made more sense to display ColoredDepth in this way as it was more intuitive to have red pixels be further away from the camera.
Colored Tool Depth
The following screen recording and screenshot shows the ColoredToolDepth augmentation running in the final system.

As can be seen, the green prop changes colour based on how far away it is from the camera, moving through a spectrum of blue and green when close to the camera to red when further away from the camera. This augmentation again makes use of the heat map algorithm, except this time it only applies it to green pixels (which make up the tool).
The original thinking behind this algorithm was that it would be useful in helping the surgeon to position certain tools in the body, where they would be able to tell how close these were to the camera using this augmentation and whether they needed to be moved further away.
Once again, this augmentation began as being just a simple thresholding algorithm, where if the depth of the green pixels was less than 750 millimetres then they would be turned green, less than 700 and they would be turned yellow and so on through the spectrum to read. Once again the team planned to have the tool turn green when further away from the camera and red when closer, but after applying the heat map algorithm the tools would turn redder the further away from the camera they were. Like with the ColoredDepth augmentation described above, the team agreed that this was more intuitive and should be kept this way.
However, this is the first augmentation in which thresholding could actually be considered as a suitable, useful augmentation as opposed to something more advanced like a heat map. This is because if the surgeon were allowed to set the thresholds at which the colours change, then they would be able to exactly measure the distance of the tool from the camera. Say for example the tool was set to turn red when more than 70 millimetres away from the camera but less than 100 millimetres (these measurements correspond to realistic distances in surgery as opposed to distances with the Kinect). The surgeon would then know that when a tool was red it was between these distances away from the camera. Giving the surgeon the ability to set the thresholds would mean that they could make the measurements as precise as they wanted to.
This would be an extremely easy augmentation to write as writing thresholding algorithms is very easy, and if several new user interface controls were added to change the thresholds then the augmentation would be complete. The main issue with it would be that it would be more difficult for the surgeon to control by voice control than the other augmentations as they would have to set many different threshold options which would be an extremely tedious chore by voice command. However if the surgeon needed to measure exactly in millimetres how far away a tool was from the camera, they could ask an assistant to set the thresholds while they carry on with surgery - they could even continue to look at the same screen as the assistant while the thresholds are being set because the normal view would be shown at all times.
Voice Control
The team has successfully made the system voice controllable. This is shown in the recording below:
The voice control has a total of six commands:
“Tool Proximity On”
“Tool Proximity Off”
“Tool Depth On”
“Tool Depth Off”
“Color Depth On”
“Color Depth Off”
With these six commands, the augmentations can be easily switched on and off without any mouse clicking or button pressing. This is a feature that would be particularly useful in surgery as when a surgeon is scrubbed up they cannot afford to be clicking any buttons, so they need a hands free method of control. Voice control makes the system more interactive and much simpler for surgeons to use than controls that have to be clicked at the endoscope terminal, which they would have to ask an assistant to press rather than talking directly to the system themselves as they can with voice control.
There are not many ways that the voice control of the system could be improved. An icon could be added to show when the system is listening for commands and there could be a way to stop it listening, although as the sequence of words that form the six commands are very unlikely to be spoken in everyday conversation this may not be necessary.
Summary
The system may seem to be fairly simple, and if it does then that is a good thing. The user interface is certainly very simplistic with just three buttons for user control. That is exactly what is needed for a surgical system. The main focus of the whole system is the camera feeds being provided by a laparoscope, or in our case the Kinect sensor. These must always be visible and be large so that the surgeon can see them in as much detail as possible. The surgeon cannot afford to be trying to work out what hundreds of different user controls do while they are trying to perform the extremely delicate task of surgery. Our user interface exhibits one of the most important principles of good design - advocate simplicity. And quite simply all the user interface is is an augmentation view and normal camera view, with three different augmentations that can be applied to the camera view. There is minimal clutter and maximum simplicity.

The principle of simplicity applies to the whole design of the system. The code architecture is a simple and intuitive Strategy design pattern that is easy for future developers to add to. The voice control is simple and easy to use with just three “on/off” commands.
When a task is as potentially dangerous as surgery is, then simplicity has got to be the number one goal in any system used in it. When things are confusing and people do not understand how they work, then things go wrong and patients can get hurt. The team has attempted to make its system as intuitive and simple as possible to avoid just that, and to further lessen the risk of surgery to patients by giving surgeons depth sensing ability when performing laparoscopic surgery.